Enroll users into my class
You can enroll existing Möbius users into your class by:
- Enabling users to self-enroll with self-registration
- Uploading a user roster file
- Searching for specific users using the Enroll Users option
- Establishing an LTI connection to directly enroll users into your class from your organization's LMS
Enable self-enrollment
You can enable student self-enrollment for your class using the Who can self-enroll into this class? setting while creating or editing a class.
Check out Manage student enrollment.
TIP: You can also use the Who can self-enroll into this class? setting to prevent student self-enrollment so that you're in full control of who's enrolling into your class. Check out Manage student enrollment.
Enroll users with a user roster file
After you've created a user roster file that contains existing Möbius users, you can upload the file into Möbius to enroll many users at once into your class.
TIP: Check out Work with a user roster file for more information on working with these types of files.
NOTE: If you have the instructor + create or administrator privileges, you'll be able to simultaneously create new users and then enroll them into your class. If you don't have privileges to create users, then the users you're enrolling into your class using a user roster file must already exist in Möbius. Check out Import Users From Roster option on Class Homepage.
To upload a user roster file to enroll users into your class:
Click Class User Manager on the Class Homepage.

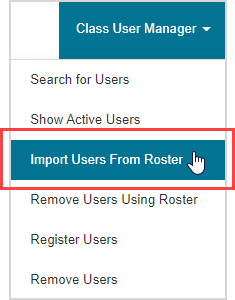
Click Import Users From Roster on the Class User Manager menu.
NOTE: A warning message appears on the Roster Upload page if you don't have the correct privileges to create new users. You're still able to enroll existing users into your class, but you can't create users to enroll into your class. Check out Import Users From Roster option on Class Homepage for more information on simultaneously creating and enrolling users into your class.

Select the format of your user roster file from the Select file format drop-down menu.

NOTE:Instructor + create and administrator profiles will have the ability to select the Notify users by email when a new account is generated check box if they're creating a new user with a user roster file upload. Without these privileges, selecting this check box will have no effect.

Click Choose File to navigate to where your user roster file is saved.
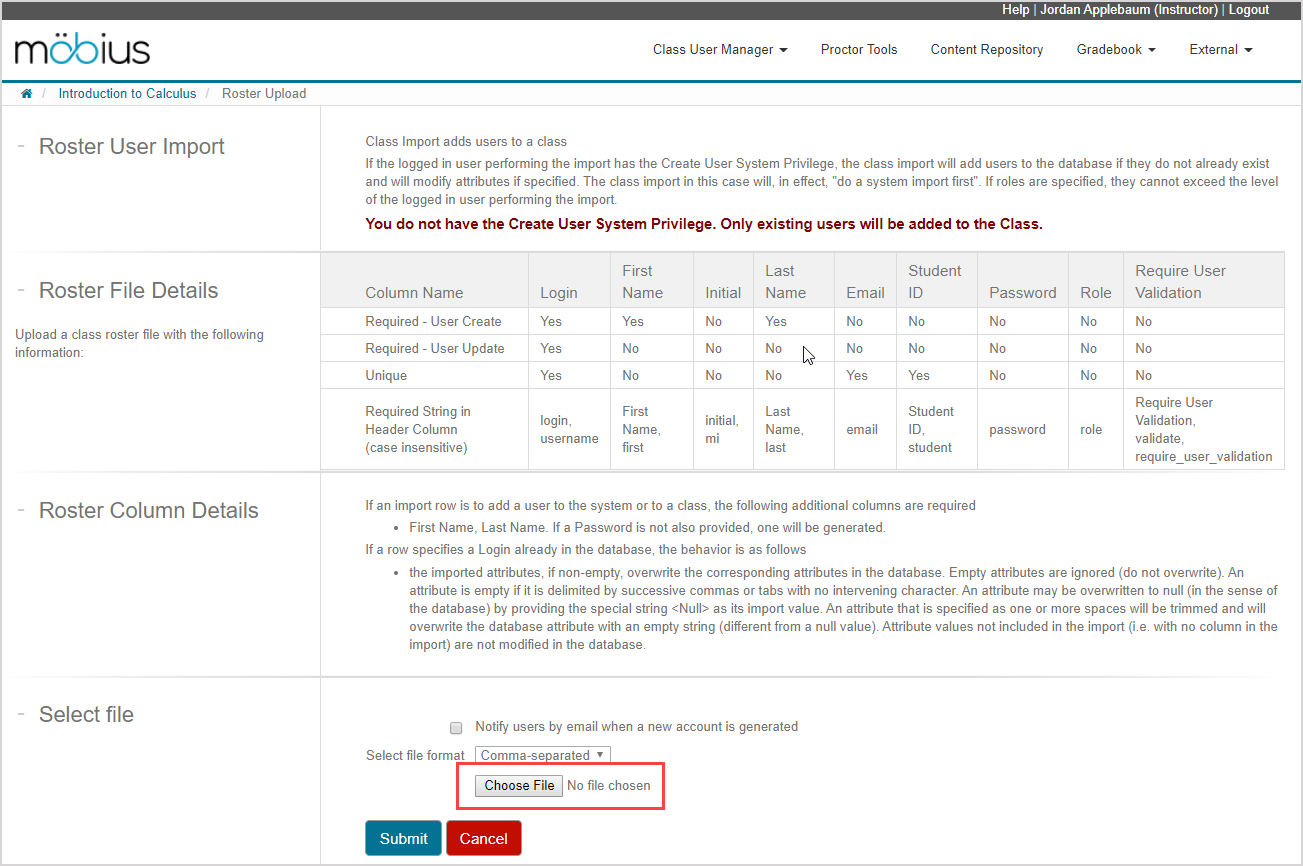
Click Submit to preview your user roster file upload.

NOTE: Clicking Submit without a selected file will prompt you to select a file location.

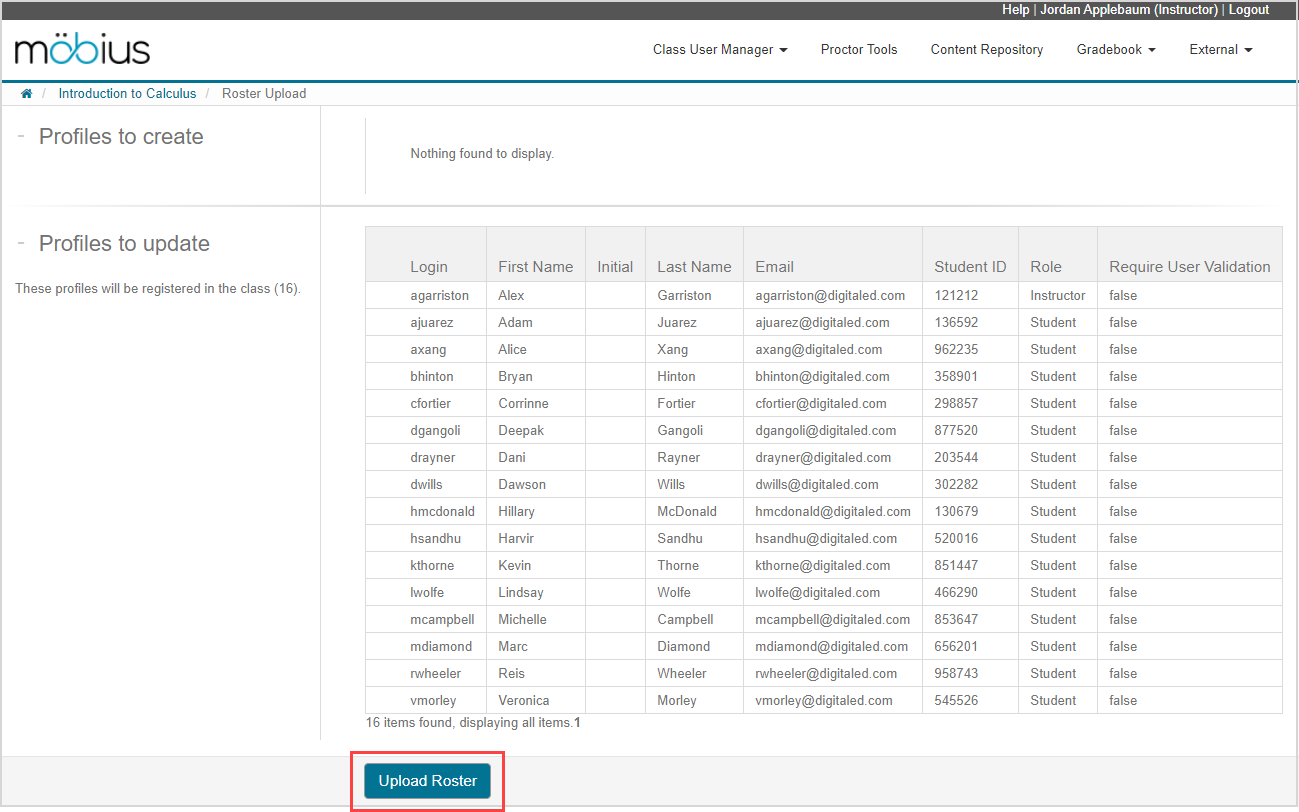
An upload preview is displayed:
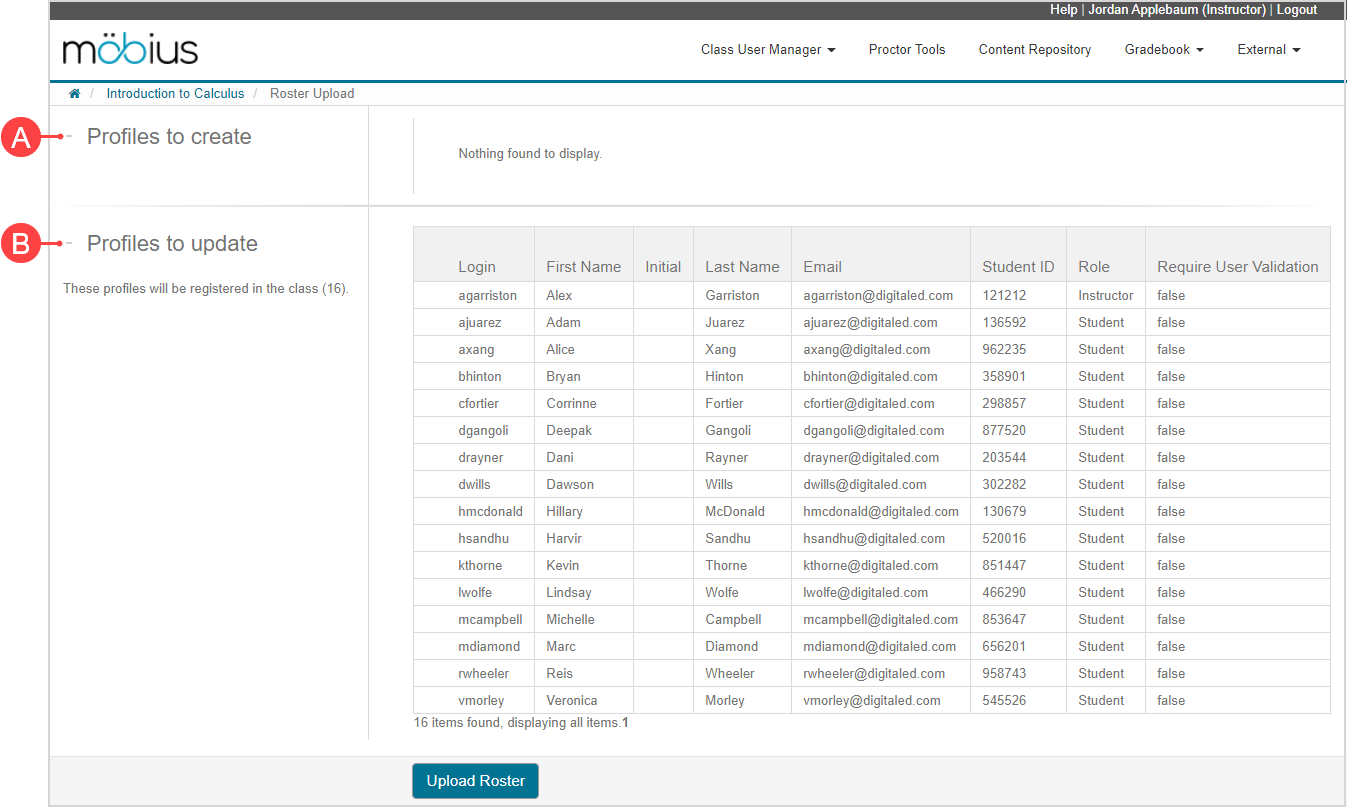
A. Profiles to create — Displays the users that will be created if you have the required privileges to create users.
B. Profiles to update — Summary table of the existing users that will be enrolled into to your class from the user roster file.
NOTE: If your user roster file import has errors, the Invalid lines section will be displayed.
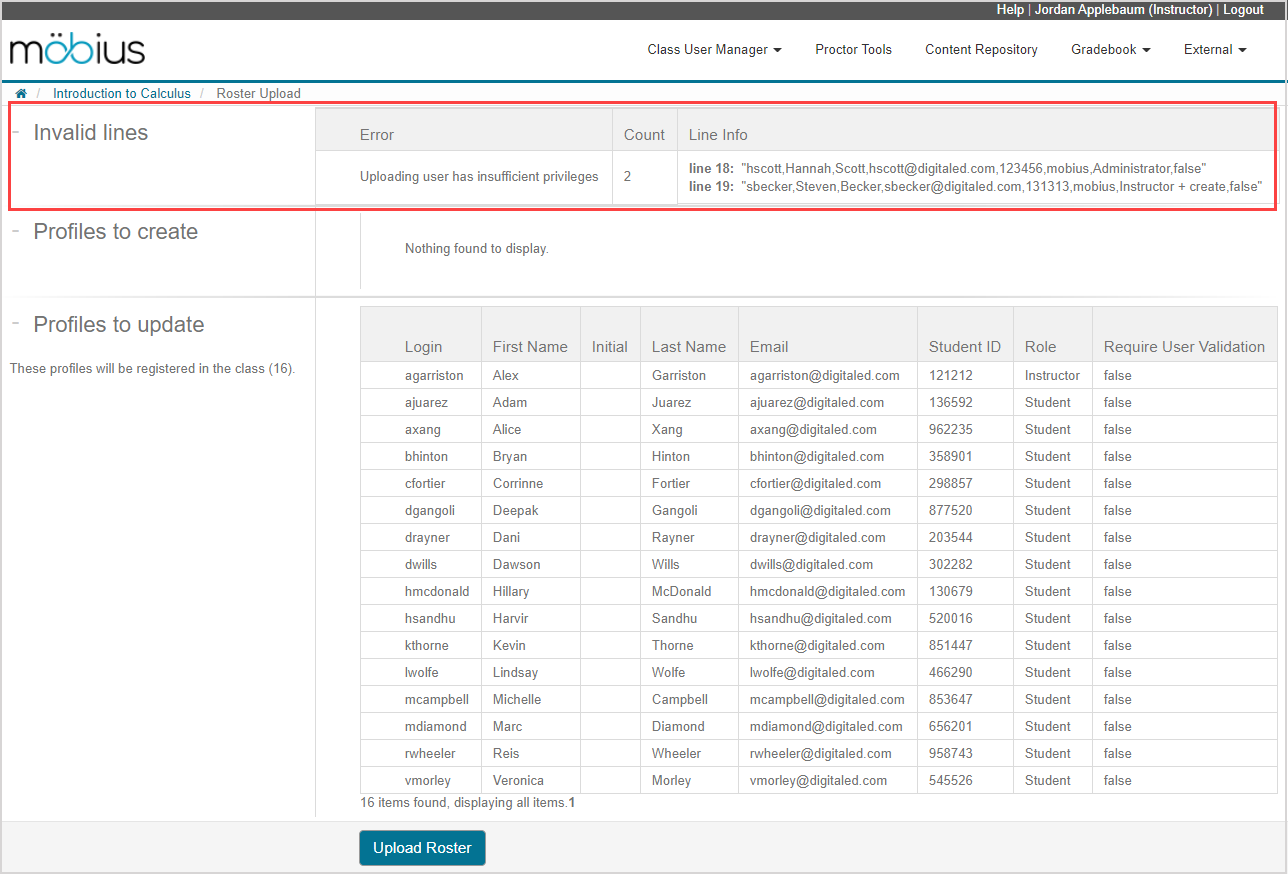
Reasons for invalid lines during your user roster file upload could be:
- You're trying to enroll users with privileges beyond your own (Example — you're an instructor attempting to enroll an administrator or instructor + create user)
- Your user roster file has errors in an attribute column heading name
- Your user roster file is missing an attribute value
- Your user roster file contains users that have had their profiles deleted but not permanently deleted
Check out Work with a user roster file for more help.
Click Upload Roster to confirm the users that will be enrolled into your class.
A summary page then appears after successfully enrolling the users into your class.
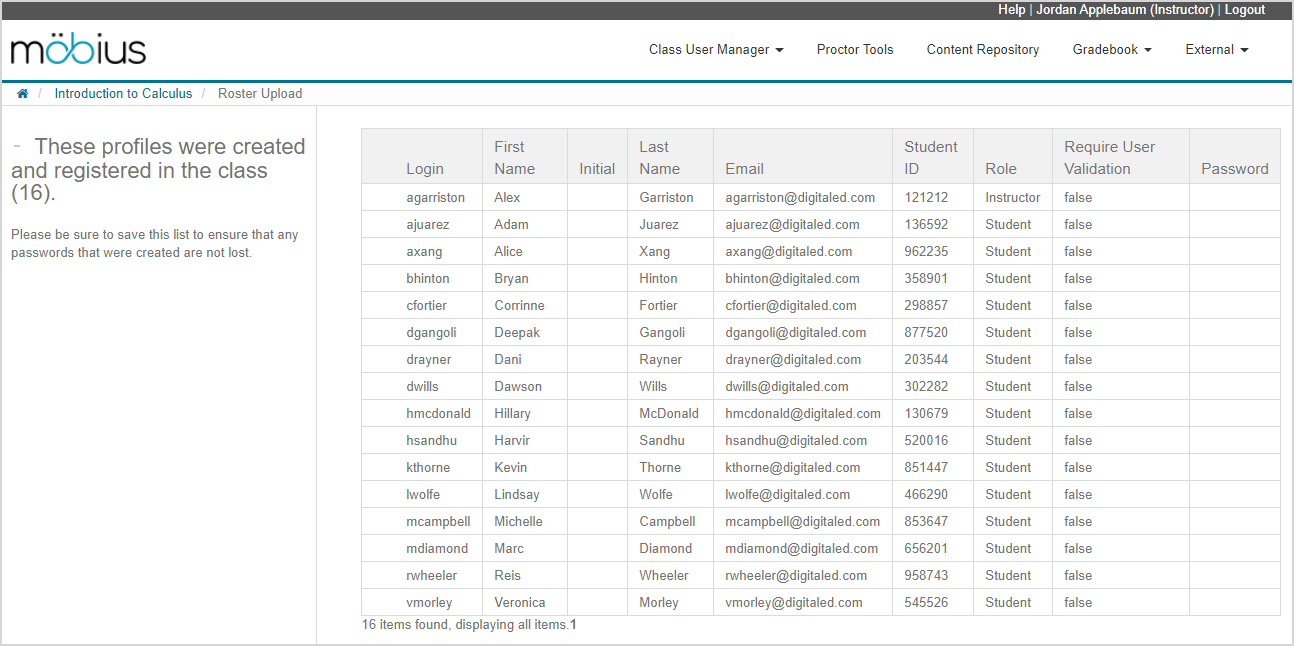
NOTE: Passwords aren't displayed when uploading a user roster file from the Class Homepage.
Click Create CSV to generate a CSV file download so that you can maintain a record of the enrolled users.
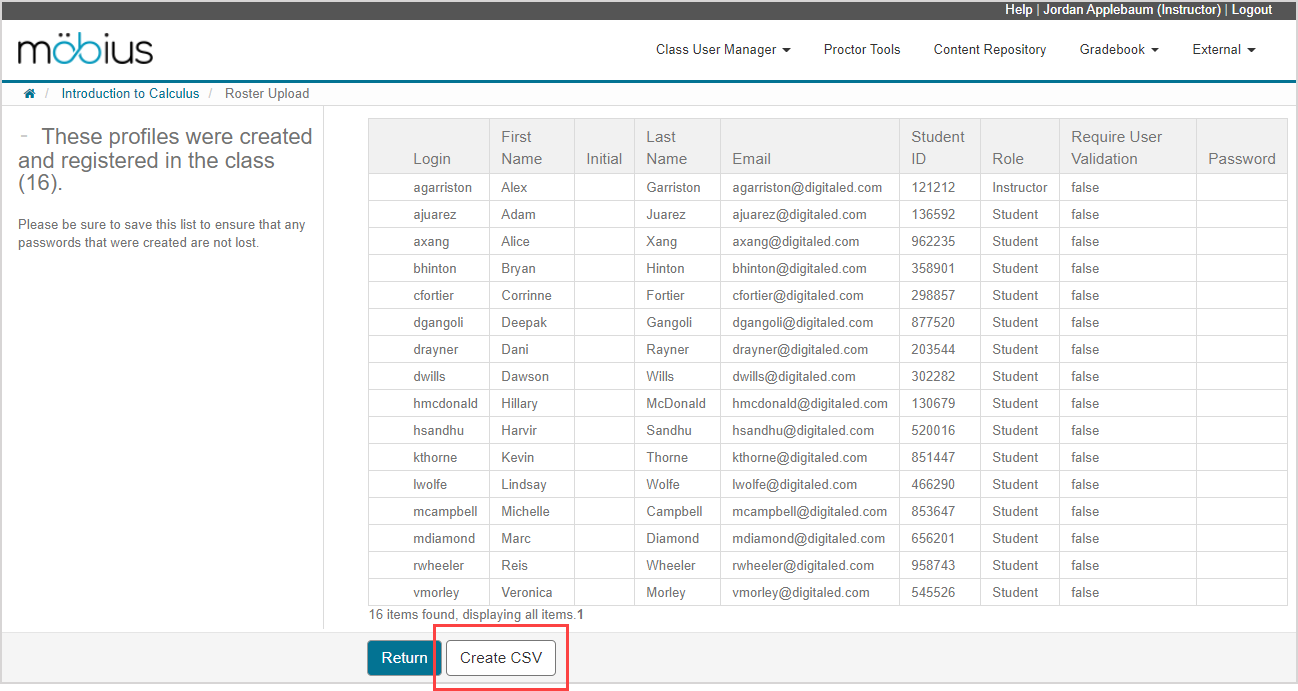
NOTE: Clicking Return navigates you to the User Search menu of the Class User Manager where you can search for specific users within your organization. Check out Search for a user.

Enroll users with the Enroll Users option
Specific users can be searched and then selected from a list of existing Möbius users to enroll into your class.
To enroll specific users into your class that your searched for with the Enroll Users option:
Click Class User Manager on the Class Homepage.

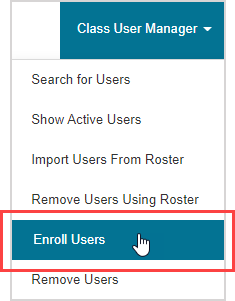
Click Enroll Users on the Class User Manager menu.
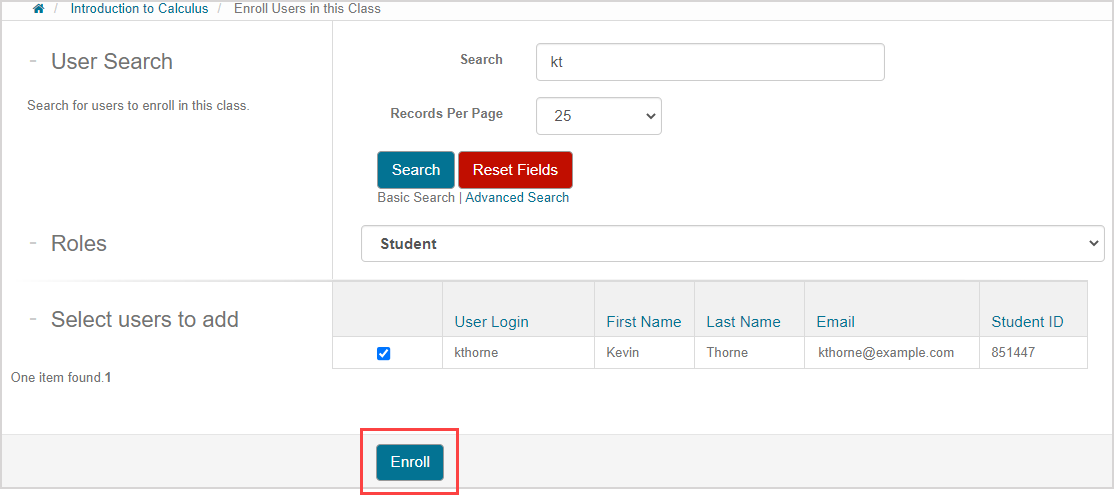
Perform a basic search or advanced search for the user that you want to enroll into your class.

TIP: Check out the sections Basic search or Advanced search within the Search for a user topic for tips on how to optimize your user search.
NOTE: Users that are already enrolled in your class won't appear in your search results.
Click Search to display all users matching your query.

NOTE: Click Reset Fields at any time to begin a new query.

A table of search results displays all existing users that match your search query criteria.

NOTE: If the user is already enrolled in your class, they won't be displayed as a search result.
Select the check box beside the user that you want to enroll into your class.

TIP: You can select multiple user check boxes.
Select the user role from the Roles drop-down list to assign to the user(s) being enrolled in your class.

Click Enroll.
A success message appears that the selected users have been enrolled into your class.

Enroll users with an LTI connection
After your Learning Management System (Example — Blackboard®, Brightspace®, Canvas™, Moodle™, etc.) is integrated with Möbius using the LTI standard, you can set up one or more LTI links, which will automatically enroll users when they use the link.
Check out Create links to Möbius from your LMS class if your LMS has already been integrated with Möbius, or contact your organization's Möbius administrator and LMS administrator.