Edit a class
The details and settings of an existing class or child class can be edited at anytime from the Class Homepage.
Extra fields are available to be reviewed when editing an existing class (in addition to the initial fields that you defined during class creation) such as:
- Class Dates
- Description URL
- Class Description
- Class Message
To edit your class's details:
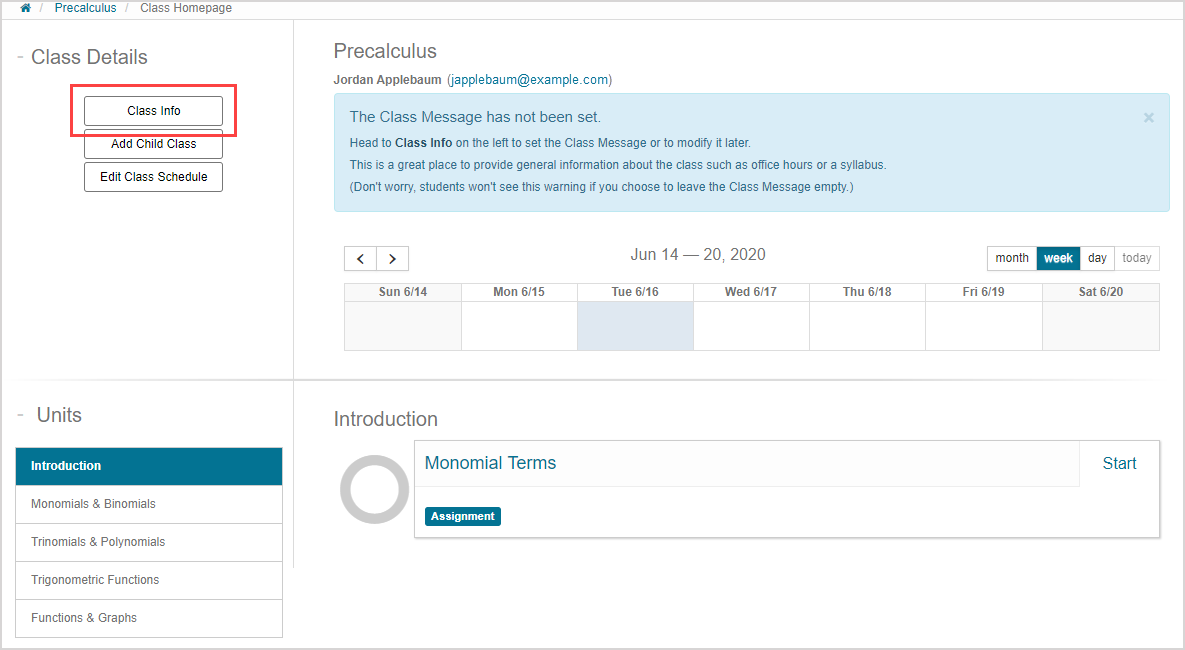
Click Class Info on the Class Homepage of the class you want to edit.
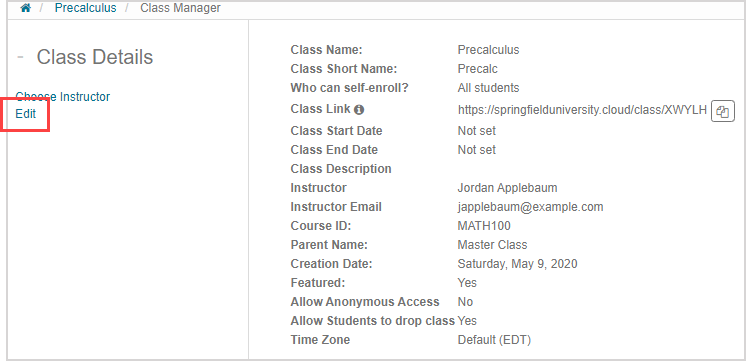
Click Edit.
Edit any of the class details fields in the Class Details pane as needed.
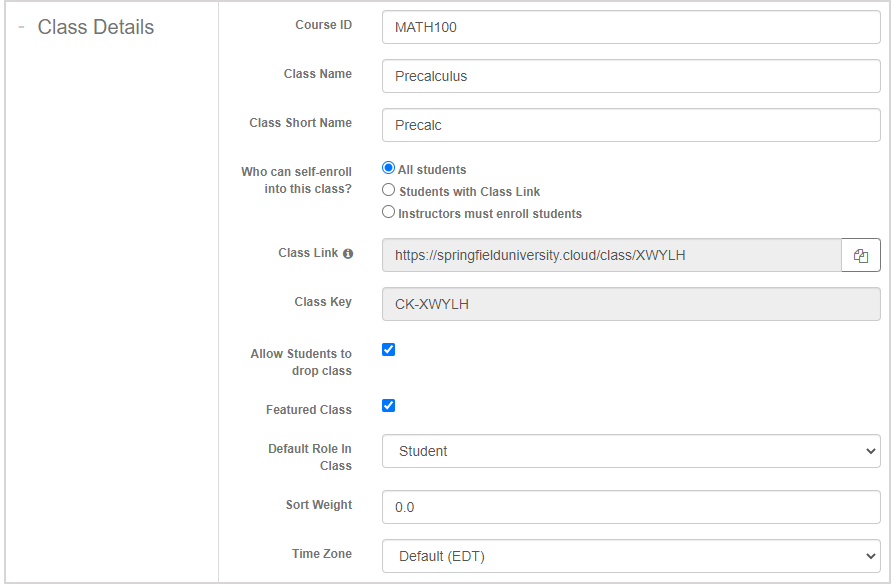
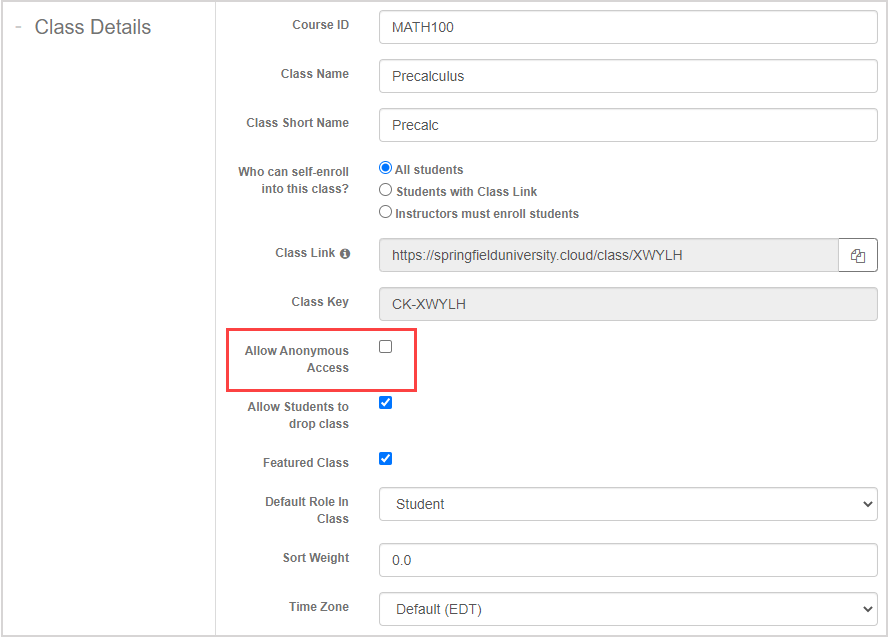
NOTE: The Allow Anonymous Access check box will be available for edit if anonymous access is enabled for your organization. Check out Manage anonymous access.
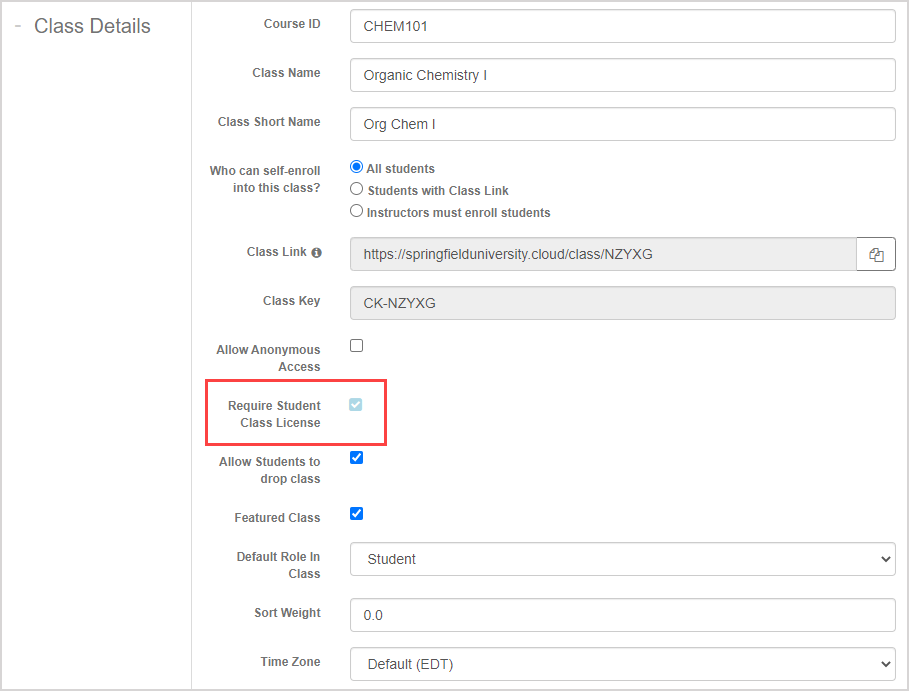
NOTE: The Require Student Class License check box will be visible if your organization has student licensing enabled. You can then select or deselect this check box depending on your permissions.
NOTE: The Class Link is visible as a read-only field. You can still click Copy Class Link to clipboard![]() from the Edit Class Details page to distribute to your students. Check out Share my Class Link.
from the Edit Class Details page to distribute to your students. Check out Share my Class Link.

Edit the Class Dates for the class:
NOTE:Class dates determine when students can self-enroll into your class. This date range also defines the default view of the Class Schedule (check out Work with the Class Schedule default view).
- Click on the Class Start Date field to reveal a drop-down calender to select when self-enrollment can begin and the start date of the Class Schedule default view.

- Click on the Class End Date field to reveal a drop-down calender to select when self-enrollment ends and the end date of the Class Schedule default view.
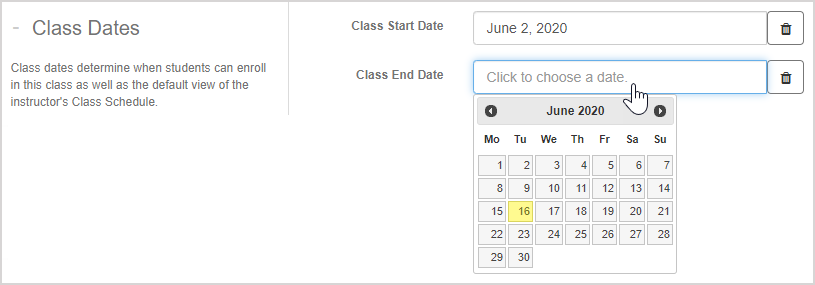
TIP: Click the delete icon to remove a class date.
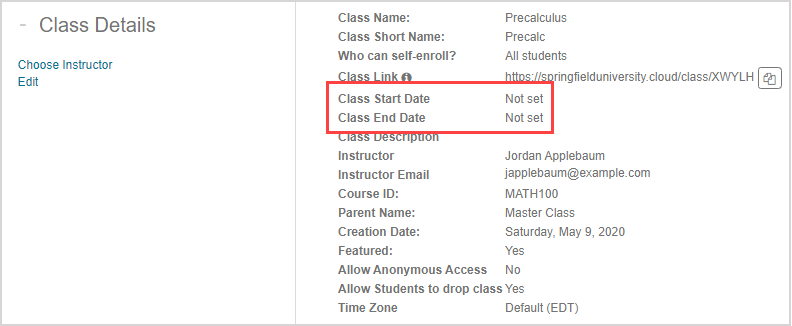
NOTE:Not set is displayed on the Class Details summary page if you choose to leave these class dates undefined.
Define a description URL using a link destination URL if you want to provide your students with a supporting web page that will appear on the Class Homepage.

Define link text for your description URL to provide more information about the displayed URL.

Enter a class description to outline your class to users who perform a search of available classes.

TIP: Check out Use the Visual Editor for details on how to use this toolbar to the fullest to control the visual appearance of your class description.

TIP: You may have to click the expand icon![]() to make the Class Description field available.
to make the Class Description field available.
![]()
Enter a class message that will be displayed on the Class Homepage to provide general information to your students about your class.

TIP: Check out Use the Visual Editor for details on how to use this toolbar to the fullest to control the visual appearance of your class message.

Click Submit.

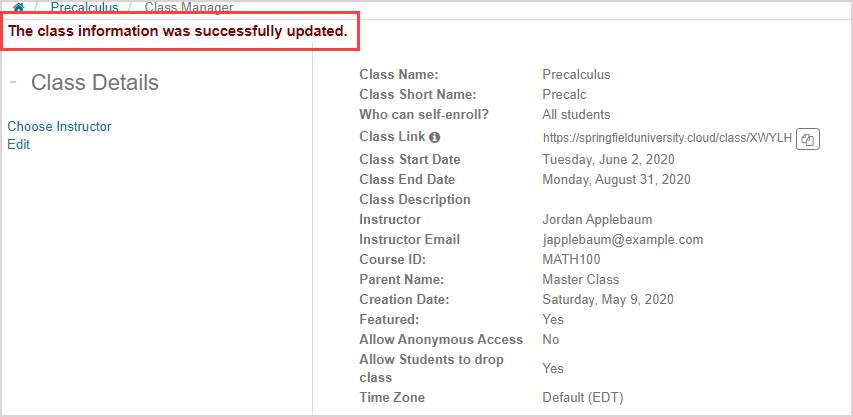
A success message appears after saving your changes. Your class has been successfully updated.
