Export content
Content can be exported to your hard drive in 2 ways:
- A quick export to rapidly download small amounts of content (Example — a specific question).
- A Course Module export to download a larger amount of content (Example — all questions within the Questions pane of your Content Repository).
NOTE: A quick export is ideal if you want to package up a small amount of content (Example — a specific question). When this exported content is then imported by a recipient, the piece of content is automatically stored in its respective pane in Möbius. Example — If a single question is exported with a quick export and then imported by a recipient, the single question is automatically stored in the Questions pane of the recipient's Content Repository.
NOTE: A Course Module export is ideal if you want to package up a larger amount of content (Example — all questions within the Questions pane of your Content Repository). When this exported Course Module is then imported by a recipient, the Course Module is automatically stored in the Course Modules pane, and the contained content is also stored in its respective panes in the Content Repository.
Exporting content packages up your content as a .zip file.
Exporting your content is ideal so that you:
- Have a back-up copy of your content saved locally on your computer's hard drive.
- Can distribute your content (Example — You can distribute your content to another instructor who uses Möbius at a different university).
Once the content has been exported to your hard drive, you can then choose how you want to distribute it to other Möbius classes and users. Example — Email the exported content .zip file to a colleague.
TIP: Check out Import content from your hard drive for how to import the content .zip file back into Möbius.
TIP: You can also share your content directly through Möbius instead of exporting it. Check out Share content.
NOTE: Once a Course Module is exported and then imported by a recipient, its content is no longer associated with the original content that was used to build the Course Module. This means that when a recipient imports the Course Module into their Content Repository, their imported content won't automatically update to reflect changes made to the original content by the content author. This is in contrast to sharing content where a recipient of shared content will automatically receive content changes when changes are made to the original content by the content author (unless the recipient has cloned the shared content).
NOTE: Exporting content that's associated with subject tags will also export those subject tags. Check out Work with subjects.
Quick export
A quick export is ideal for packaging up smaller amounts of content (Example — a specific question).
To perform a quick export to your hard drive:
Click Content Repository on the Class Homepage.

Navigate to the content that you want to export to your hard drive and select the check box of the content of interest.
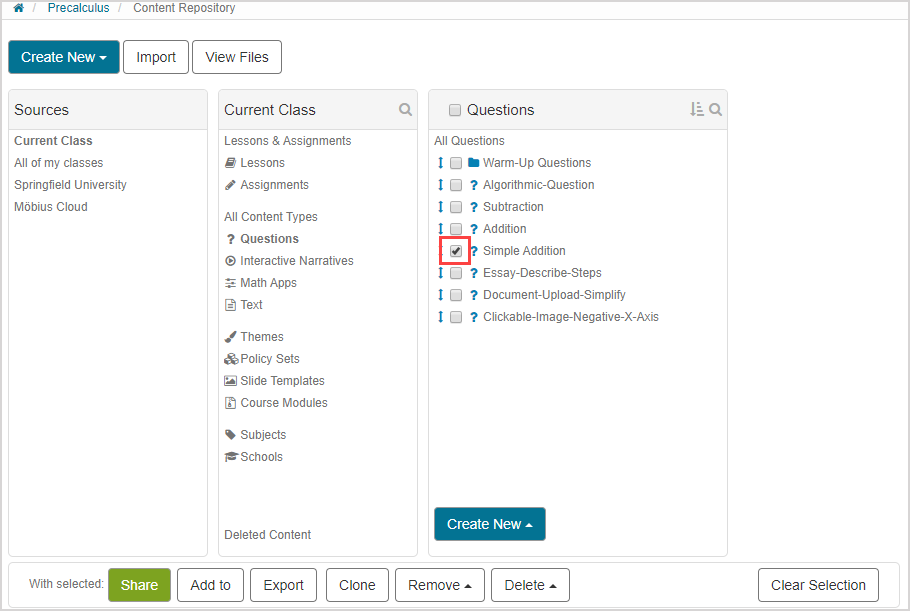
TIP: You can select multiple pieces of content for a quick export as a single .zip file. However, consider exporting as a Course Module, instead, if you feel it will be easier for the recipient of your exported .zip file to manage all of the contained content.
NOTE: You'll have to export content as a Course Module if you want to export content from multiple containers (Example — questions from more than 1 question group).
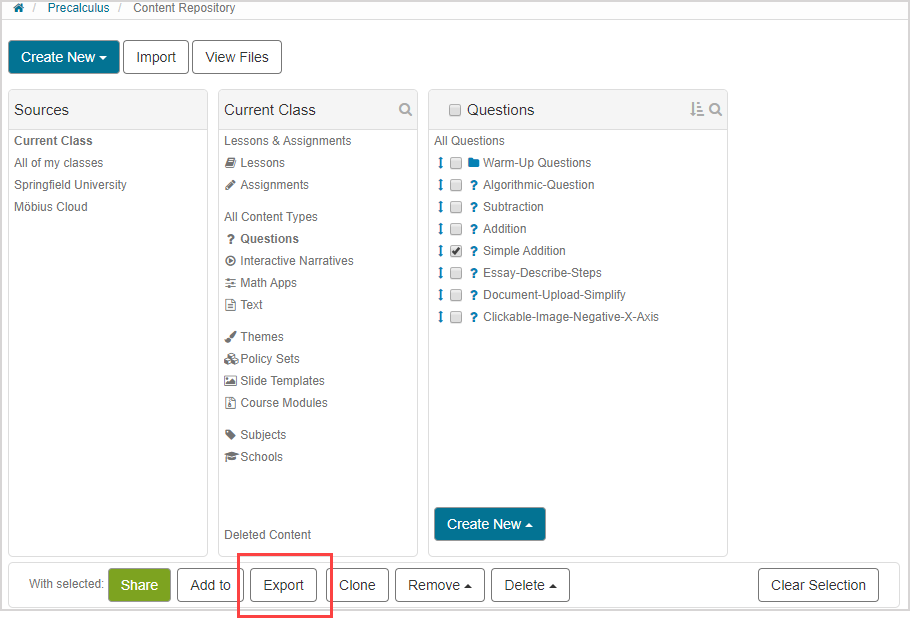
Click Export on the bulk functions bar.
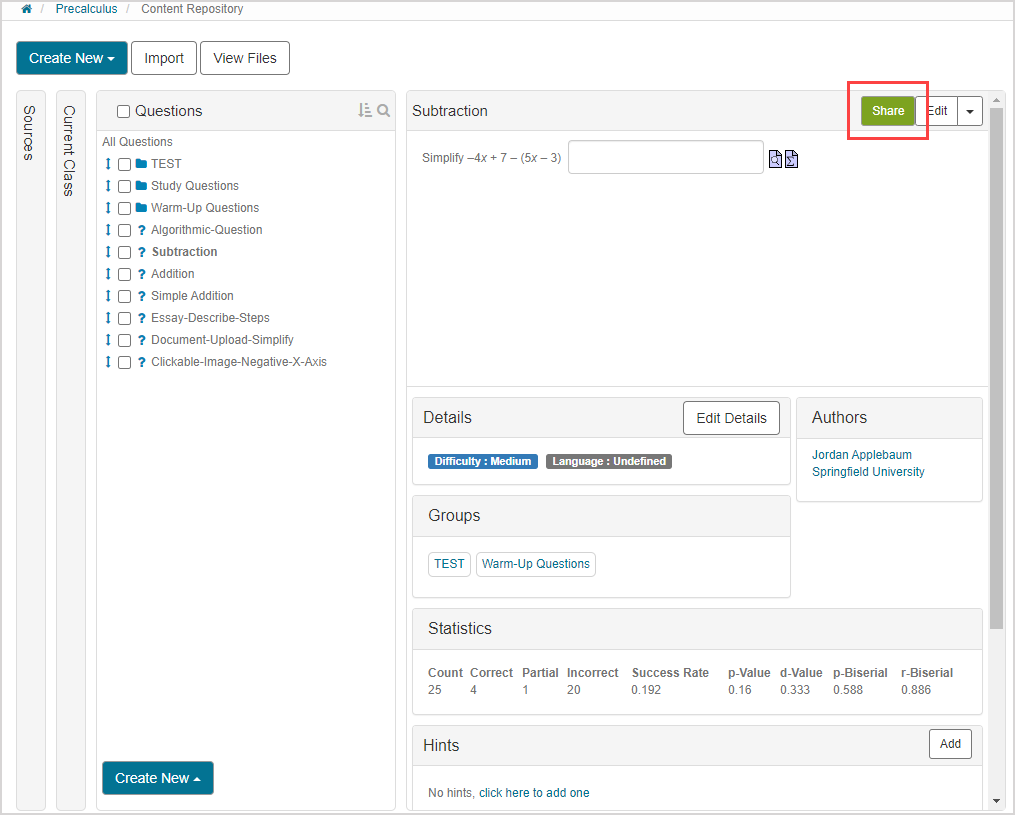
TIP: Alternatively, you can export any individual piece of content (Example — a single question) from the Content Summary pane's Share window:
Navigate to the Content Summary pane of the piece of content that you want to export as a Course Module and click Share.
Click Export to Course Module in the Share window.
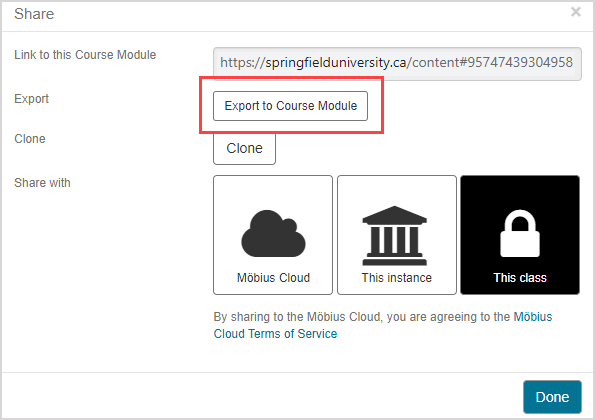
Your selected content is downloaded to your local hard drive as a .zip file. Navigate to where your downloads are stored on your computer to decide how you want to distribute your exported content to other classes and users. Example — Email the exported content .zip file to a colleague.
What's next?
Now that you've exported the content, you're ready for:
Course Module export
Course Module — Defined package of content and supplementary content that can be redistributed to other Möbius users.
A Course Module export is ideal for packaging up larger amounts of content (Example — all questions within the Questions pane of your Content Repository).
TIP: Check out Create a Course Module to create a Course Module to use for exporting large amounts of content.
To perform a Course Module export to your hard drive:
Click Content Repository on the Class Homepage.

Navigate to the Course Module that you want to export to your hard drive and select the check box of the Course Module of interest.
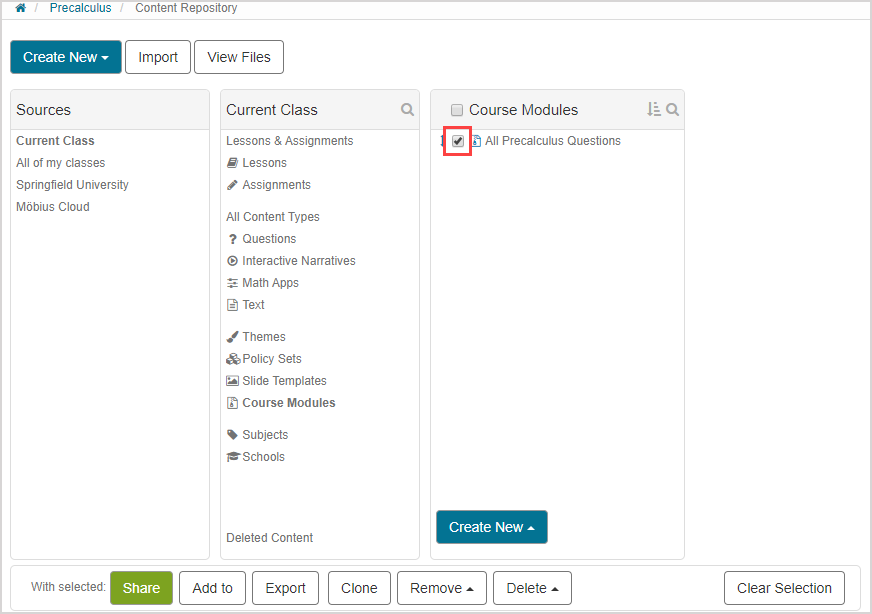
TIP: You can select multiple Course Modules to export as a single .zip file.
Click Export on the bulk functions bar.
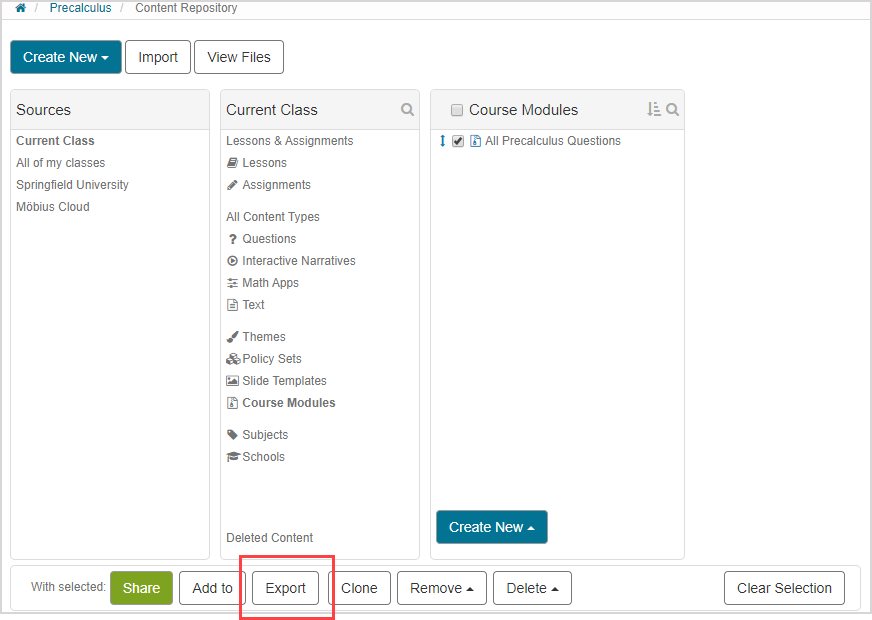
Your Course Module is downloaded to your local hard drive as a .zip file. Navigate to where your downloads are stored on your computer to decide how you want to distribute your exported Course Module to other classes and users. Example — Email the exported Course Module .zip file to a colleague.