Create a remote homework assessment
Jump to section
You can create remote homework assessments in Möbius Grading powered by Edufide, allowing students to access the assessment online and upload their answers for each question.
TIP: To help your students with completing the remote assessment online, check out Submit a Möbius Grading assessment for a student-facing guide.
Create a remote assessment
A new Möbius Grading tool must be added to your Learning Management System (LMS) course for each remote assessment, and from there the assessment is configured and questions are created in Möbius Grading.
To create a remote assessment in Möbius Grading:
-
Add the Möbius Grading tool to your LMS course, ensuring that the Grade points match the desired total for your assessment.
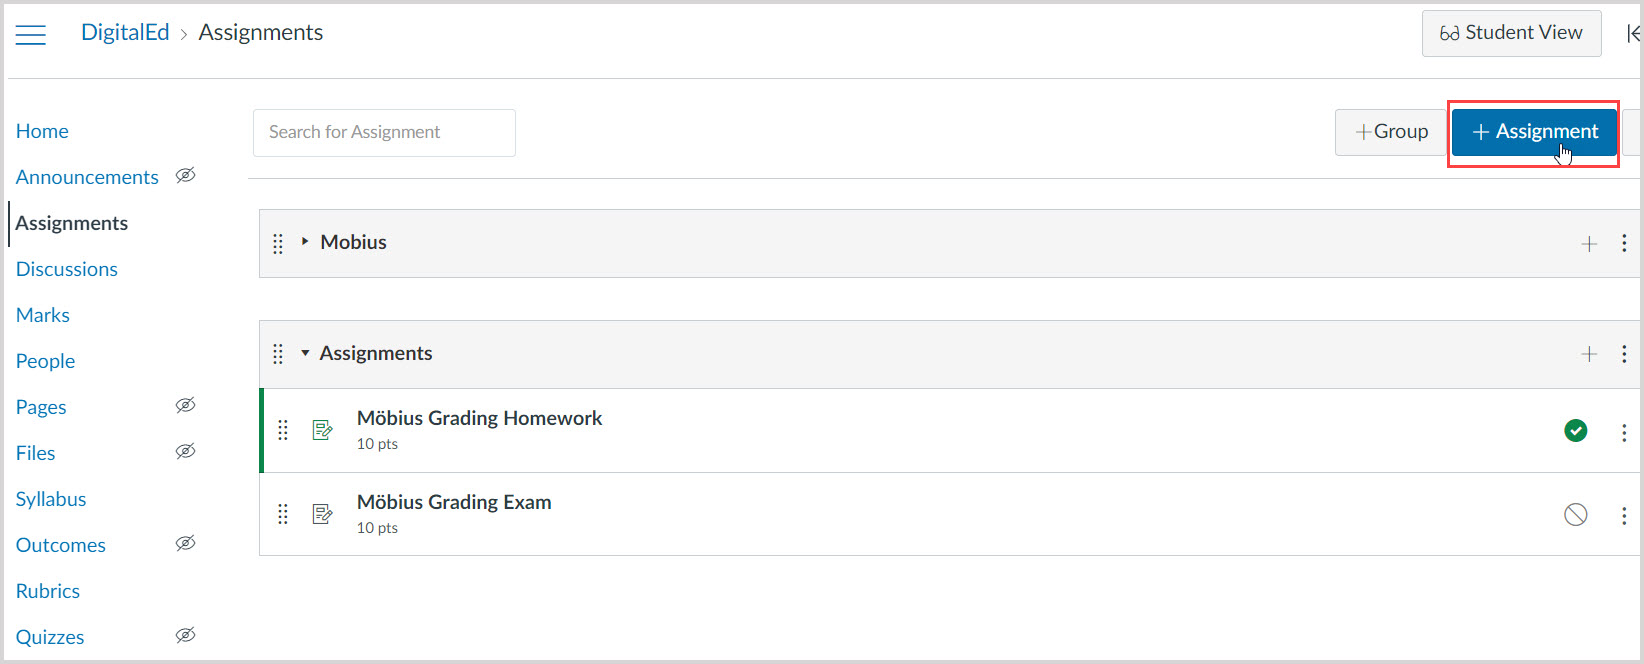
TIP: This process depends on the Learning Management System (LMS) integration, but each Möbius Grading assessment must have its own link. Check out the following help topics for help with integration:
-
Click the link in your LMS course to open Möbius Grading.
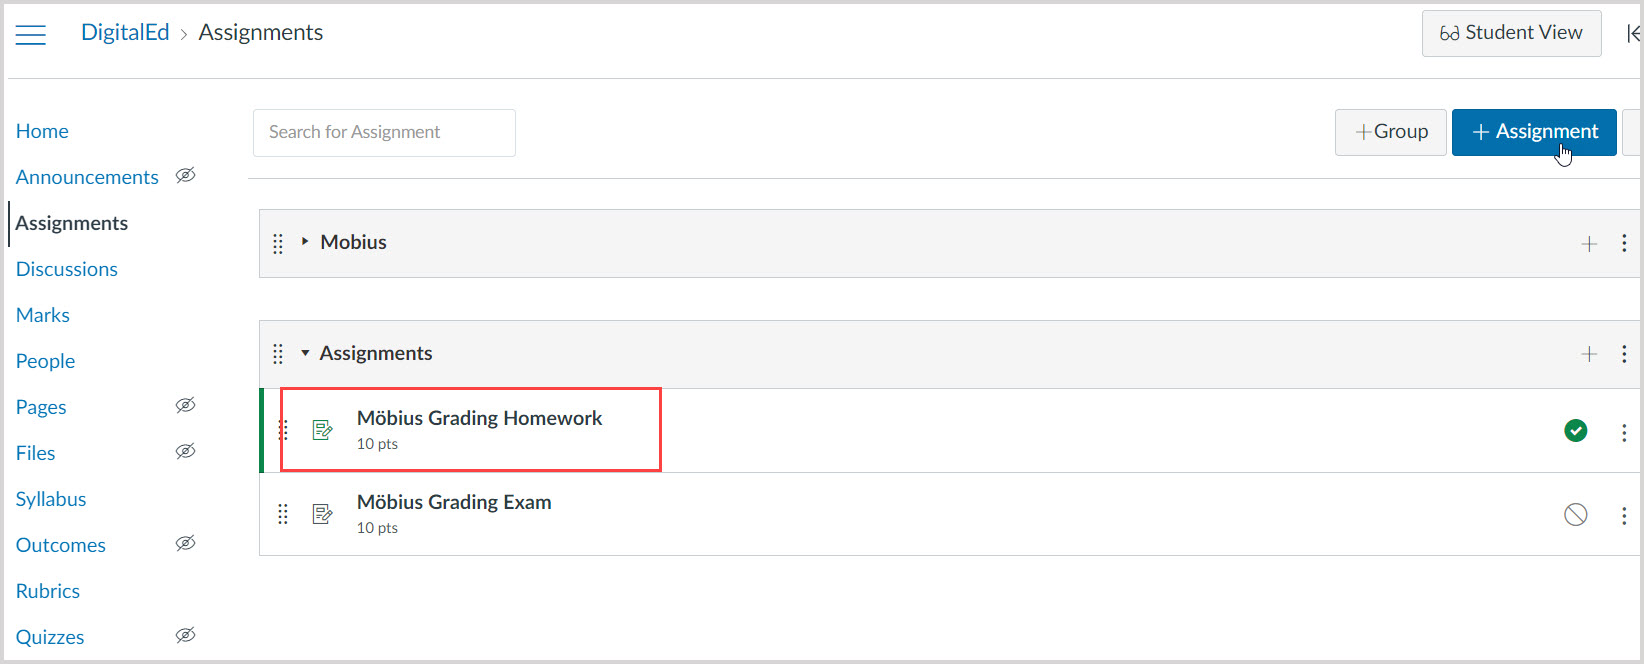
TIP: Once assessment setup is complete, students will access the assessment and submit work by clicking this link.
-
Select Homework on the Assessment page.
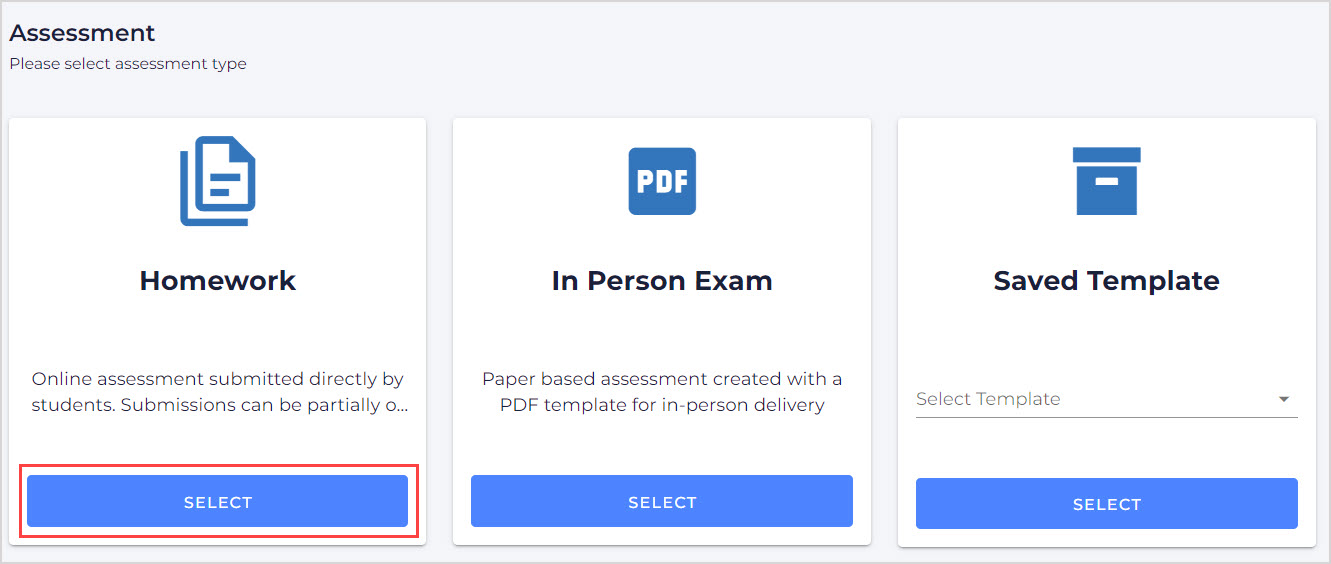
NOTE: Once an assessment type is selected and the assessment has been saved, the type can't be changed. You'd need to create a new link in your LMS course.
-
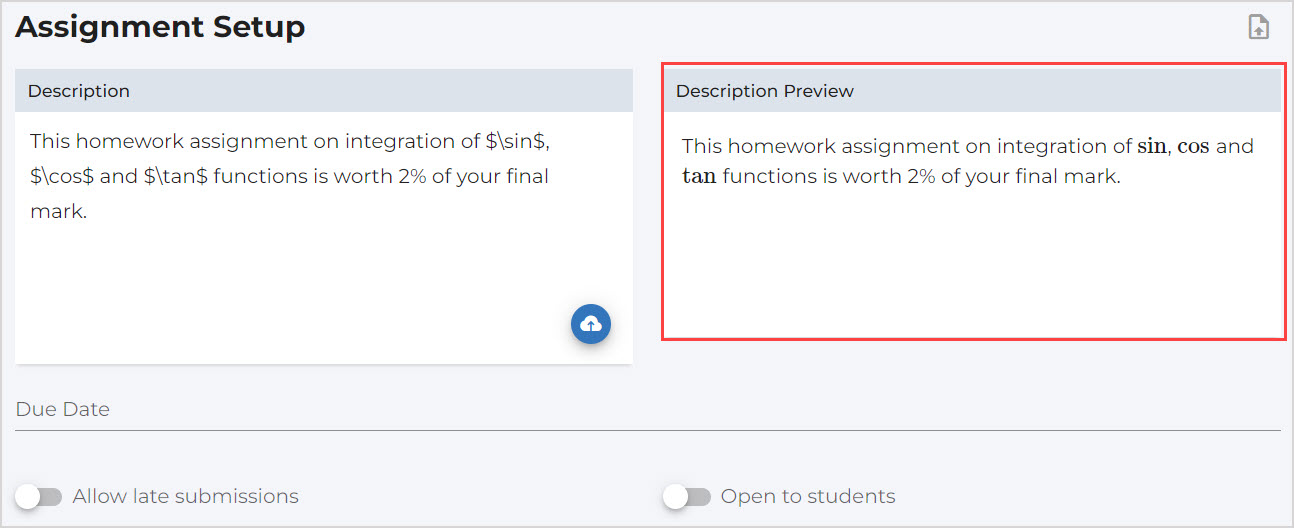
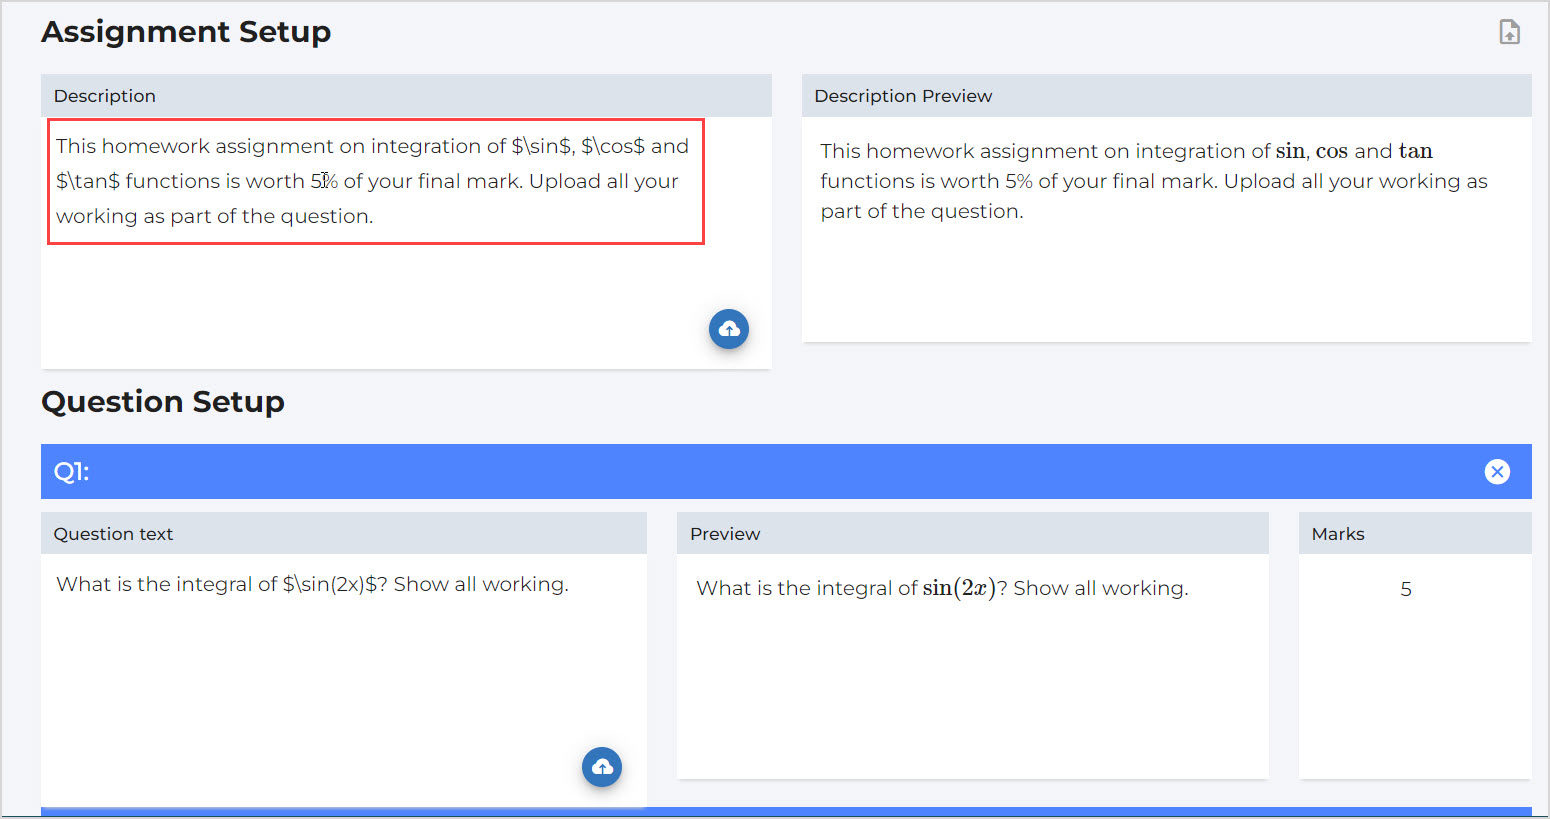
Enter a Description for the assessment under the Assignment Setup heading.
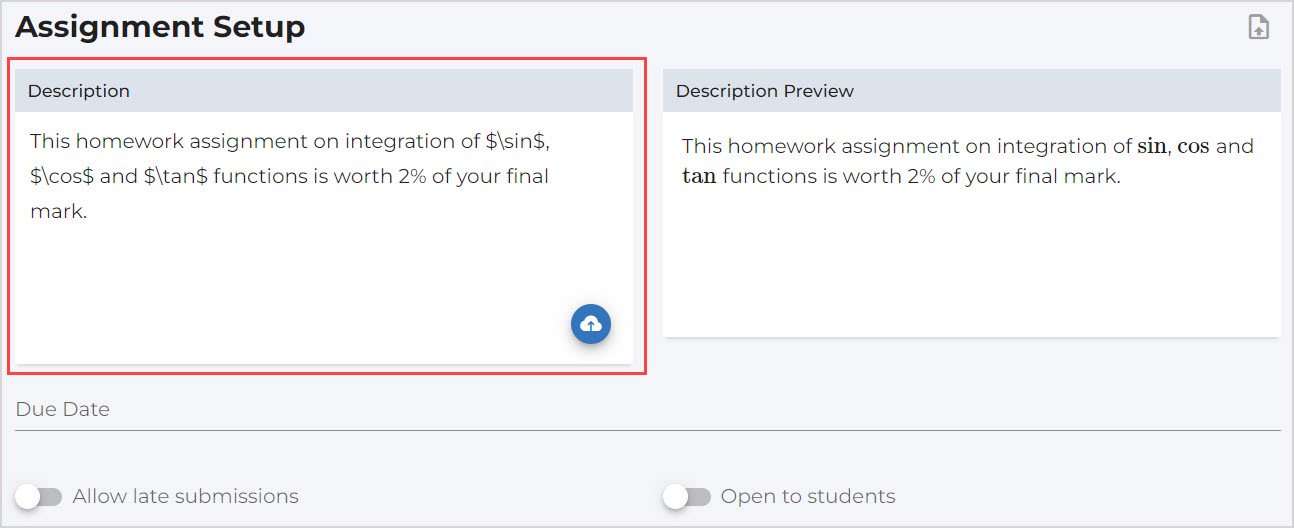
NOTE: The Description field supports Markdown and LaTeX syntax for displaying math. You'll see the description as visible to the students in the Description Preview field:
-
Customize the availability settings for the assessment:
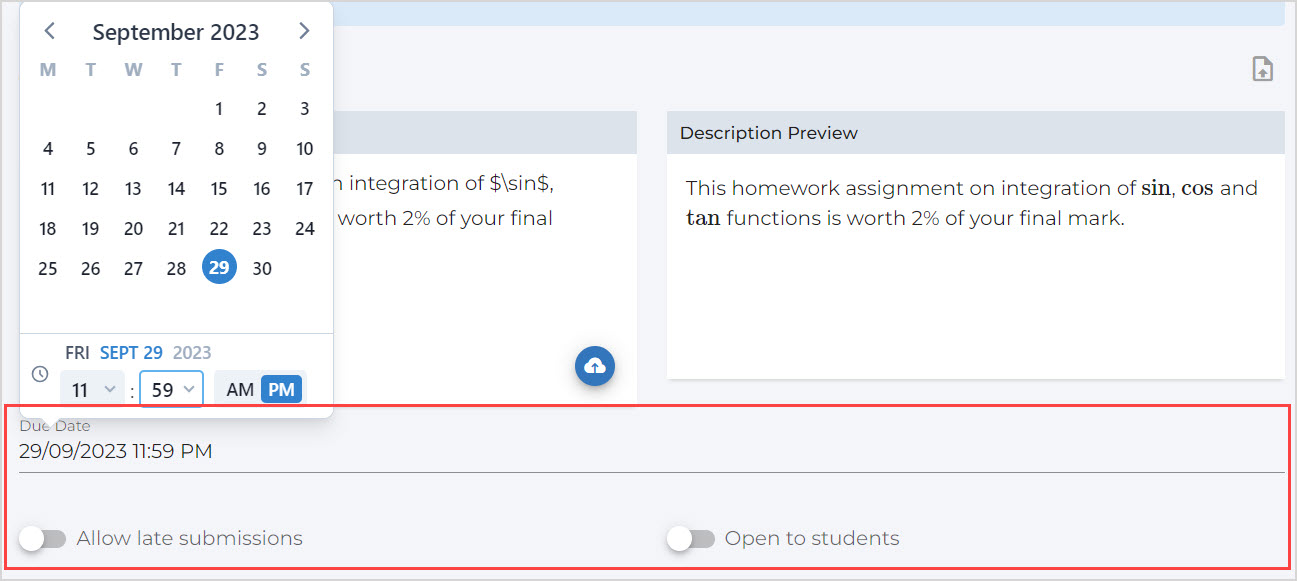
| Property | Default setting | Explanation of property |
|---|---|---|
| Due Date | Empty |
Sets the end date for submission; students can't access the assessment to upload files or submit after this date and time. |
| Allow late submissions | Off |
On — Allow students to upload and submit responses after the Due Date, subject to the Late Penalty settings. Off — Don't allow students to upload and submit responses after the Due Date. |
| Open to students | Off |
On — Allow students to access the assessment before the Due Date. Off — Don't allow students to access the assessment. |
IMPORTANT: The date and time set in the Due Date field will be in the time zone of your device.
-
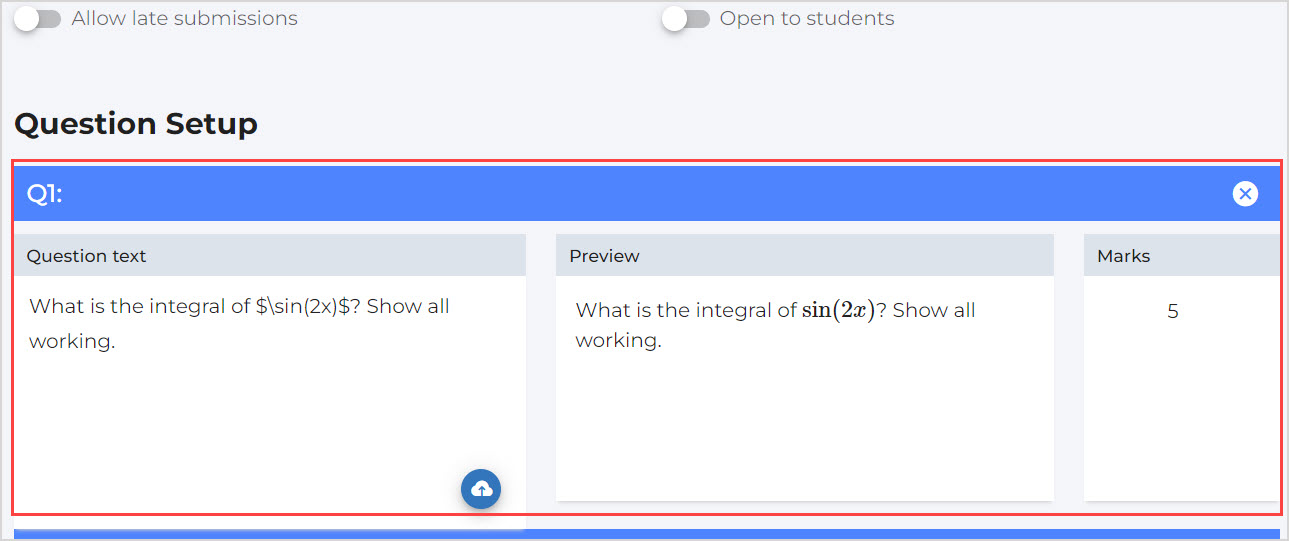
Create each question for the assessment under the Question Setup heading (check out Add questions to an assessment).
-
Once every question in the assessment has been added, scroll to the bottom of the page and click Save Assessment.
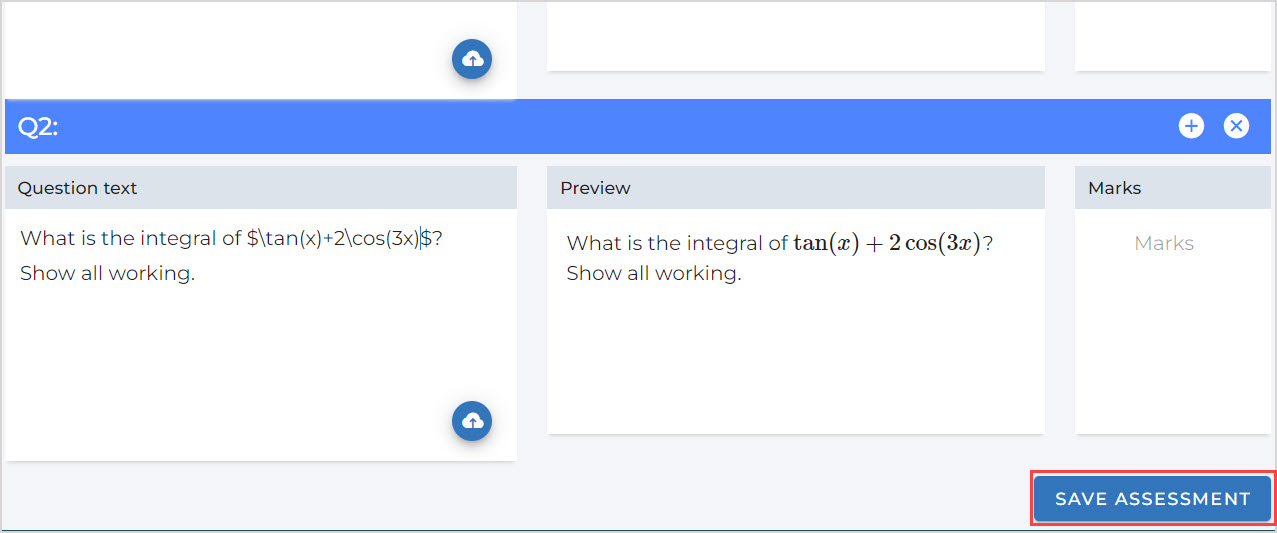
NOTE: After saving the assessment, you'll be taken to the Möbius Grading dashboard for this assessment:
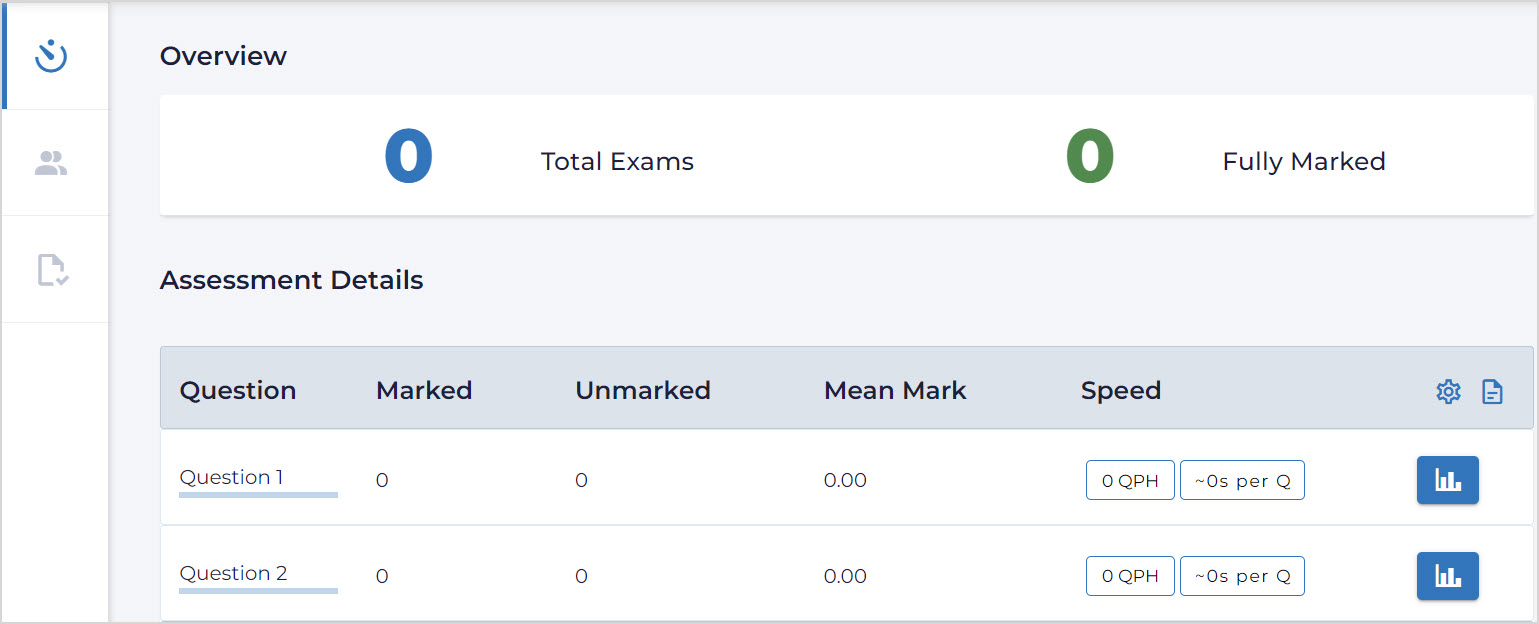
Check out View the assessment dashboard and navigation menu for more details on the dashboard and assessment navigation.
Add questions to an assessment
When creating or editing a remote assessment, each question for the assessment is added under the Question Setup heading.
TIP: The students will see a separate upload area for each question that you add.
To add questions to the remote assessment:
-
Navigate to the section for the question under Question Setup.
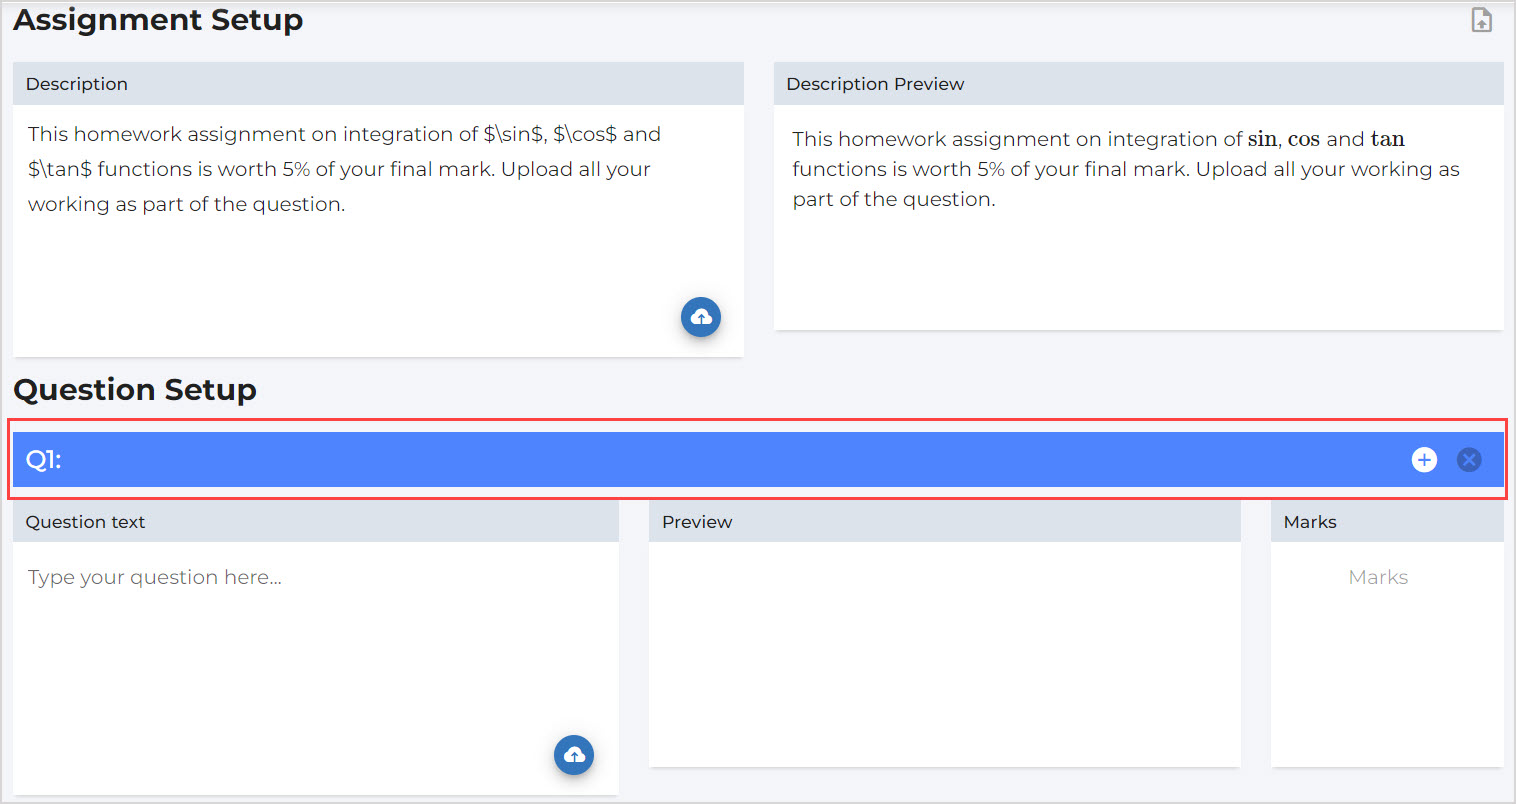
-
Enter Question text for the question.

NOTE: The Question text field supports Markdown and LaTeX syntax for displaying math. You'll see the question as visible to the students in the Preview field:

-
Update the Marks field with the number of points allocated for that question in the assessment.

IMPORTANT: The combined total of all Marks values for all questions in the assessment must match the points total set in your LMS at Step 1.
-
Click Add Question to add another question to the assessment.

-
Update the Question text and Marks fields with the details of the new question.

NOTE: To delete a question from the assessment, click Remove Question:

-
Once every question in the assessment has been added, scroll to the bottom of the page and click Save Assessment.

Edit the remote assessment content and settings
You can come back to the Möbius Grading assessment at any time to edit question content or update the assessment availability and feedback settings.
To update the availability settings, click Settings on the Assessment Details table (check out Schedule assessments and manage feedback settings):
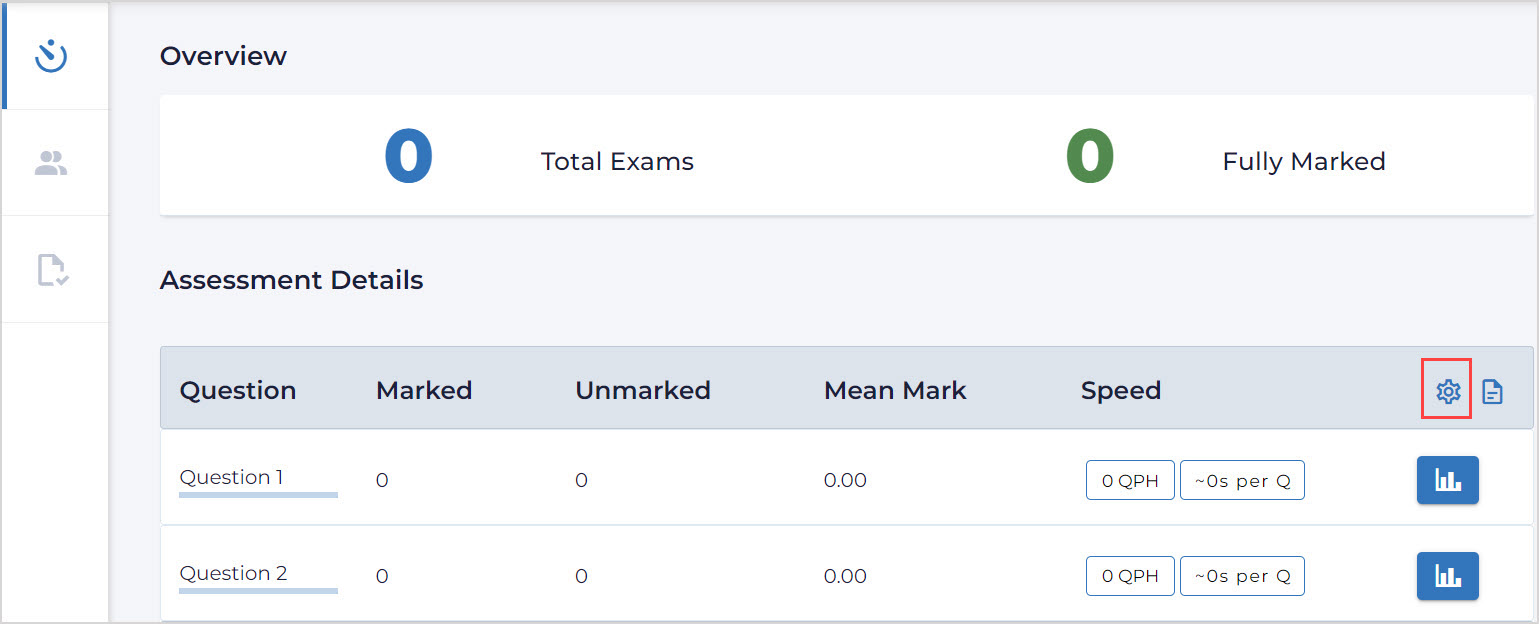
To edit the description and question content in the assessment:
-
Click Edit Exam on the Assessment Details section of the dashboard.
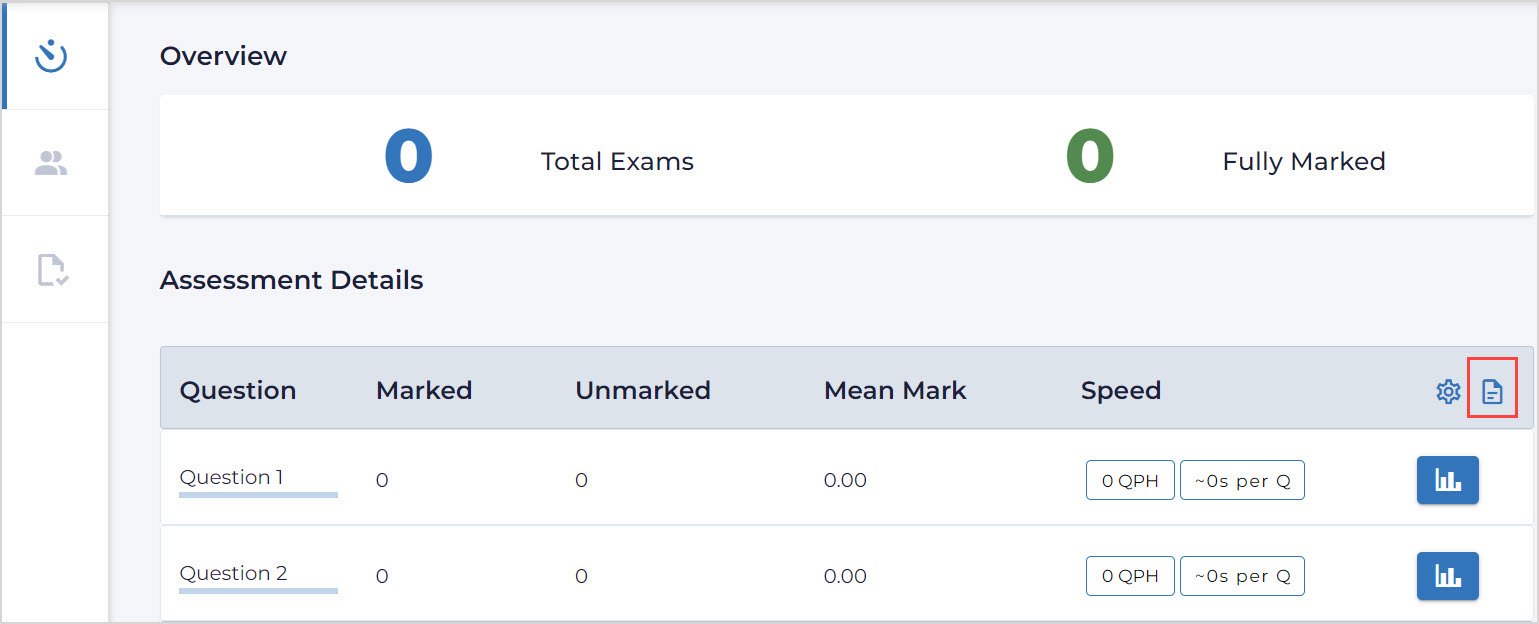
-
Make the desired changes to the content.
-
Once editing is complete, scroll to the bottom of the page and click Update Assessment.

What's next?
Now that you've created the assessment and students have uploaded their work, you're ready to: