Use Proctor Tools
Jump to section
Proctor Tools are used to perform remote authorization and are accessed from the Class Homepage.
NOTE: Proctor authorization can also be performed locally on a student's computer without Proctor Tools. Check out Perform local authorization.
Remote authorization through Proctor Tools applies to Möbius assignments that are authored as proctored exams with or without Proctored Browser Mode.
TIP: Check out Create a proctored exam and Enable Proctored Browser Mode for more details on these assignment types.
Proctor Tools allow proctors to remotely authorize the following student permissions:
- Grant or deny permission to start (or re-enter) an activity
- Grant permission to submit an activity for grading
- Grant permission to return to a graded attempt
- Grant permission to submit their attempt at a later end date
- Grant permission to have extra time awarded on a timed activity
NOTE:System proctors can proctor any class from the System Homepage within their organization without needing to first be enrolled in the class. Class proctors can only proctor classes that they're enrolled in with the class role of proctor. Instructors can proctor any of the classes where they're listed as an instructor. Check out Learn about proctors.
To use Proctor Tools, a user search is first performed to identify the student(s) of interest, and then authorization can take place using the Permissions Table.
NOTE: The configuration of the assignment properties of a proctored exam determines the need for when authorization of a student's attempt is required. A student will know if they need proctor authorization for their proctored exam from either the launch page or when Submit Assignment is clicked, or both (depending on the assignment's configured properties). If proctor authorization is required to launch or re-enter their attempt, the student must click Request Authorization on the launch page.
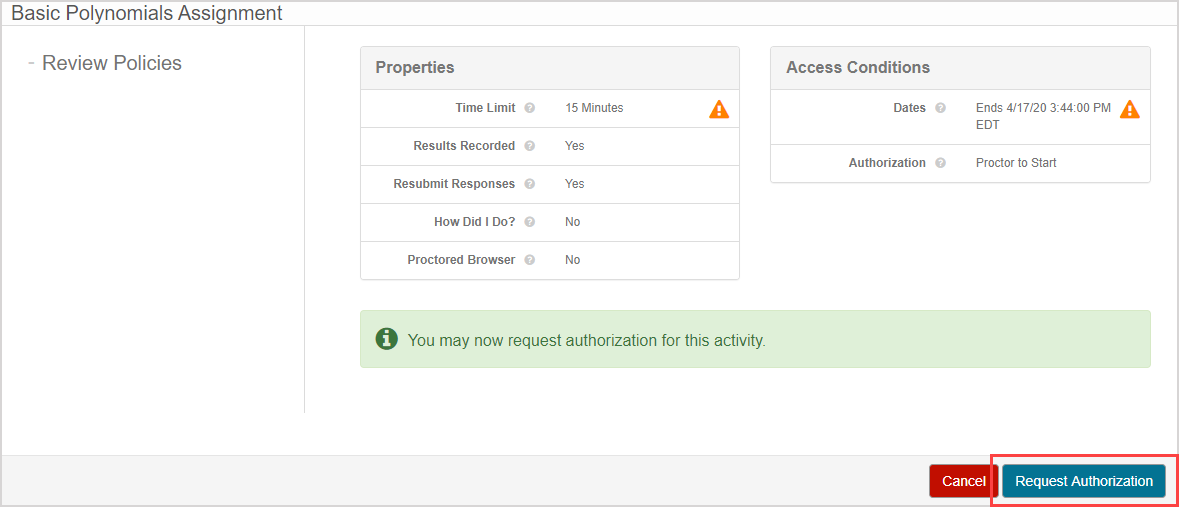
If proctor authorization is required to submit the attempt for grading (whether or not authorization to launch is also configured), the student clicks Submit Assignment.

Additionally, if a student exits a proctored exam with the Proctored Browser Mode enabled without first submitting their attempt, they'll require re-authorization to return to their attempt and must click Resume on their warning page.

In all of these scenarios, the student is then navigated to the Proctor Authorization Request page.
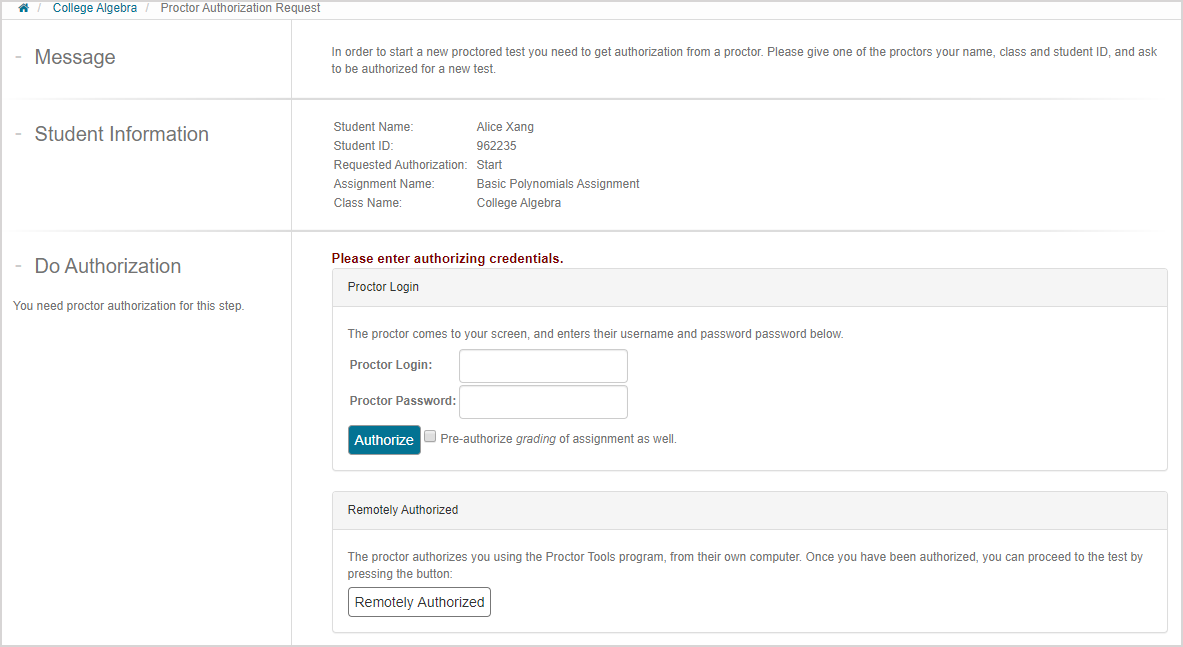
The student should then contact you or a proctor (Example — via email) and then Proctor Tools can then be used on your or the proctor's own computer to search for and remotely authorize the student. The authorization occurs in real-time. The student must then be notified that they're now authorized (Example — via email) and they can then click Remotely Authorized on the Proctor Authorization Request page to continue to launch, re-enter, or to submit their attempt (or all actions depending on the assignment properties).

NOTE: A range of scenarios could lead to a student needing proctor authorization (that aren't specific to a proctored exam):
- Example — A student used up all of their allowed attempts but didn't notice that the Maximum Attempts property was defined.
- Example — A student may have a medical reason for requiring an extended amount of time on a timed exam.
- Example — A student may have accidentally clicked Submit Assignment on an incomplete attempt instead of Quit & Save.
In some scenarios, a student will be able to click Request Exception from the activity's launch page and then notify you or a proctor that an exception has been requested.
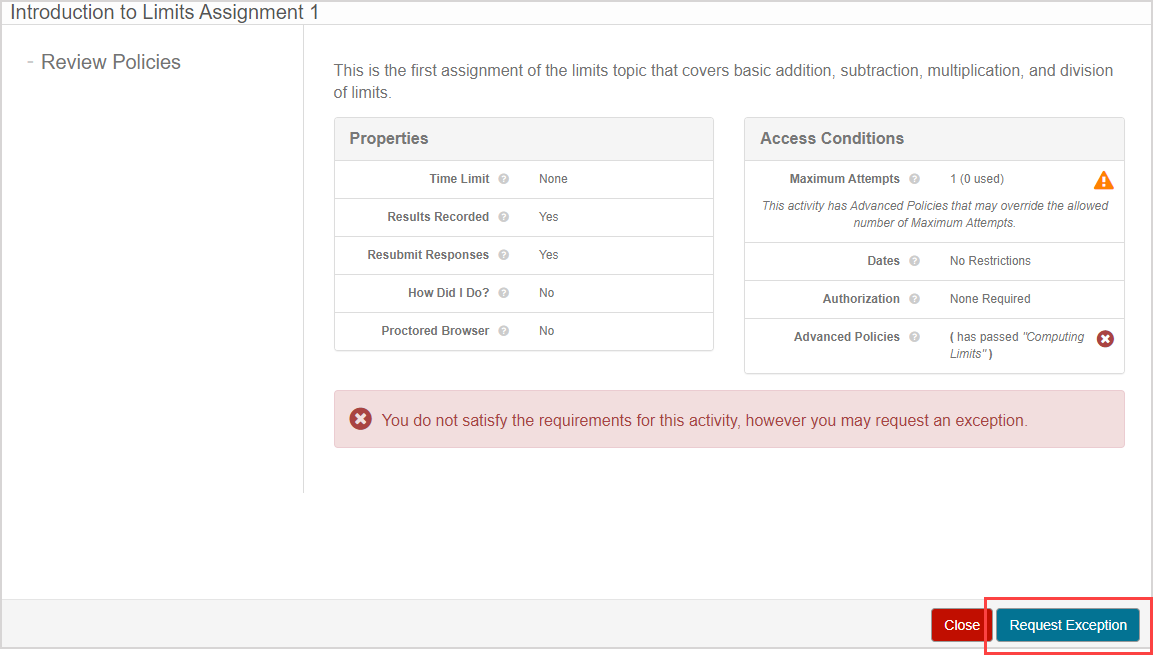
The student is then navigated to the Proctor Authorization Request page.

You or the proctor will then use Proctor Tools to authorize student permissions in real-time. If granted, the student will immediately be able to click Remotely Authorized and continue with their attempt.

In other scenarios, a student can't request the permission through Möbius (Example — if it's known in advance that extra time on a timed exam is required for a medical reason). Communication should take place between you or the proctor and the student, and if it's acceptable to apply the permission, the permission becomes active in real-time through Proctor Tools. These types of permissions will automatically apply to the student without any additional student action within the platform (Example — if a student is allowed extra time through Proctor Tools on a timed exam, their time limit automatically adjusts in real-time).
Access Proctor Tools
To access Proctor Tools:
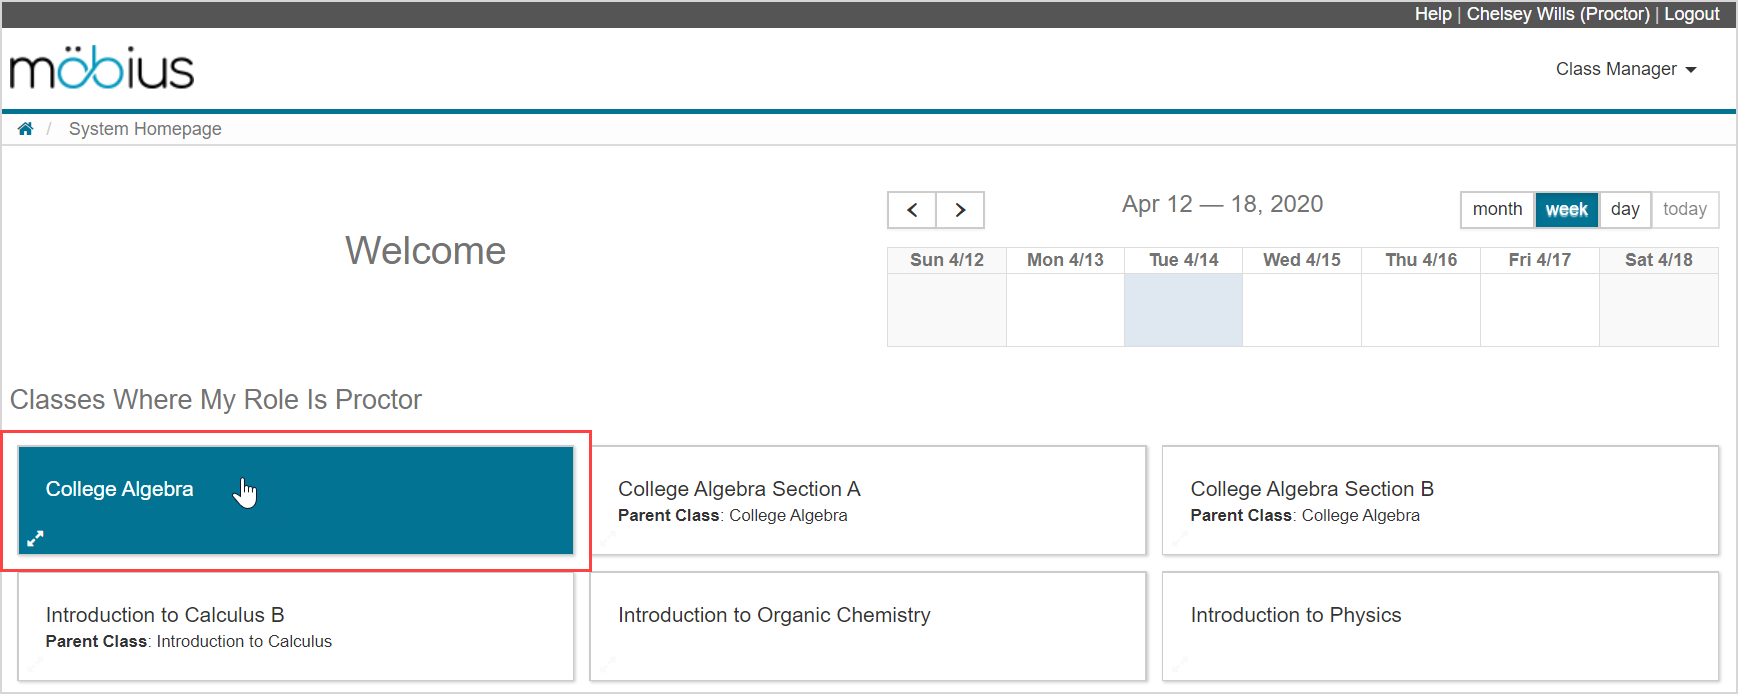
Click on the class name from the System Homepage that you want to perform your authorization for.
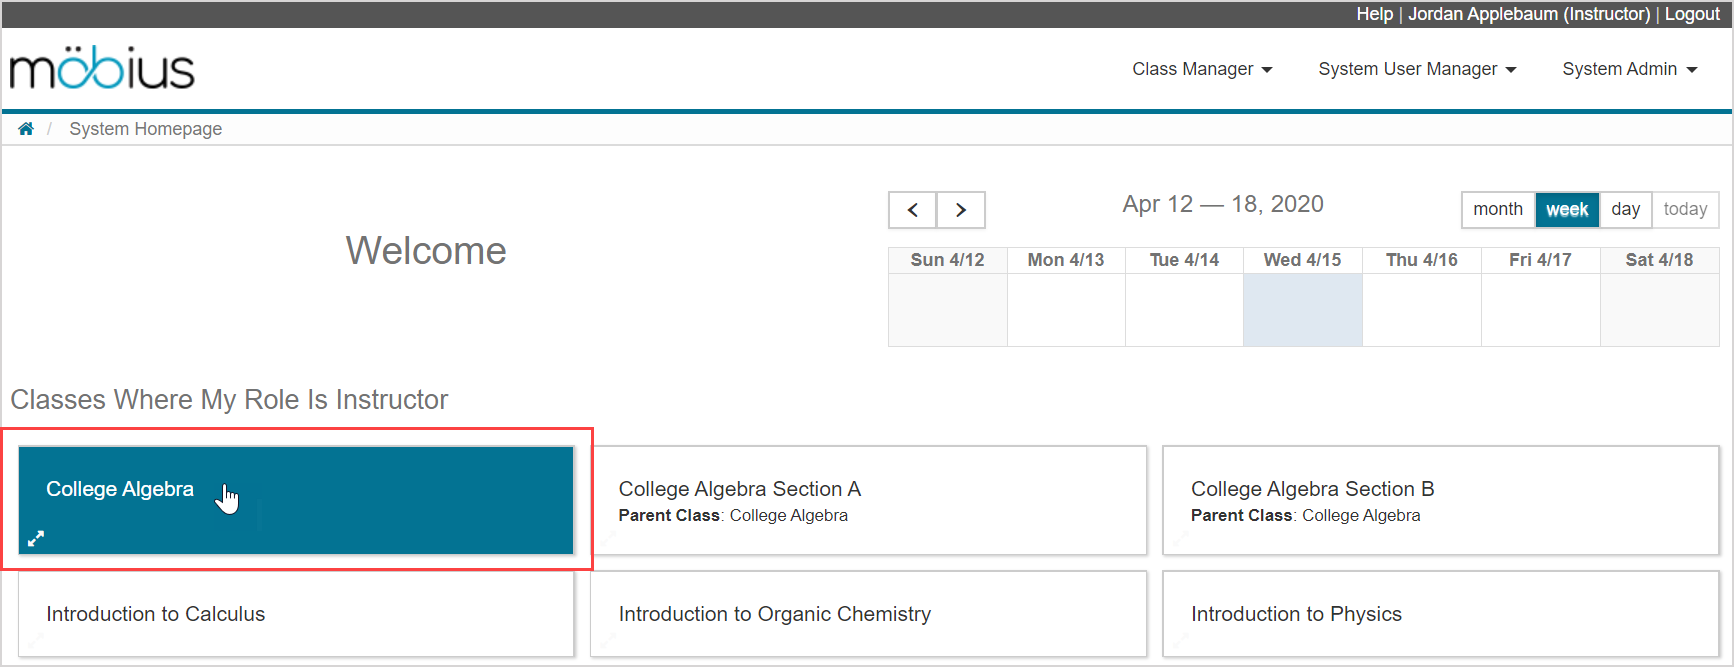
NOTE: If you're proctoring as a system proctor or class proctor, the classes that you can proctor are listed on the System Homepage with the heading Classes Where My Role Is Proctor. Click on a class name to enter the class.
Click Proctor Tools on the Class Homepage.

NOTE: If you're proctoring as a system proctor or class proctor, you can then click Proctor Tools on the Class Homepage.

You're navigated to Proctor Tools.
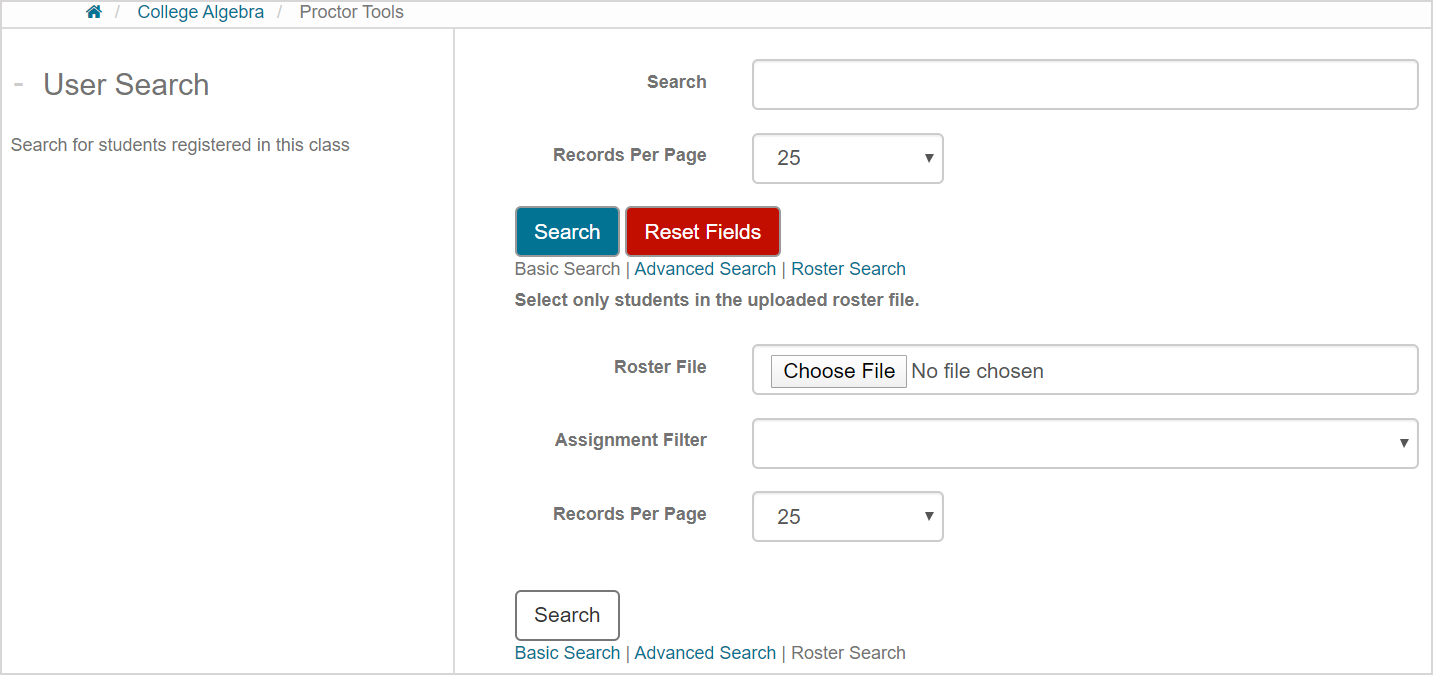
User searches in Proctor Tools
A Proctor Tools user search is the first step to be able to remotely authorize permissions for a student.
You can perform four types of user searches in Proctor Tools:
- No parameter search
- Basic search
- Advanced search
- Roster search
From these search results, you can select which students you want to authorize permissions for.
These search results also display a student's existing granted or denied permissions, and you can then proceed to modify these permissions as needed.
TIP: Click Reset Fields at anytime to display the default basic search page with no fields entered.

No parameter search
Click Search without entering any search parameters to display all students in the class with all of their existing permissions.

Basic search
Perform a basic user search using the Search field to find a specific user to view only their existing permissions (and then click Search).

TIP: Your user search can include a user's:
- User login
- First name
- Last name
- Student ID
Advanced search
Click Advanced Search.

Complete as many advanced search fields as needed to refine your search results to view existing permissions for a specific user and activity (and then click Search).
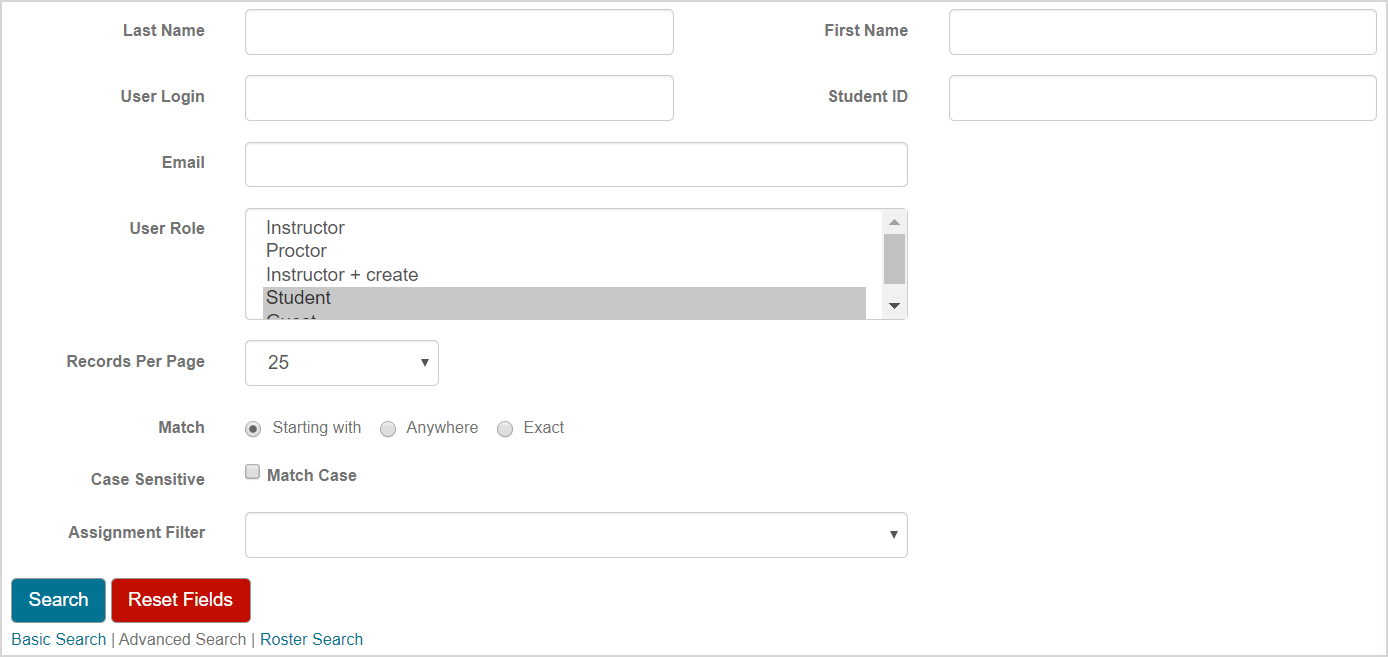
TIP: If the only field you define in the advanced search is the assignment name using the Assignment Filter, all students in the class will be displayed with their existing permissions for only that assignment.
Roster search
TIP: The user roster file that you upload contains a subset of students from your class. Uploading a user roster file in Proctor Tools is, therefore, ideal for reducing the amount of searching you'll need to do for the students that you want to authorize permissions for.
Click Roster Search.

Click Choose File to upload a user roster file.

Select the user roster file (.tsv or .csv) that's saved locally on your computer and click Open.
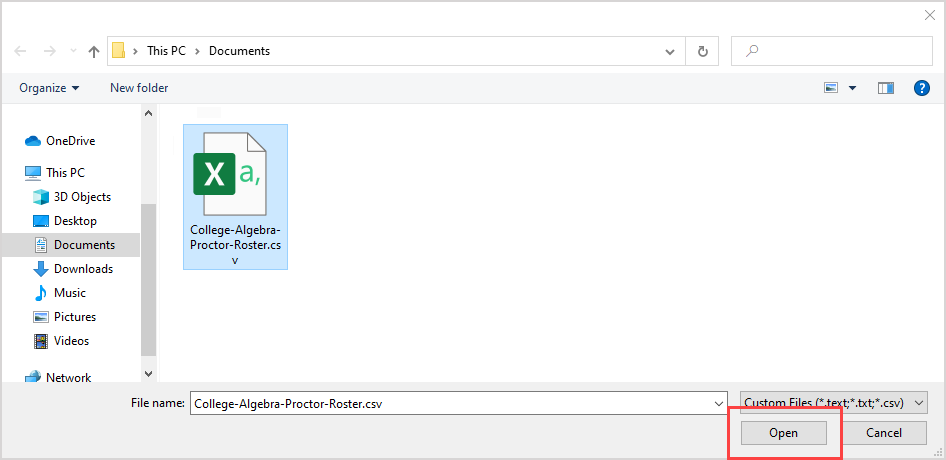
NOTE: Your user roster file only requires the (A) login or (B) username attribute. The users listed in your user roster file must already be enrolled in the class.

(Optional) Select which assignment you want to view or authorize permissions for from the Assignment Filter drop-down list.
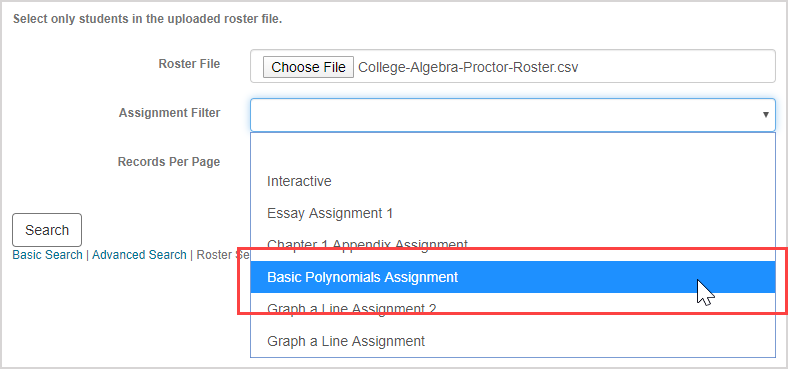
NOTE: Selecting an assignment name at this step will refine your student search results to only show the permissions that the students hold for the specified assignment. However, this is optional in the roster search since you can also select the desired assignment when you authorize permissions in later steps.
Click Search.

Permissions Table
Your Proctor Tools user search results (regardless of the type of search you performed) are displayed in the Permissions Table:

A. Student user details — Information that identifies the student: login, first name, last name, email, and student ID.
B. Holds Permission — Identifies which permission(s) the student has already been granted or denied.
C. End Date — Displays the new end date that has been permitted for the student (if the Extend end date until additional permission was granted).
D. Time Limit — Displays the new time limit that has been permitted for the student (if the Grant additional time additional permission was granted).
E. Assignment — Displays which assignments the student holds granted or denied permissions for.
NOTE: An assignment won't be listed for a student in the Permissions Table if the student doesn't hold any permissions for it.
Remote authorization using Proctor Tools
IMPORTANT: A student's eligibility for permission authorization is at your discretion.
NOTE: Remote authorization can be applied before the student wants to launch or re-enter their attempt or while the student's attempt is in progress. Remote authorization occurs in real-time.
To remotely authorize permissions for a student using Proctor Tools:
Select the name of the assignment that your authorization will affect from the Authorize Which Assignment drop-down list.

NOTE: The name of the assignment that will be authorized will autofill as a read-only value if you've already defined it during an advanced search or roster search.

Select the type of permission radio button that you'll apply to the selected assignment:

| Permission type to be given | Explanation of permission type |
|---|---|
| Grant permission(s) |
|
| Deny access |
|
NOTE: You can only select one permission type radio button. Selecting Deny access prevents any specific permissions from being selected.
IMPORTANT: Assignments that you're granting permissions for must be visible to students on their Class Homepage. Check out Control activity visibility.
(Optional) Proceed to select the specific permission check box(es) if the Grant permission(s) permission type was selected at step 2:

| Specific permission to be given | Explanation of specific permission |
|---|---|
| Start/Re-Enter |
TIP: The Set end date permission will also need to be applied if the Start/Re-Enter permission is applied to an assignment with an end date that has already passed. |
| Grade |
NOTE: This permission only applies to proctored exams. Check out Create a proctored exam. |
| Re-open if already graded |
NOTE: The activity's progress icon (on the student's Class Homepage and in the student's Gradebook) changes from Completed to In Progress. |
| Set end date |
|
| Set additional time |
TIP: The Set end date permission will also need to be applied if the amount of additional time of the Set additional time permission extends beyond the assignment's end date. IMPORTANT: Starting with Möbius 2022.2, multiple uses of this permission will override any previous additional time, and won't be cumulative. Example — If a proctor has previously authorized 15 minutes of additional time, then to add another 15 minutes you will need to enter 30 minutes in the Set additional time field. Example — Enter 0 minutes to revoke additional time that has previously been applied. |
NOTE: Depending on the assignment that was searched (Example — using the advanced search to list all students for a specific assignment), some specific permissions might not be available depending on that assignment's defined properties (Example — the Set additional time field won't be visible if the assignment doesn't have a time limit already defined in its assignment properties).
Select the check box(es) of the student(s) from the Permissions Table that you want to authorize for the selected assignment and with the selected permissions.

NOTE: If the student of interest doesn't have the assignment listed, it's because they don't yet hold any permissions or authorizations for it. By selecting the activity in step 1 and then selecting the student check box in step 4, the authorization will be applied to that student for that specified assignment.
TIP: Select the Select All check box to authorize all of the listed students.

Click Authorize.

The Permissions Table updates to display your selected students with the authorized permissions applied for the selected activity.

IMPORTANT: These permissions update in real-time such that once Authorize is clicked, your authorization is instantly applied to the affected students.
Notify the affected students that they've been authorized and that they're now able to click Remotely Authorized on the Proctor Authorization Request page.
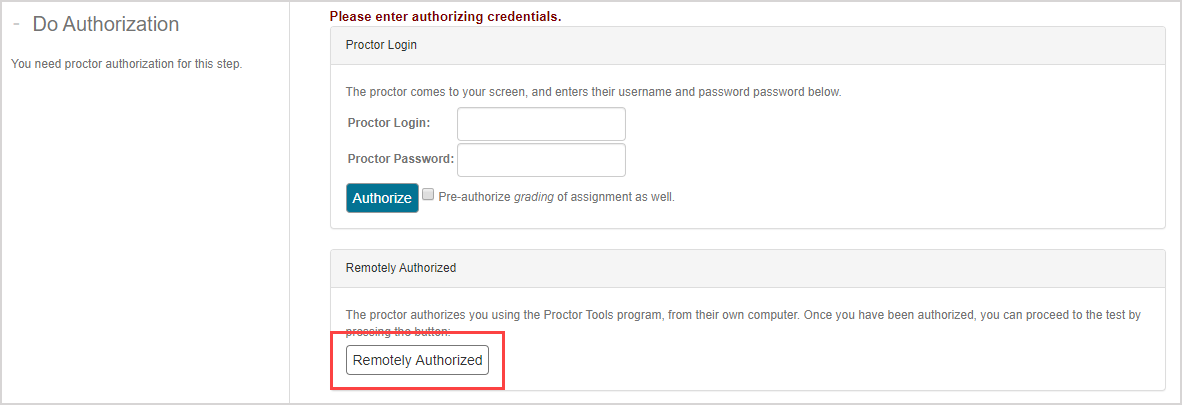
NOTE: If you performed your authorization ahead of time (Example — before the student even tried to launch the attempt), they won't be navigated to the Proctor Authorization Request page and will be able to simply click Start or Submit Assignment as they would for an assignment without restrictions. Similarly, some granted permissions don't involve the Proctor Authorization Request page, so simply communicating to the student that their permission has been granted or denied is recommended (Example — for a student who is given a time extension while mid-attempt on a timed activity).
NOTE: Your authorization can only be used once by the student and then becomes unavailable. Exceptions are the Extend end date until permission and the Grant additional time permission (Example — if you grant 10 extra minutes on an in-progress timed exam, the student will be allowed 10 extra minutes on the in-progress attempt as well as on all subsequent attempts at that timed exam).
What's next?
Now that you've understood Proctor Tools, you're ready for: