Use the Add to Glossary icon
The Add to Glossary icon of the Visual Editor allows you to add an element to the glossary while authoring an interactive narrative.

TIP: Check out Use the Visual Editor to learn more about all of the icons on this toolbar.
NOTE: The Add to Glossary icon is only available while creating or editing slides in the Interactive Narrative Editor. Check out Author an interactive narrative.
Students can then view the glossary during an interactive narrative to read additional information about a slide element.
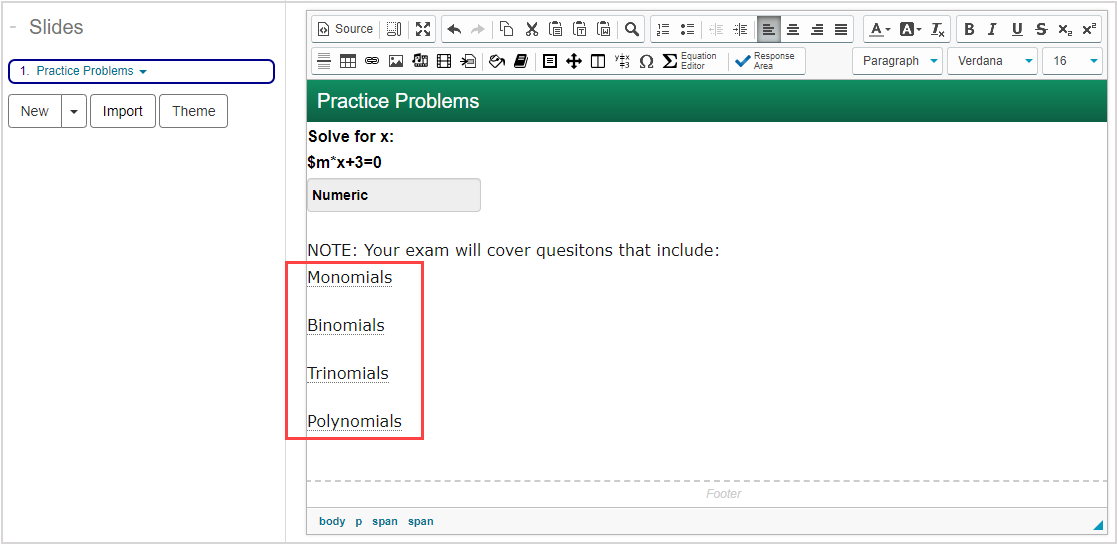
You can highlight an element on a slide and assign a term and entry (definition) to be stored in the glossary.
A glossary term and its entry can be linked to as many times as needed throughout the interactive narrative.
To add a term and entry to an interactive narrative's glossary:
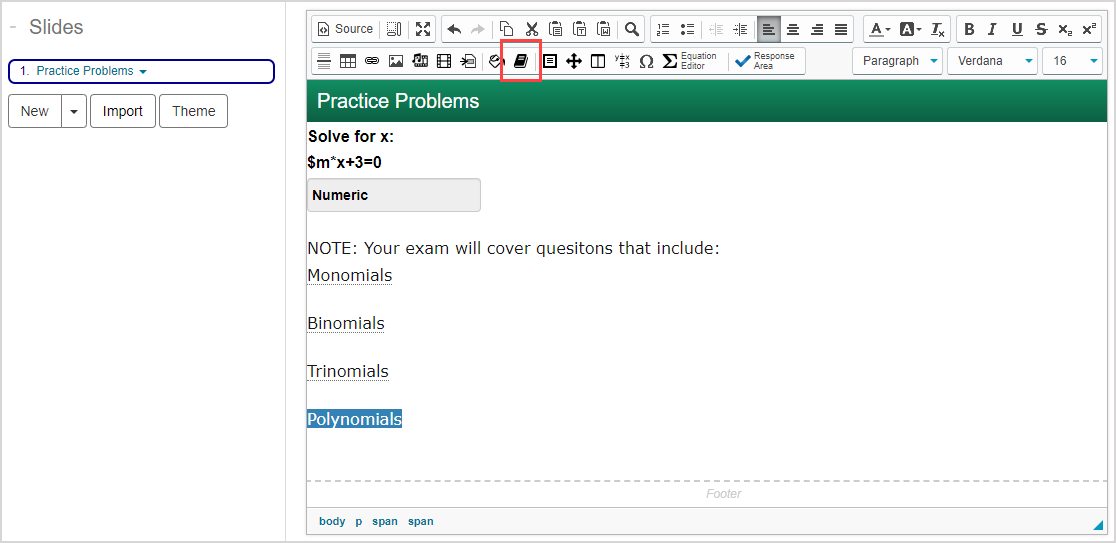
Highlight the element on the slide with your cursor that you want to define in the glossary and click Add to Glossary.
Enter the name of the term you want to define in the Glossary Term field.
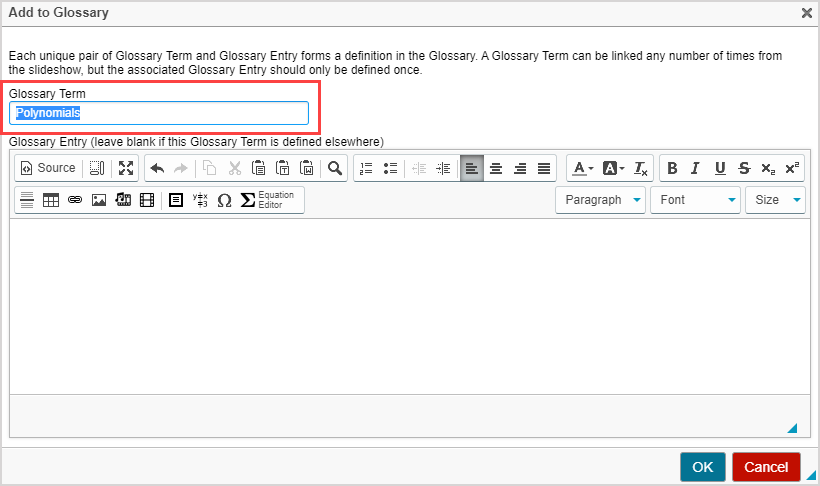
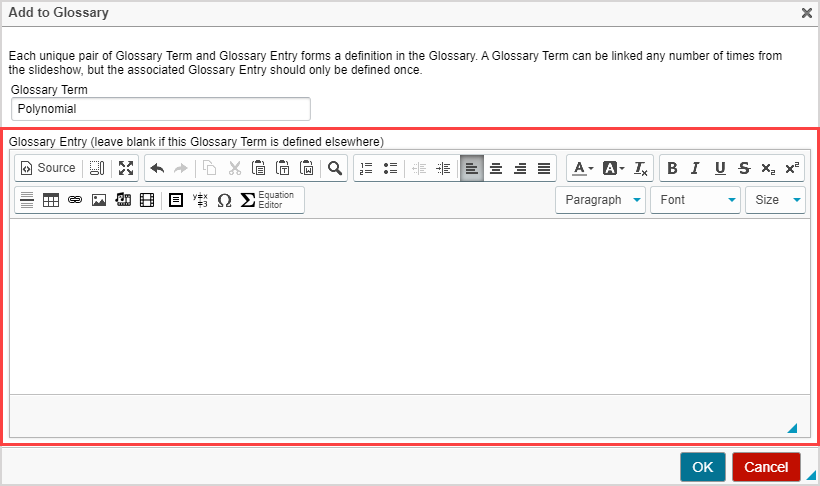
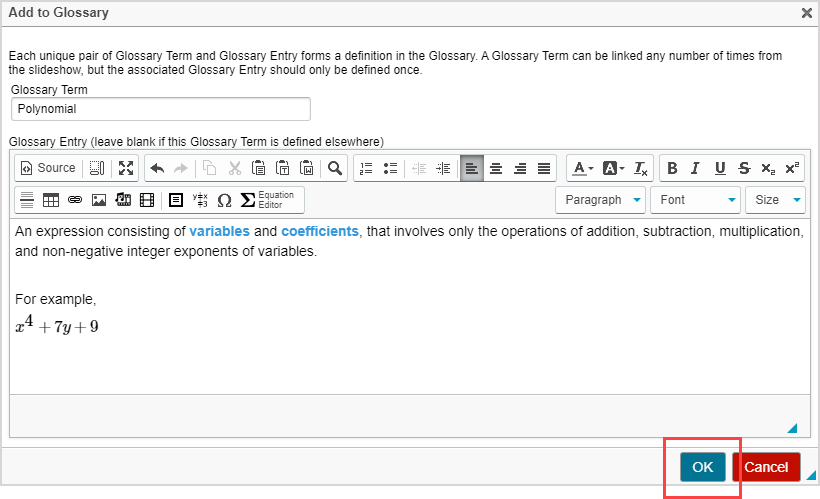
Enter the definition of the glossary term in the Glossary Entry field.
TIP: Leave the Glossary Entry field blank if this term has already been defined in the glossary.
TIP: Check out Use the Visual Editor for details on how to use this toolbar to the fullest to control the visual appearance of your glossary entry.

Click OK to save your term and entry to the glossary.
Slide elements that are defined within the glossary become underlined.
TIP: Double click on the underlined element while working in the Interactive Narrative Editor to edit the glossary entry.
NOTE: A student can click on underlined elements or the Glossary icon while viewing the interactive narrative to see all definitions of the glossary for the entire interactive narrative.
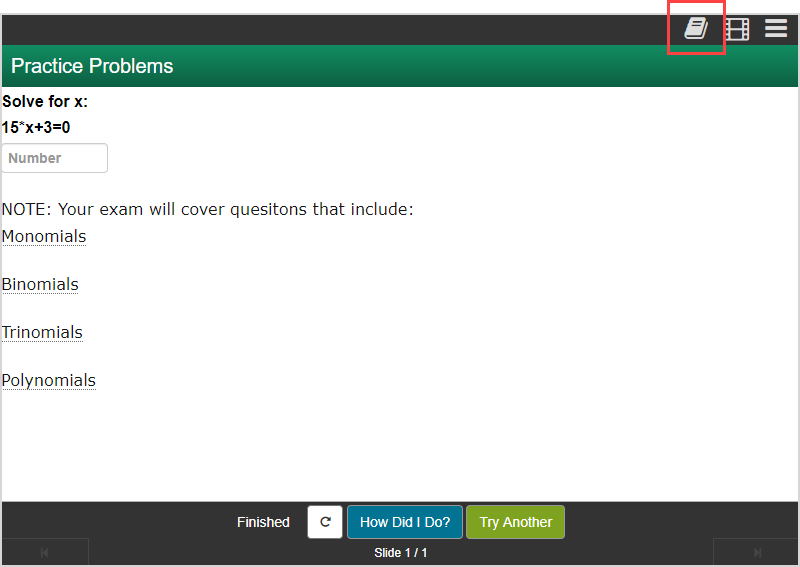
Clicking the Glossary iconagain closes the glossary.
NOTE: The interactive narrative will pause while the glossary is being accessed if the interactive narrative was authored with audio.