Work with the Class Schedule
The Class Schedule allows you to easily view and edit the start dates, end dates, and time availabilities that have been set for your activities.
From the Class Homepage, you can access the Class Schedule which is a graphical representation of your activity availabilities that were initially defined using the Content Repository.
Changes made on your Class Schedule update in real-time within your class.
View activities on the Class Schedule
To view an activity's defined dates and times:
Click Edit Class Schedule on the Class Homepage.

The Class Schedule is displayed:
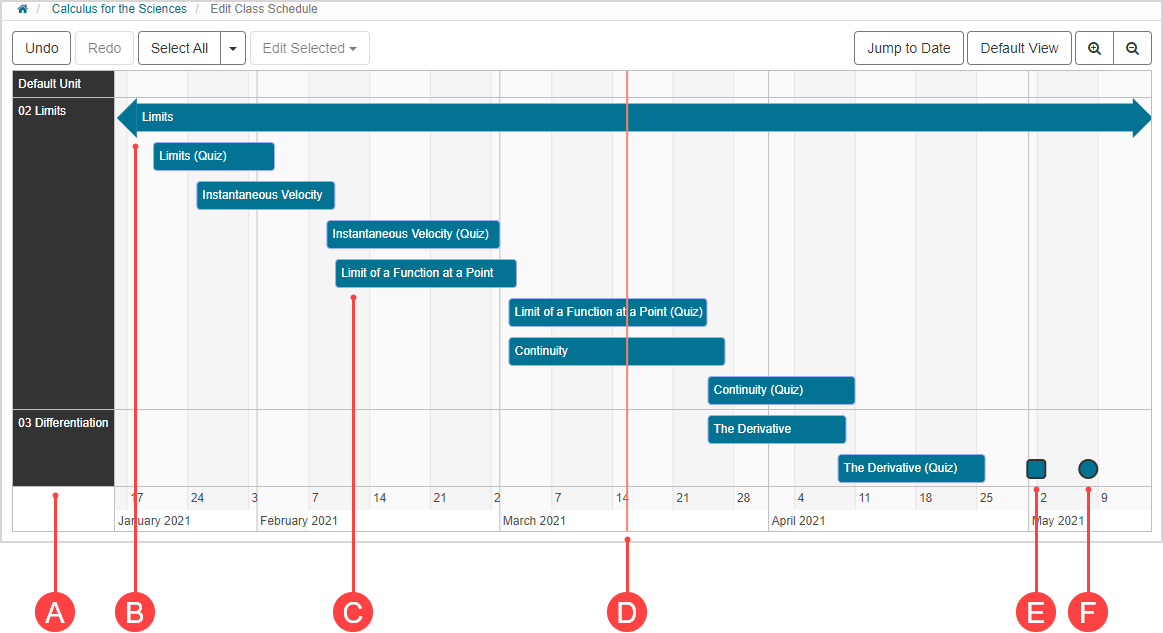
A. Unit column — Panes to group your activities into units.
B.Activity bar with arrows — Activity without a defined date range.
C.Activity bar with rounded ends — Activity with a defined date range.
D. Current date — Vertical line to identify today's date.
E. Force Grade Date — Square to identify an activity's Force Grade Date (visible if defined as an activity property).
F. Feedback Date — Circle to identify an activity's Feedback Date (visible if defined as an activity property).
Hover your cursor over a scheduled item to display its scheduling details:
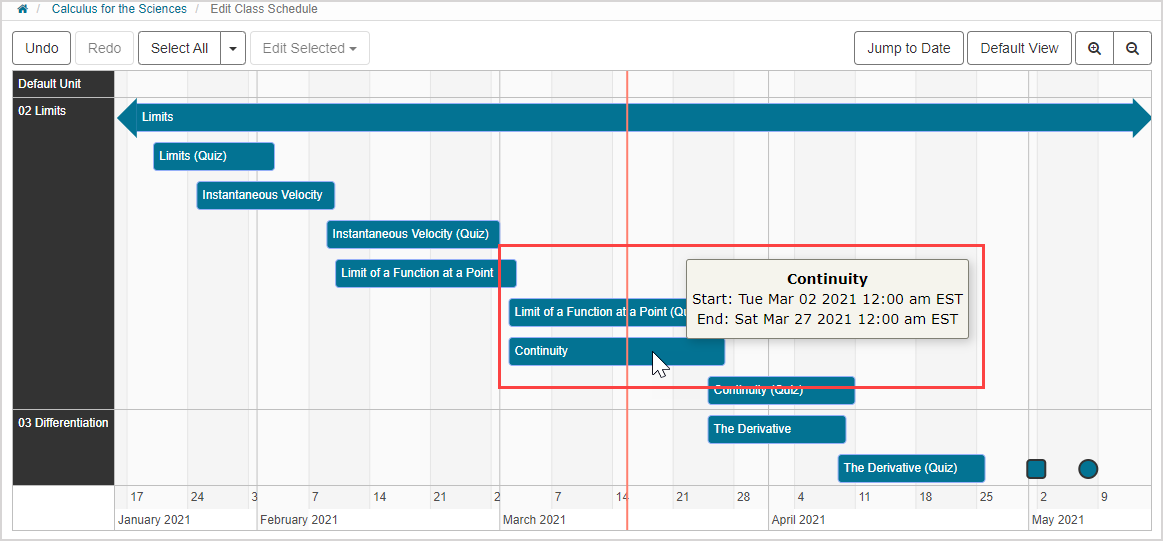
- Item name
- Start date and time
- End date and time
NOTE: The order of your units and activities on the Class Schedule matches how they are arranged in the Content Repository. To modify this order, they must be re-ordered in the Content Repository. Check out Reorder content.
Buttons for changing the view of the Class Schedule
To modify the view of the Class Schedule, you can use the following buttons:
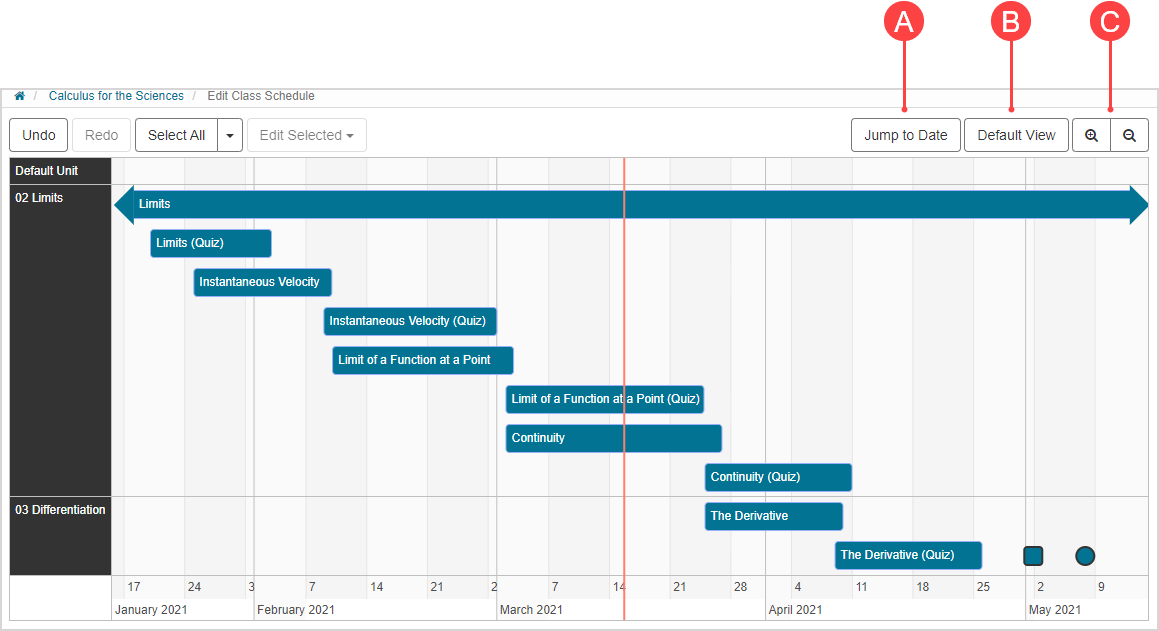
A. Jump to Date — Reveals a drop-down calendar to select a date to focus on.
B. Default View — Restores the view set in your Class Details.
C. Zoom — Zoom in or zoom out to change the date resolution.
NOTE: The vertical line representing the current date won't be visible if you click Default View and your default view date range doesn't include the current date. Check out Work with the Class Schedule default view. Example — If the current date is April 15th and your default view is January 6th through April 6th, clicking Default View will display your default view but the current date vertical line will not be visible.
NOTE: You can also zoom in or zoom out of the Class Schedule by pressing CTRL ( ) and scrolling or use pinch and zoom.
Edit activities on the Class Schedule
Any item on the Class Schedule can be edited.
Buttons for editing the Class Schedule
To edit items on the Class Schedule, you can use the following buttons:
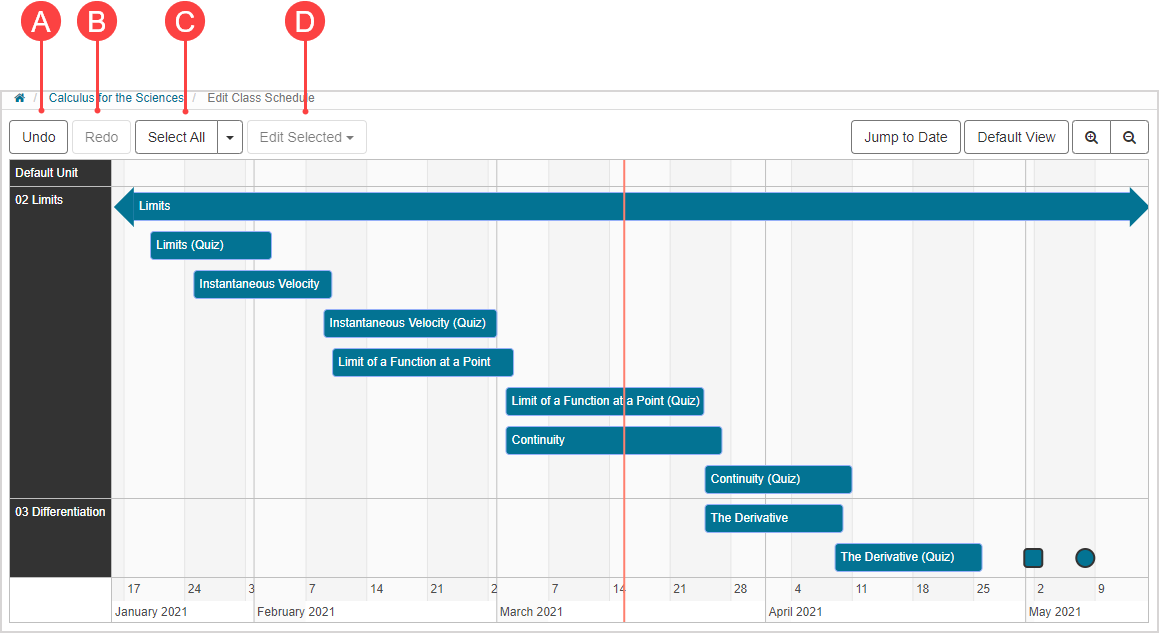
A. Undo — Reverses the most recent change.
B. Redo — Returns the most recent change (only active after Undo has been used).
C. Select All — Drop-down list where you can choose all items of a specific type to be selected.
D. Edit Selected — After selecting items, you can choose to change the dates or times of that selected set of items in bulk.
Select items to edit on the Class Schedule
On the Class Schedule:
- Unselected items are blue:

- Clicking on an item selects it and turns it orange:

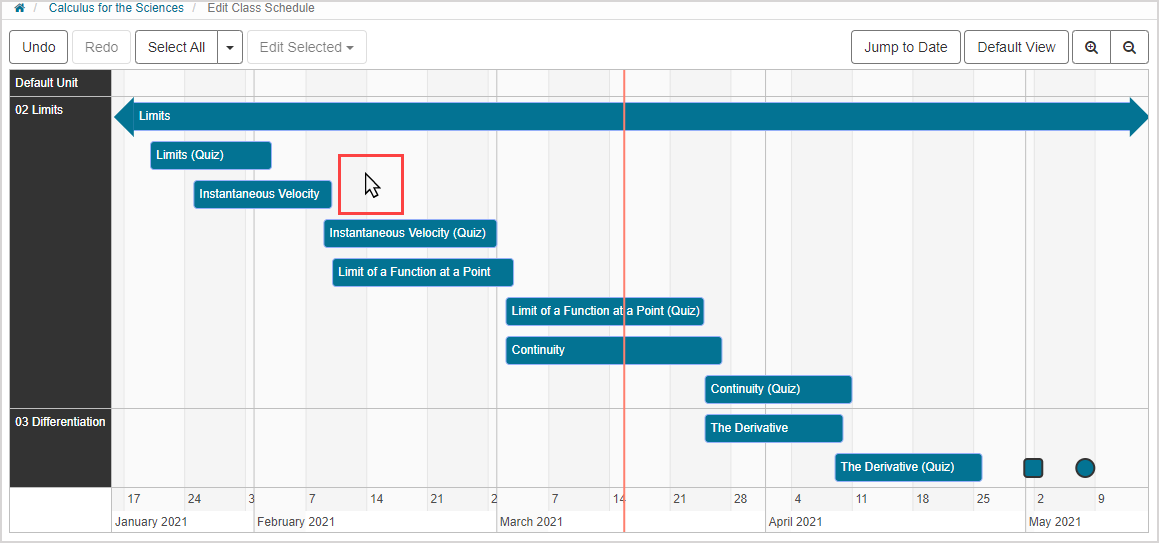
- Clicking on the empty background of the Class Schedule deselects an item:
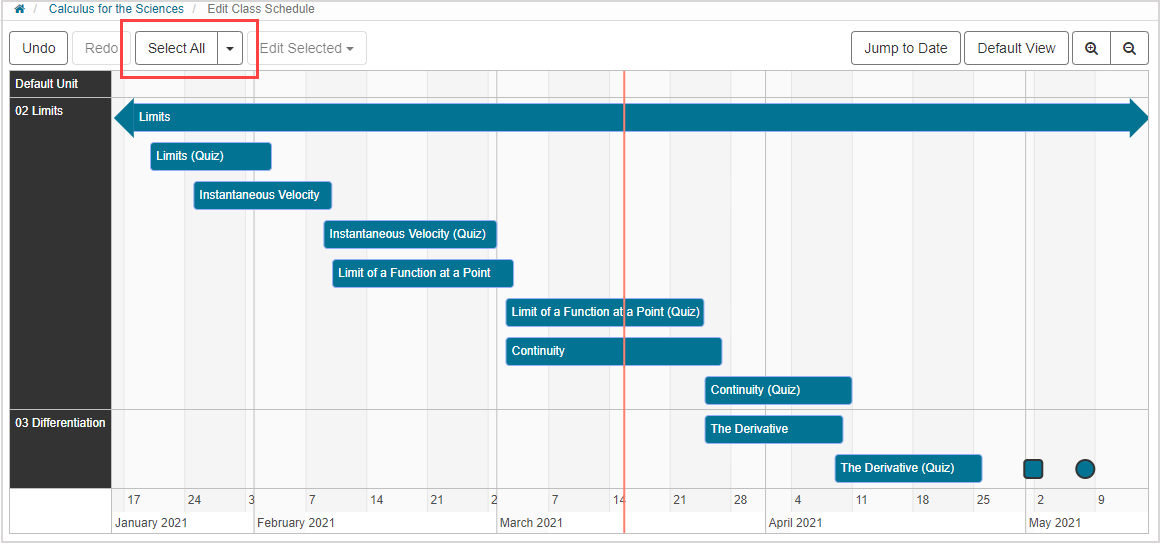
The Select All button can be used in several ways by selecting multiple items to move by clicking and dragging:
- Click the body of the Select All button to select all items on the Class Schedule to be moved in bulk (Example — roll-over of all class activities to a new semester).
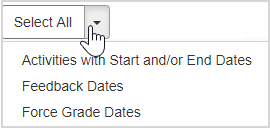
- Click the Select All drop-down list to select all items of a specific type to be moved in bulk:
- Activities with Start and/or End Dates — Only activities with assigned dates (horizontal rounded bars) are selected.
- Feedback Dates — All Feedback Date items are selected.
- Force Grade Dates — All Force Grade Date items are selected.
NOTE: Multiple activities can also be selected simultaneously by pressing CTRL ( ) and clicking on multiple activities.
NOTE: Clicking on a unit name will select all activities contained in that unit.
Edit the date range length of an activity
Hover your cursor over the left or right end of a selected item to reveal the bidirectional cursor
 .
.
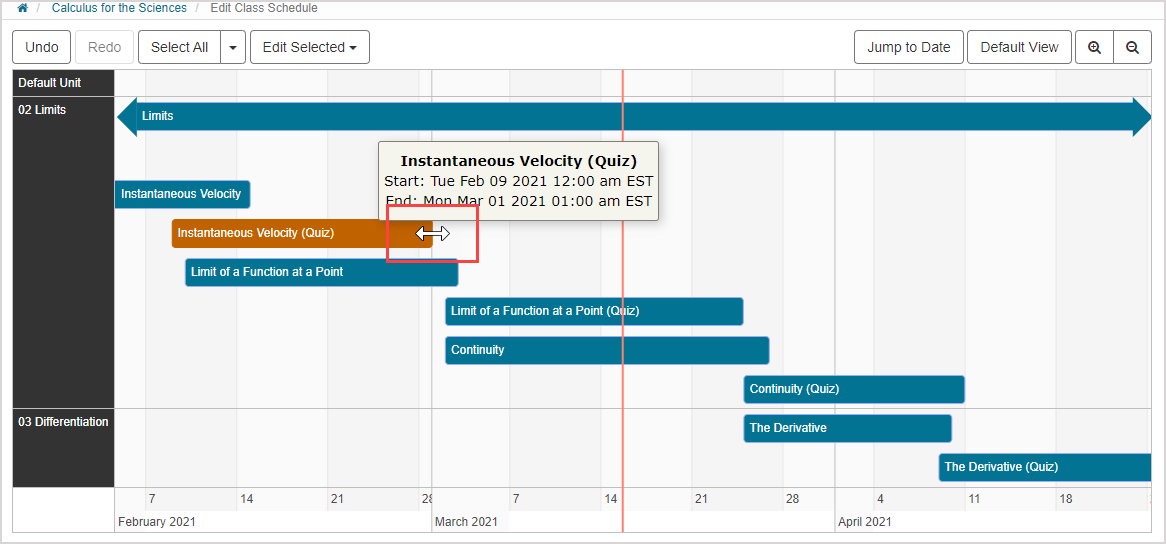
Click-and-drag the left or right end of the activity bar to resize (stretch or compress) the activity's date range.
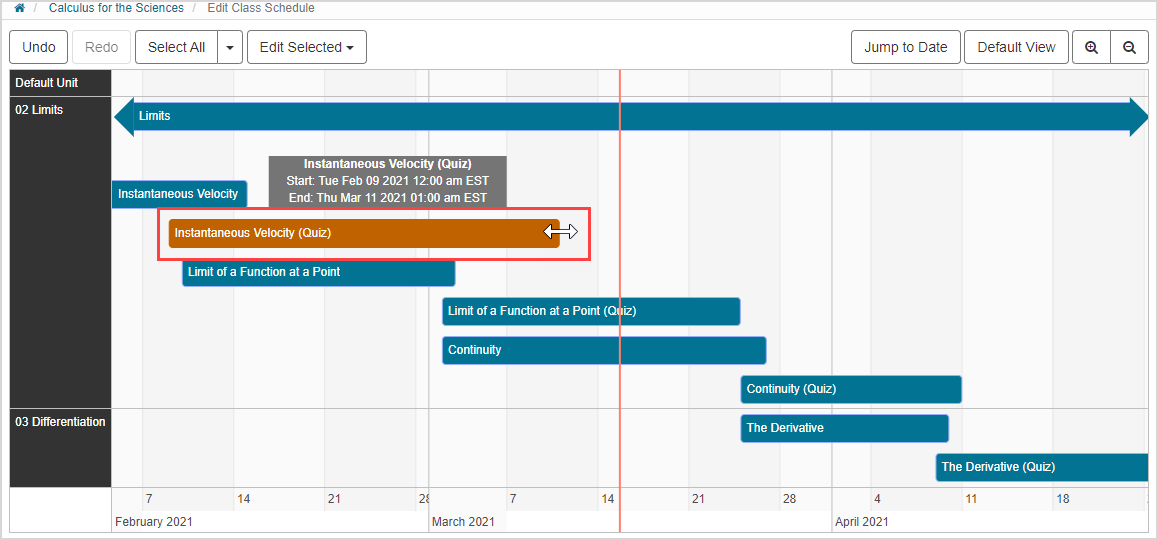
TIP: You can resize an activity without a date range (activity bar with arrows) to create a date range (activity bar with rounded ends).
NOTE: Feedback Dates and Force Grade Dates can only be relocated; they can’t be resized.
Edit the date range span of an activity
Hover your cursor over the body of a selected item to reveal the multidirectional cursor
 .
.
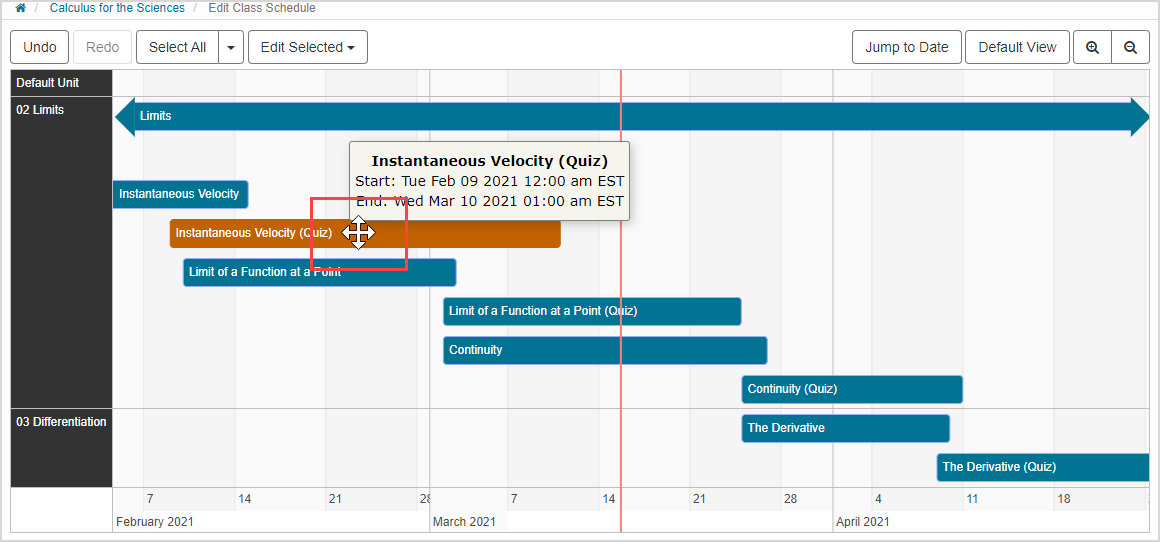
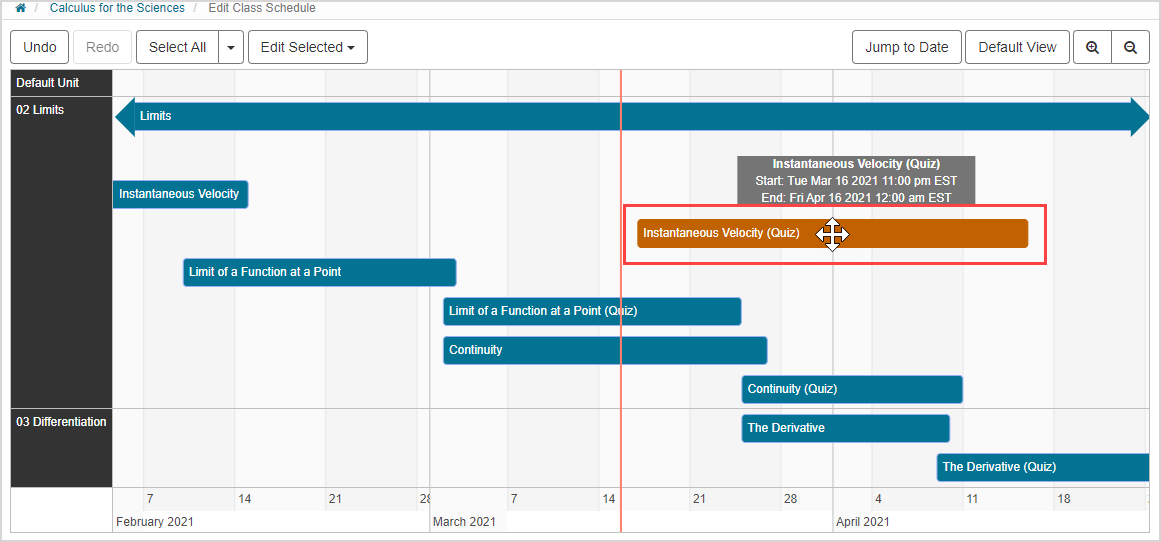
Click-and-drag the body of the activity bar to relocate the activity's date range while maintaining its date range length.
Edit Selected button
The Edit Selected button can be used to precisely edit activity dates and times in bulk (Example — roll-over of all class activities to a new semester).
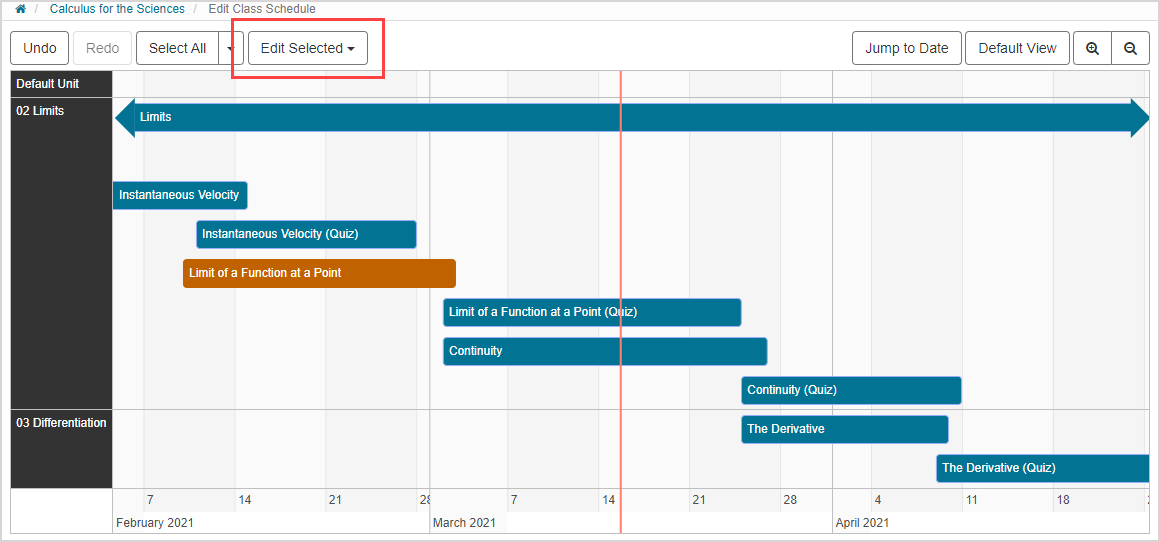
NOTE: Select at least one item on the Class Schedule to use the Edit Selected button.
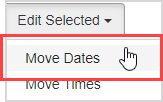
After selecting a set of items on the Class Schedule, you can use the Edit Selected drop-down list and select Move Dates:
The Move Selected Dates window appears where you can define how you want your selected item(s) to be moved:
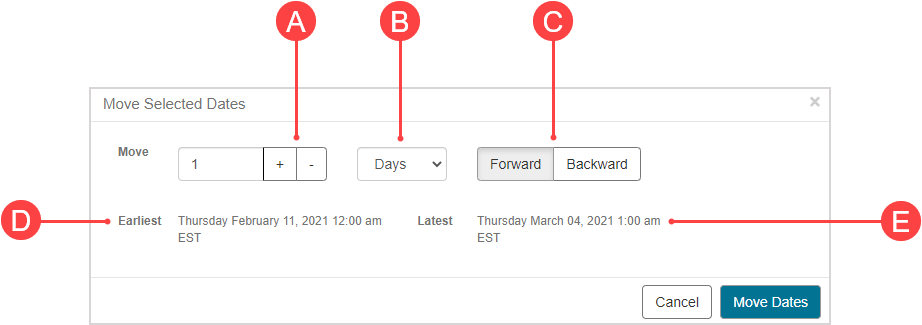
A. The number of time units to move based on the time unit you select for B.
B. The unit of time (days is the default) you would like to use to move your activity (days, minutes, hours, weeks, months, years).
C. Choose to move the activity forward or backward in time.
D. Clicking the Move Dates button applies your changes.
E. Updated start date of the activity based on your selections for A, B, and C.
F. Updated end date of the activity based on your selections for A, B, and C.
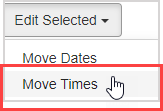
After selecting a set of items on the Class Schedule, you can also use the Edit Selected drop-down list and select Move Times:
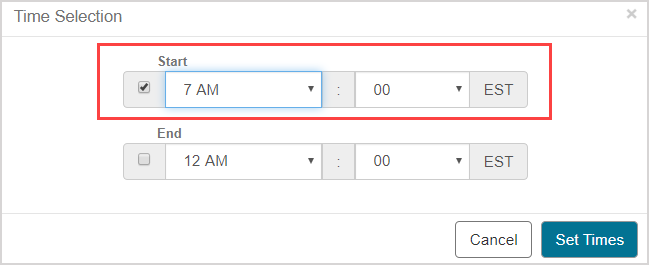
The Time Selection window appears where you can define how you want your selected item(s) to be moved:

A. Start time
B. End time
C. Clicking the Set Times button applies your changes.
NOTE: If you select a new time, the time check box autofills to show that your new time will be applied.
