Work with the calendars
Jump to section
Schedule an event on the calendar
Preview a scheduled calendar event
There are two types of calendars in Möbius:
- System Calendar — Visible on the System Homepage and displays all scheduled items associated with your profile.

- Class Calendar — Visible on the Class Homepage and displays all scheduled items specific to the class being viewed.

Both calendars are available for you to view and schedule events (Example — private event, class event, or school event).
Events can be created as public or private to control who can view your scheduled event.
The controls for both the System and Class Calendars are the same.
Calendar color codes
The calendars uses different color codes for different types of scheduled items:
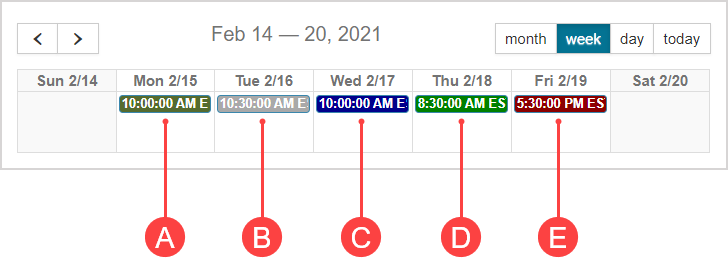
A. Moss green — School event
B. Grey — Private event
C. Blue — Class event
D. Green — Activity start date
E. Red — Activity end date
Select a calendar resolution
To change the resolution of the calendar view:
Click month, week, day, or today in the Calendar pane.

NOTE: The today button only becomes active if today's date isn't already in view.
The calendar view is changed based on which date resolution was clicked.
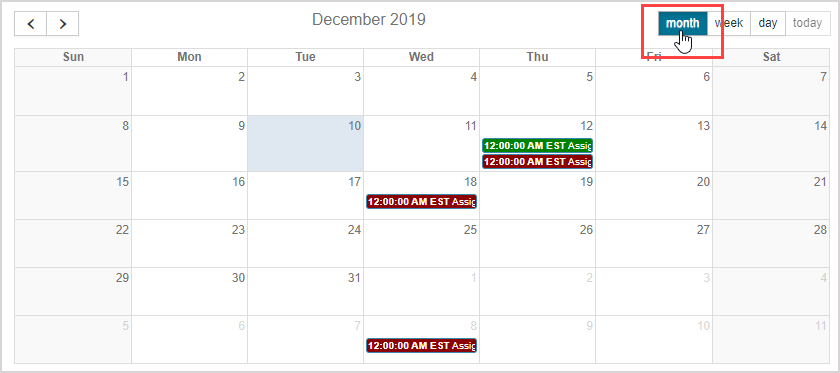
NOTE: Today's date is highlighted with a gray fill.

Move through the calendar
You can move back and forth through the months, weeks, or days of the calendar by clicking the left or right arrows above the calendar.

Schedule an event on the calendar
To schedule an event on the calendar:
Click on the date in the calendar where you want to schedule the event.

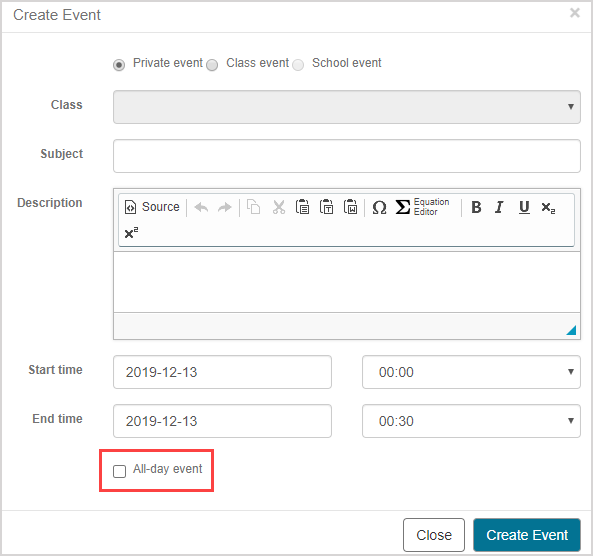
Select the radio button in the Create Event window to define the privacy settings for who can view the scheduled event:
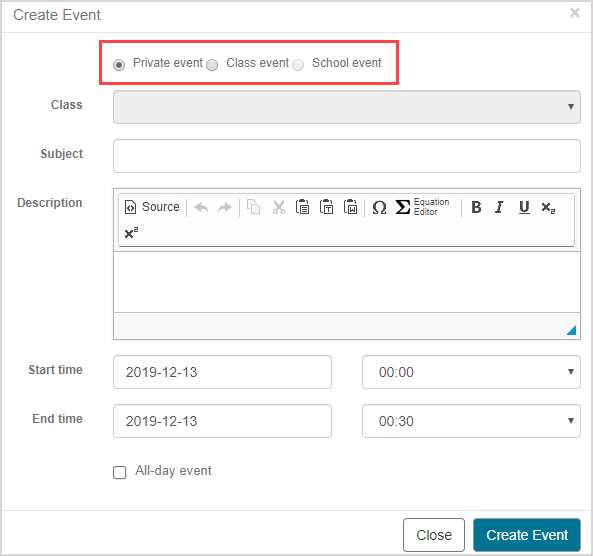
- Private event — The scheduled event is only viewable by you.
- Class event — The scheduled event is viewable by all users in a specific class.
- School event — The scheduled event is viewable by all users in your organization.
NOTE: Only an organization's Möbius administrator can create a school event.
NOTE: Students are only able to create a private event.
Set the following event details in the Create Event window:
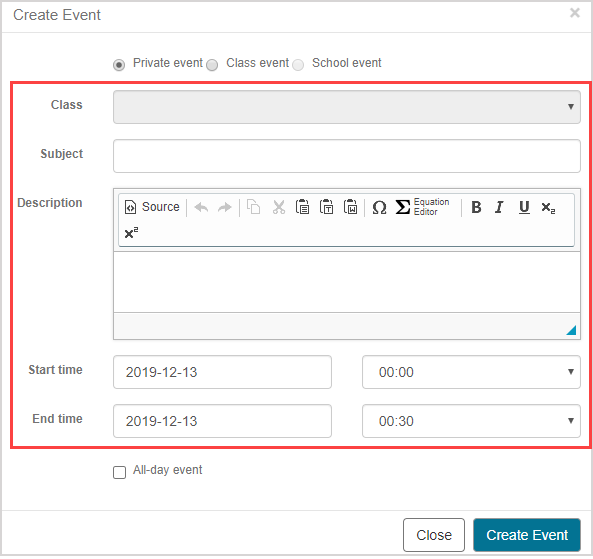
- Class
- Subject
- Description
- Start date and time
- End date and time
NOTE: The Subject field in the Create Event window is mandatory and your event won't be saved unless you've assigned a subject name for your new event.
NOTE: The Class drop-down list is only available if you're creating a Class event.
(Optional) Select the All-day event check box if your scheduled event will run for the full day.
Click Create Event.
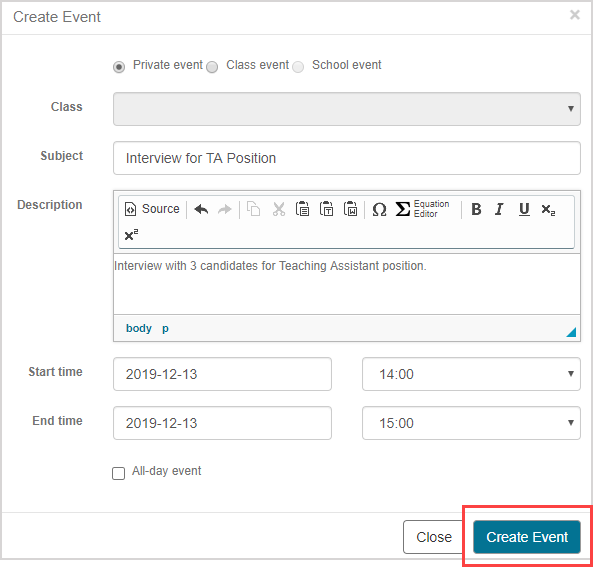
The event is now scheduled in your calendar.

Preview a scheduled calendar event
Hover your cursor over a scheduled event to preview its details:

Edit a scheduled calendar event
To edit an event on the calendar:
Right-click on the event to be edited.

Click Edit from the pop-up menu.

Make your edits in the Update Event window.
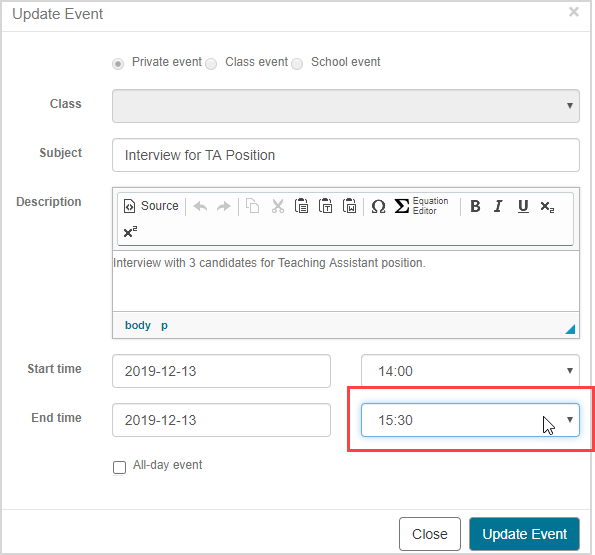
Click Update Event.
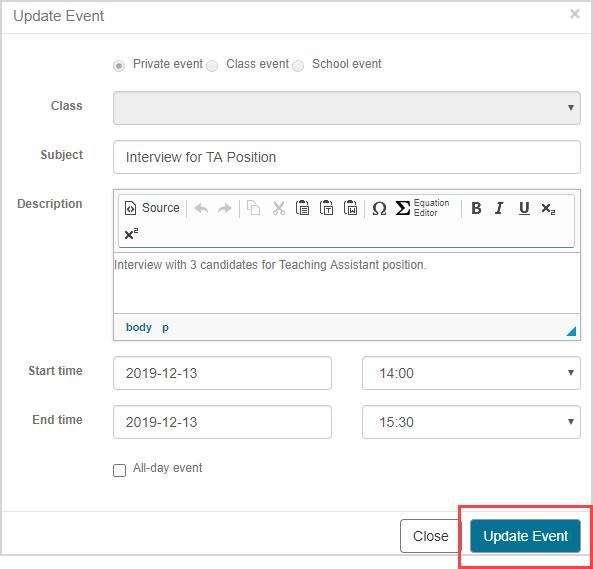
The scheduled event is updated on your calendar.

NOTE: Activity dates can only be edited using the Class Schedule or Content Repository.
TIP: You can also click-and-drag events that you've scheduled on the calendar to move them to a different day.

Delete a scheduled calendar event
To delete an event from the calendar:
Right-click on the event to be deleted.

Click Delete from the pop-up menu.

The scheduled event is removed from your calendar.

NOTE: Activity dates can only be deleted using the Content Repository.