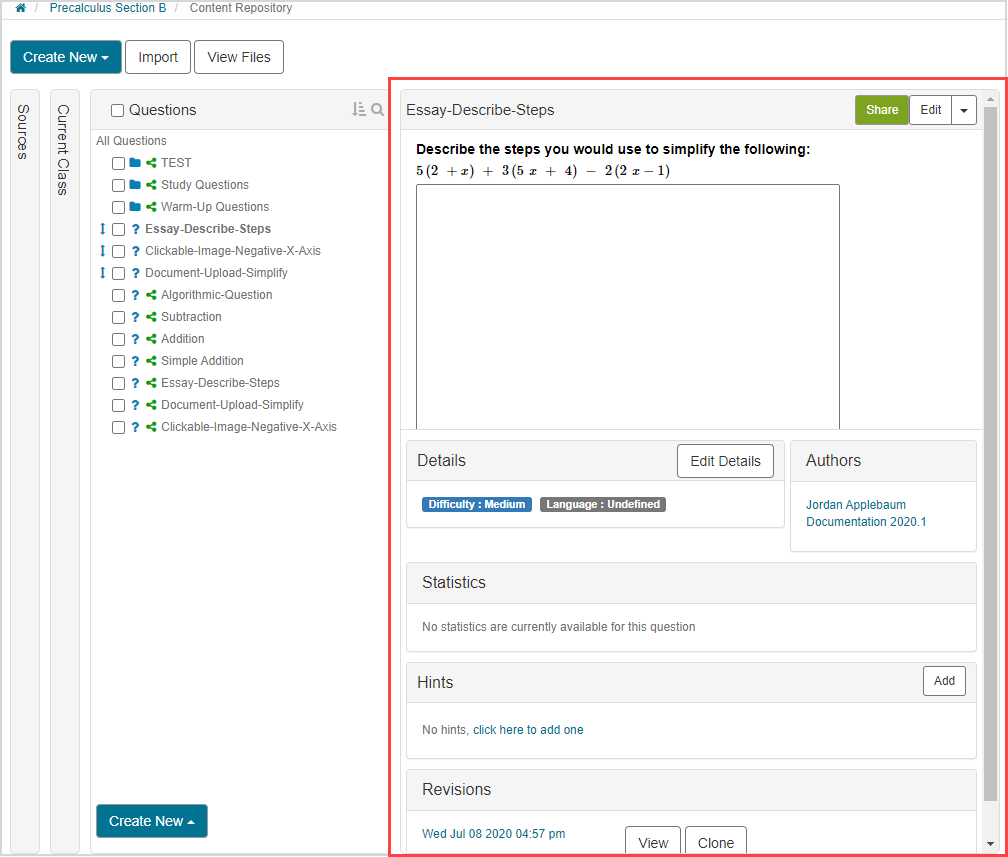
Clone content
Cloning is performed on content that has been shared with your class or inherited by your child class.
Shared or inherited content is tagged with the shared icon![]() in the Content Repository which indicates that the piece of content is eligible to be cloned.
in the Content Repository which indicates that the piece of content is eligible to be cloned.
Cloning produces a local copy of the selected content that you can edit to suit your class's specific needs.
NOTE: When referring to cloning, all shared or inherited content and supplementary content can be cloned.
Content — Any component relating to the subject matter of a class (Example — Questions, Text, Lessons, Assignments, Interactive Narratives, Units, etc.).
Supplementary content — Components that support the creation, structure, and implementation of content. Example — Themes, Policy Sets, Slide Templates, Course Modules.
Content can be cloned from any source within your Content Repository. Example — You can clone shared content from the Möbius Cloud pane to create a local copy of the selected content within your class.
All content that has been shared with your class or inherited by your child class is still connected to the original source of the content, so any changes made to this original content by the original author will automatically propagate to the shared or inherited content in your class.
However, cloning content into your class breaks the link between the original content and your clone of the content so that you can customize it as needed without worrying about changes automatically propagating into your content version without your knowledge—giving you more control over your content.
TIP: Editing an inherited Policy Set automatically creates a clone when Edit is clicked in the original inherited Policy Set’s pane.
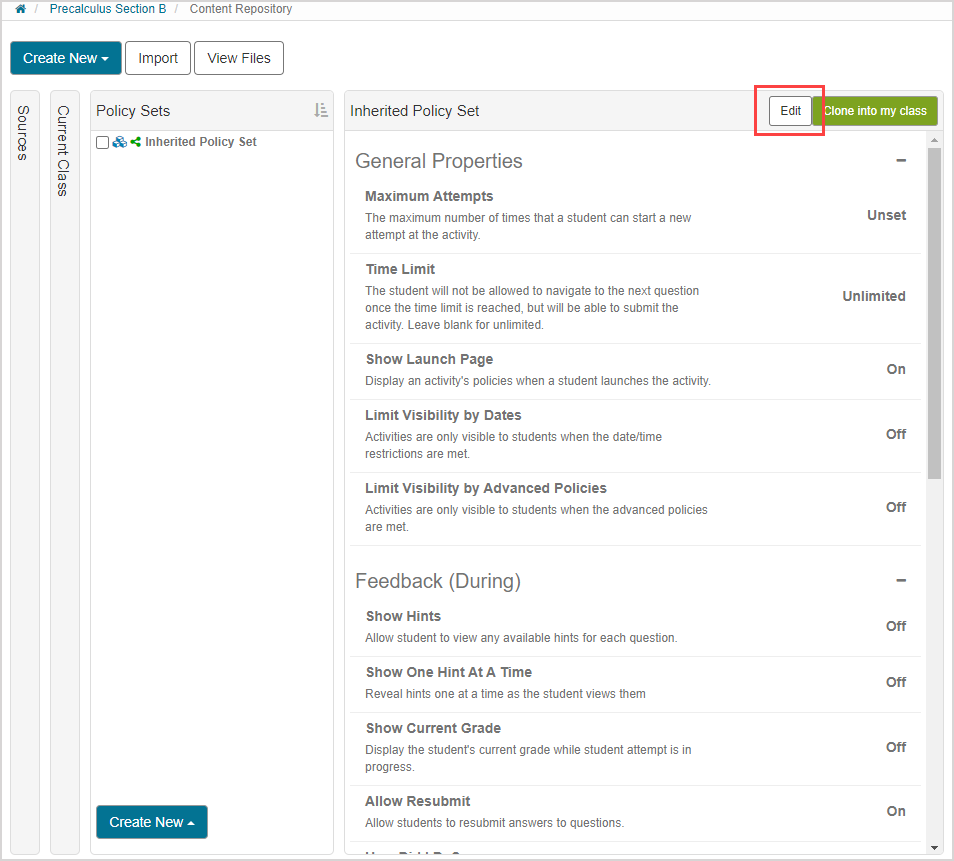
This automatically-generated clone replaces the original inherited Policy Set in all activities where it's applied in your child class (and all affected child classes if your child class has its own child classes). Clicking Confirm in the notification window permits the replacement of the original inherited Policy Set with the clone and then navigates you to the Policy Set Editor where you can edit the clone.
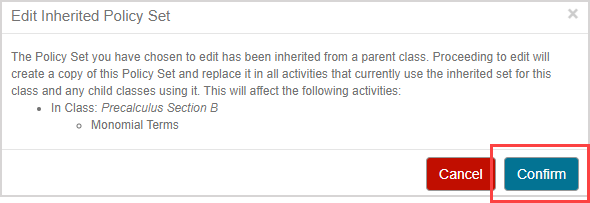
The clone is named by default with the following structure: Original Inherited Policy Set Name - Copy (Example — Policy Set 1 - Copy). The original inherited Policy Set still remains available in your Content Repository.
Content can be cloned in two ways:
- Individually — Uses the Clone into my class function to clone a specific piece of content.
- In bulk — Uses the Clone function on the bulk function bar to simultaneously clone multiple pieces of content.
TIP: Content can be shared with you from other classes or users (Example — an instructor from another class at your school (Springfield University) has shared a question to the entire organization of Springfield University by selecting This instance in the Share window). The shared content will be tagged with the shared icon![]() in the Content Repository when viewing the content in its original source pane.
in the Content Repository when viewing the content in its original source pane.
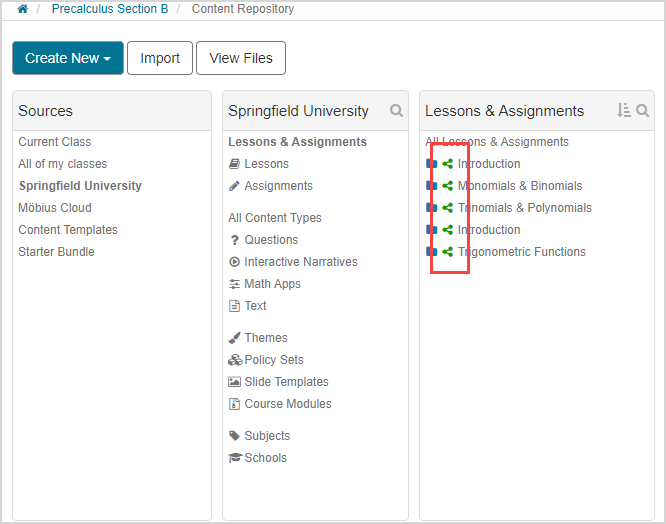
You can then choose to clone this content (individually or in bulk) to use it within your class to edit and prevent changes (made by the original author) from automatically propagating into your version of the content without your knowledge.
TIP: If you're instructing a child class, your child class's content from the Current Class source has been inherited from the parent class. This inheritance is indicated by the shared icon![]() when you view your content in the Content Repository.
when you view your content in the Content Repository.
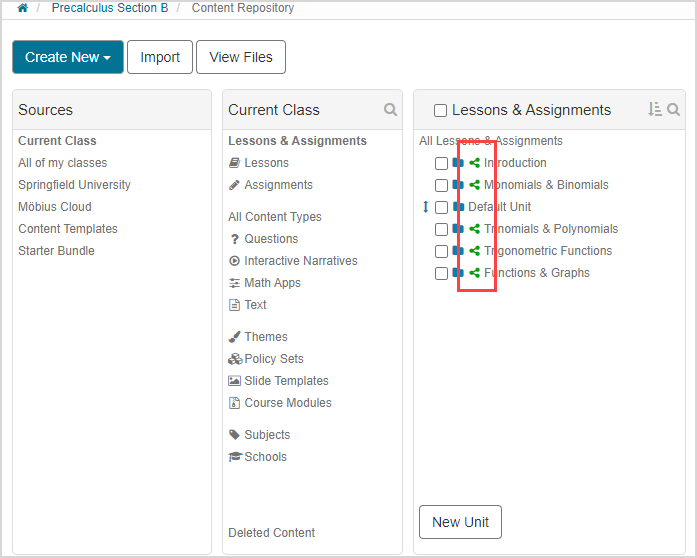
You can then choose to clone this content (individually or in bulk) within your child class to edit and separate it from the parent class. This prevents changes (made by the original author of the parent content) from automatically propagating into your version of the content without your knowledge.
In general, cloning content causes the cloned copy to be stored in its respective pane within the Content Repository with the same name as the original content (which you can then edit as needed). Example — Cloning a theme from the Themes pane causes the cloned version to also be stored in the Themes pane.
NOTE: Clones of activities that have been shared with your class are automatically placed in the Default Unit of your Content Repository. You can then choose to relocate the clones to a different unit as needed.
NOTE: Clones of inherited activities are automatically placed in the Default Unit of your Content Repository and the original inherited parent activity remains in its original unit. You can then choose to relocate the clone to a different unit as needed. Check out Control activity visibility to control whether the original parent activity is visible to your students on the Class Homepage.
TIP: Another way to break the link between shared or inherited content is by using Course Modules. Check out Create a Course Module.
Clone individual pieces of content
To clone an individual piece of content into your class:
Click Content Repository on the Class Homepage.

Navigate to specific pane of the piece of content that you want to clone and click Clone into my class.
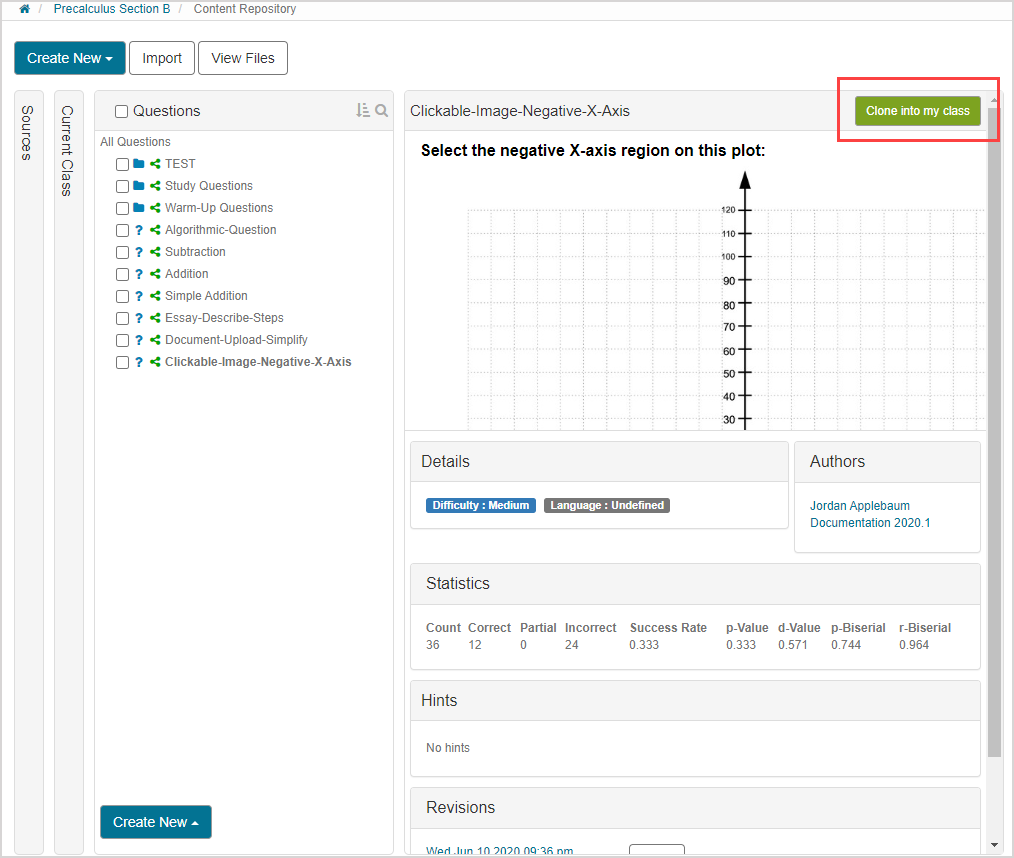
NOTE: Content (both shared and inherited) that can be cloned is indicated by the shared icon![]() .
.
A success message appears that the content has been cloned. Click the content clone name to view the copied content.

TIP: You can also click Done to return to the original content.

Your cloned content is placed in the appropriate Content Repository pane. Example — Cloning a question will place the clone in the Questions pane.
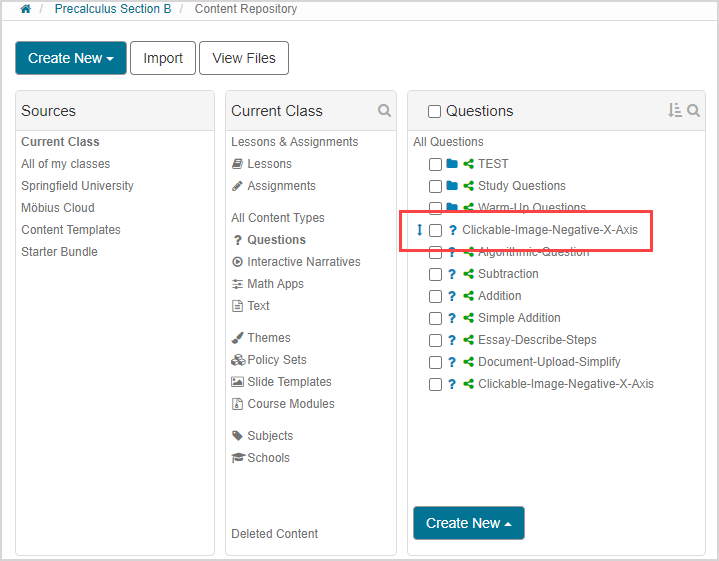
NOTE: Cloned activities are automatically placed in the Default Unit. You can relocate activities as needed. Check out Relocate content.
TIP: You may have to refresh the page for your cloned content to appear in your Content Repository.
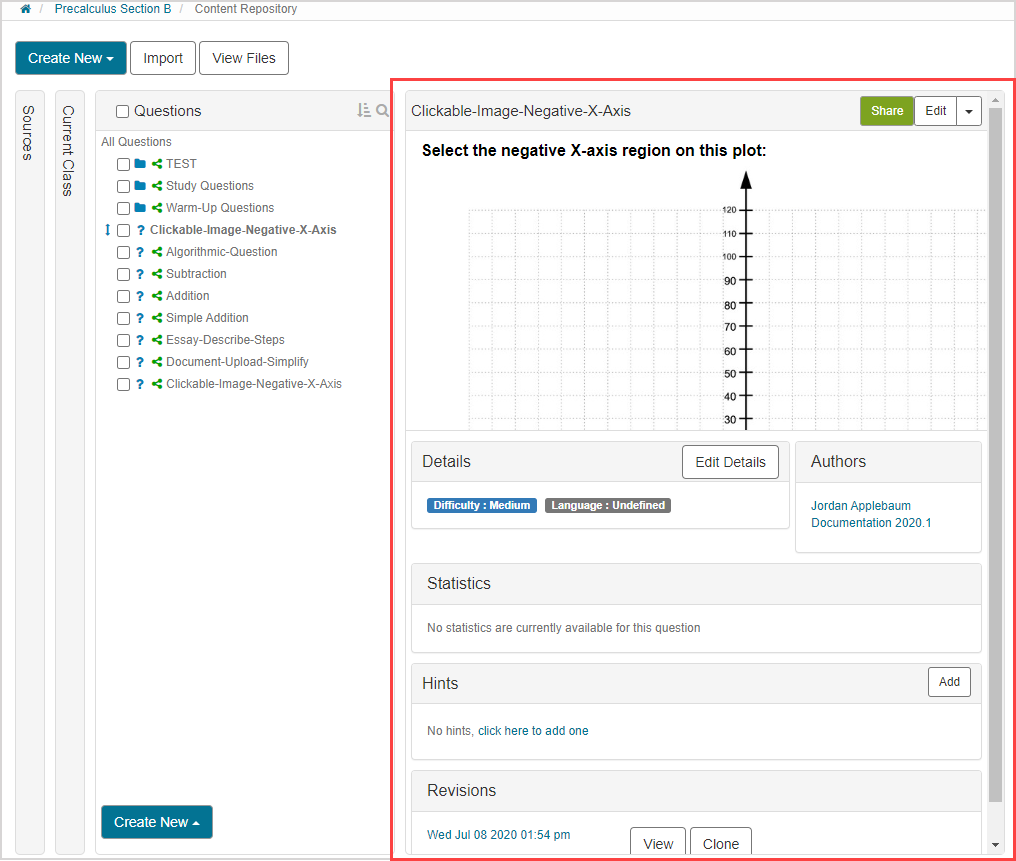
You can now view, edit, and use the cloned content as you would any other piece of content in your Content Repository.
Clone content in bulk
To clone multiple pieces of content in bulk into your class:
Click Content Repository on the Class Homepage.

Navigate to the pane that contains the pieces of content that you want to clone and select the content's check boxes.
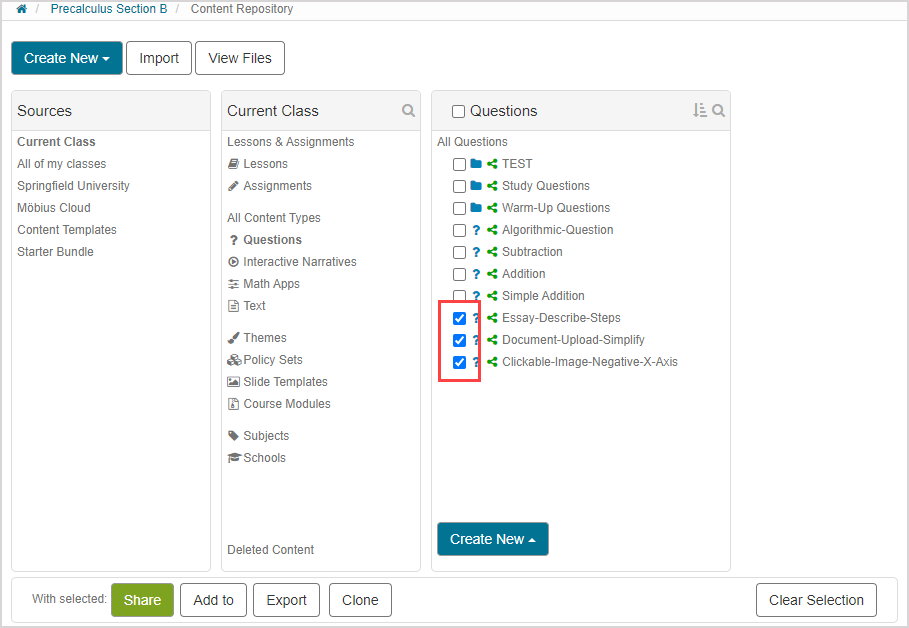
NOTE: Content (both shared and inherited) that can be cloned is indicated by the shared icon![]() .
.
NOTE: Select at least one content check box.
TIP: You can select entire panes to be cloned by selecting the heading check box and resuming at step 3.
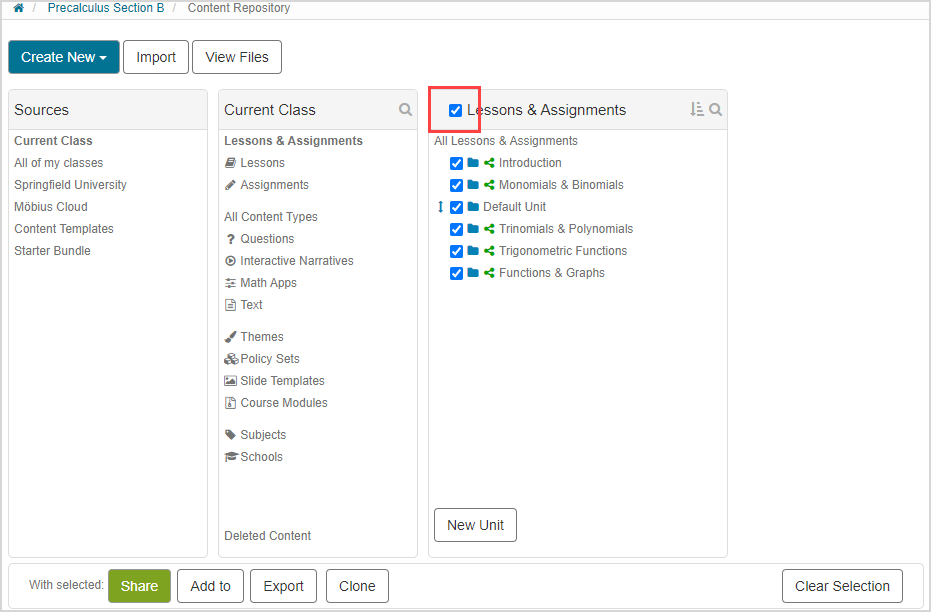
However, this pane heading selection can't be performed on the Themes pane and Policy Sets pane.
Click Clone in the bulk function bar.
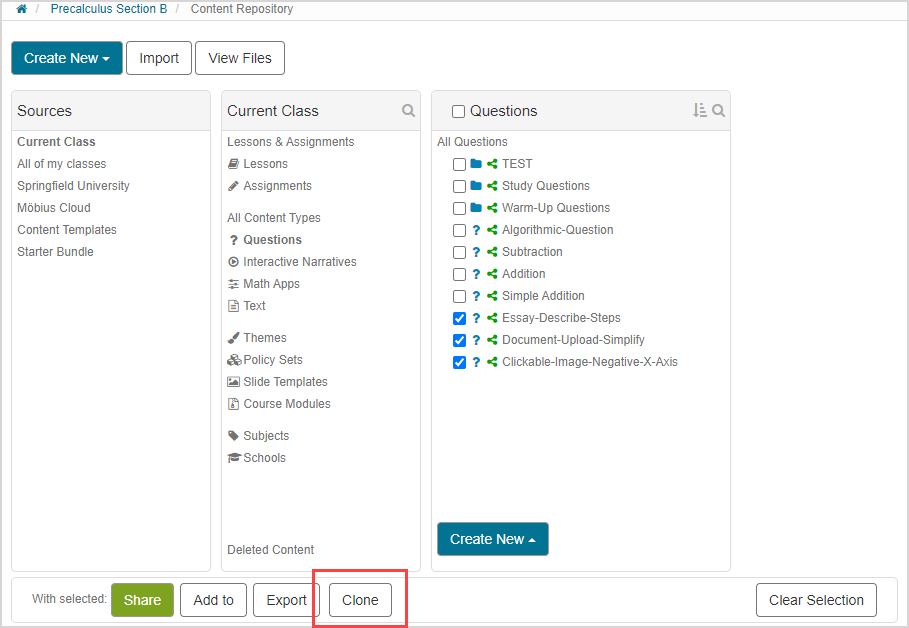
A success message appears that the content has been cloned. Click on one of the content clone names to view the copied content.

TIP: You can also click Done to return to the original content.

Your cloned content is placed in the appropriate Content Repository pane. Example — Cloning questions will place the clones in the Questions pane.
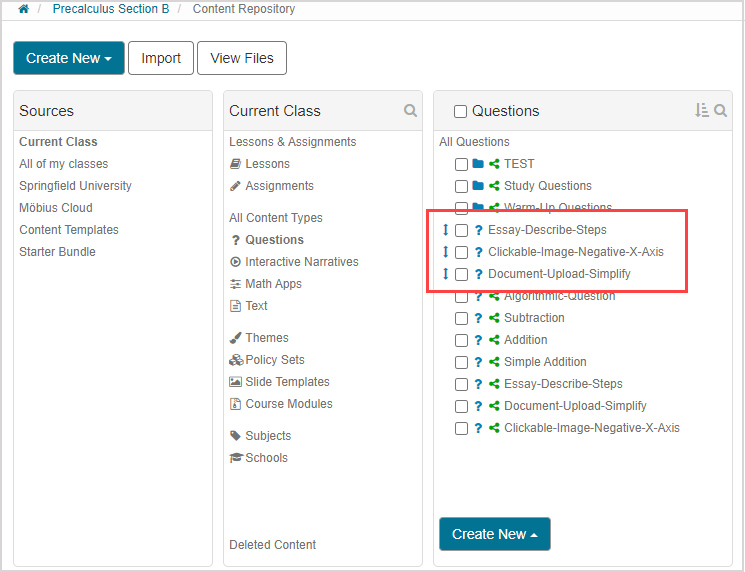
NOTE: Cloned activities are automatically placed in the Default Unit. You can relocate activities as needed. Check out Relocate content.
TIP: You may have to refresh the page for your cloned activity to appear in the Default Unit.
You can now view, edit, and use the cloned content as you would any other piece of content in your Content Repository.
