Connect Möbius to Brightspace
Jump to section
Register the Möbius tool in Brightspace
Add the Brightspace configuration to Möbius
Brightspace by D2L is a Learning Management System can be connected to Möbius using LTI 1.3 integration.
Möbius and Brightspace administrators can follow these instructions to connect their system to Möbius.
View my Möbius LTI data
Your Learning Management System will require you to provide data that's specific to your Möbius site.
Check out View my Möbius LTI data for details on how to obtain this data.
Register the Möbius tool in Brightspace
The Möbius LTI Advantage tool must be registered in Brightspace before it can be used in a course.
To register the LTI Advantage tool in Brightspace:
Log in to Brightspace as an administrator and click the Settings icon in the top-right corner.

Under the Organization Related heading, click Manage Extensibility.
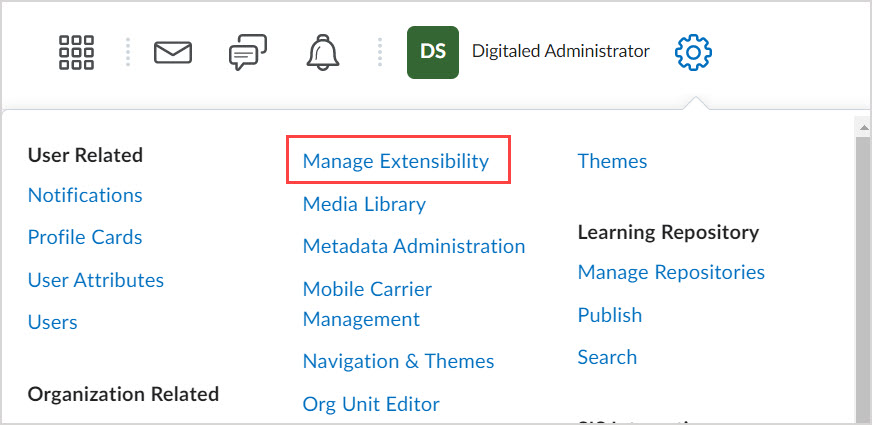
Select the LTI Advantage tab, then click Register Tool.
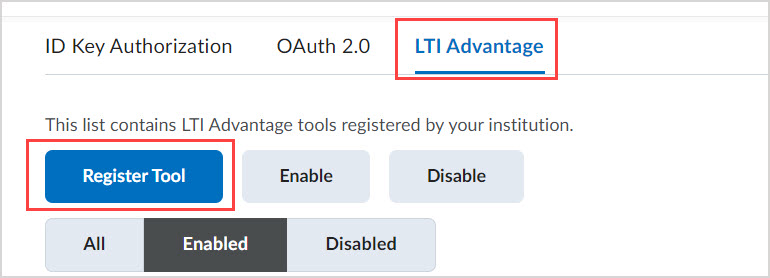
On the Register a Tool page, select the Standard radio button.
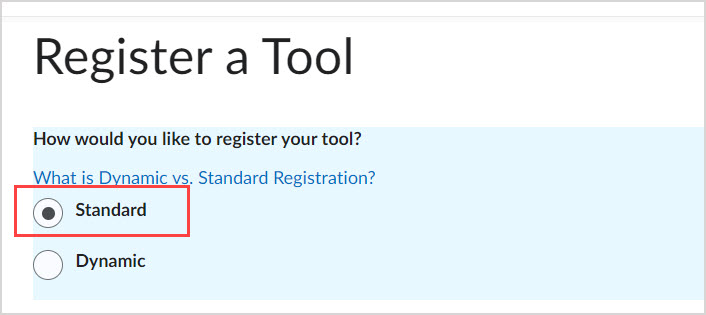
Complete these fields on the Register a Tool page:
- Name: Enter a unique name for the new key (Example — Möbius MyInstitution).
- Description: Enter a description (Example — Möbius LTI Advantage tool for MyInstitution).
- Domain: Enter the domain of your Möbius site (Example — https://myinstitution.mobius.cloud).
- Redirect URLs: Enter the Redirect URI value attained from View my Möbius LTI data.
Complete these additional fields on the Register a Tool page:
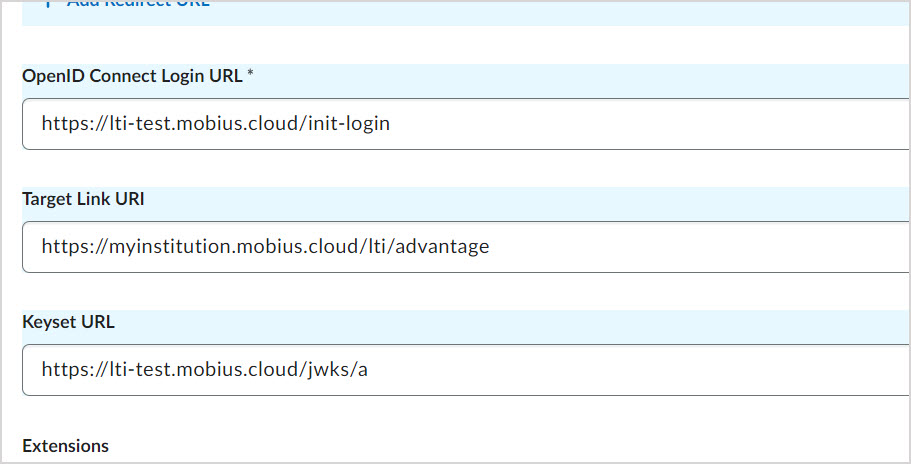
- OpenID Connect Login URL: Enter the Initiate Login URL value attained from View my Möbius LTI data.
- Target Link URI: Enter the Content Selection URL value attained from View my Möbius LTI data.
- Keyset URL: Enter the Public JWK Set URL value attained from View my Möbius LTI data.
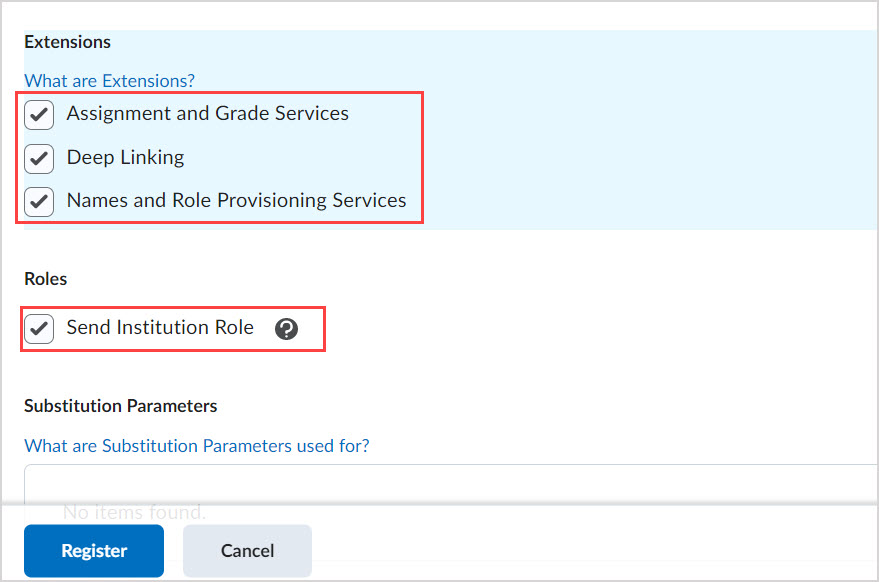
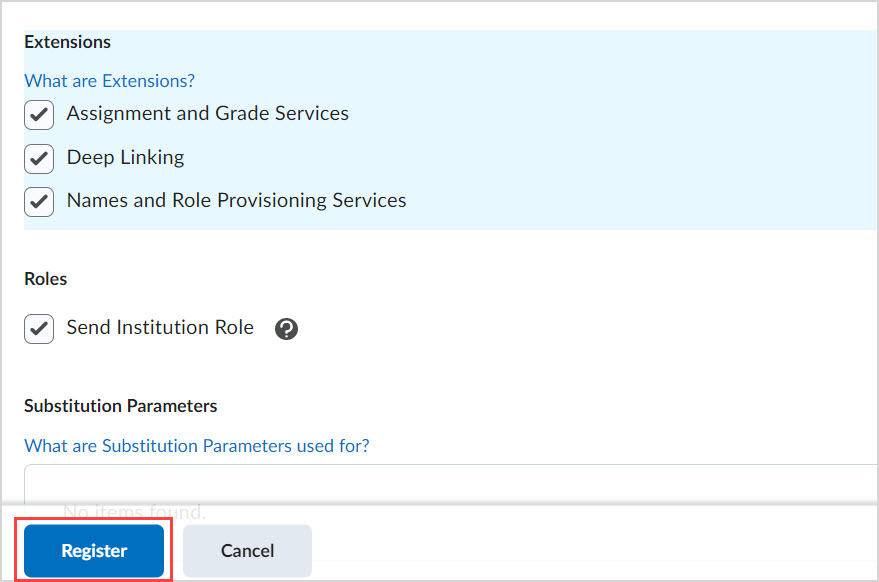
Click Register.
In the table, click the name of your new tool to view and modify tool settings.

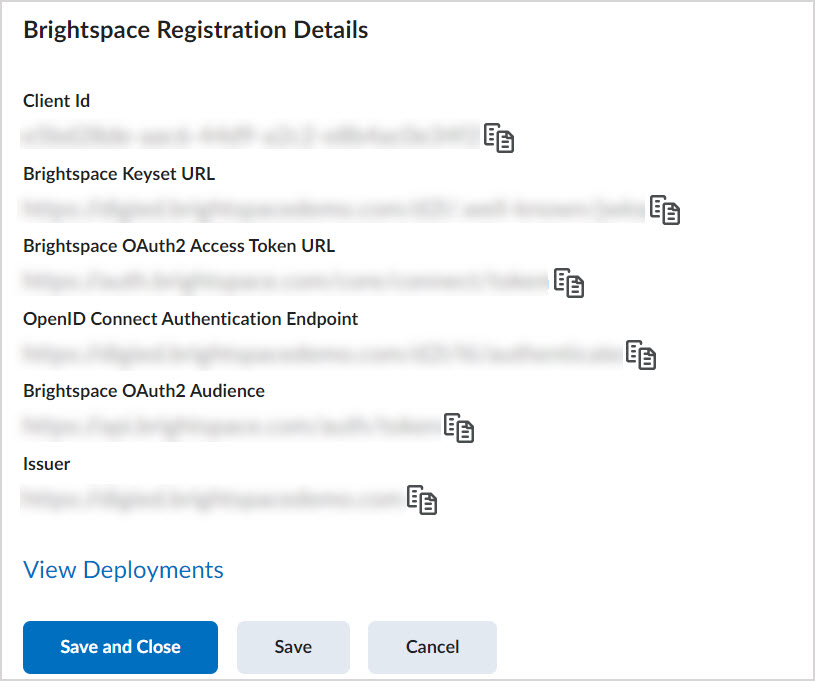
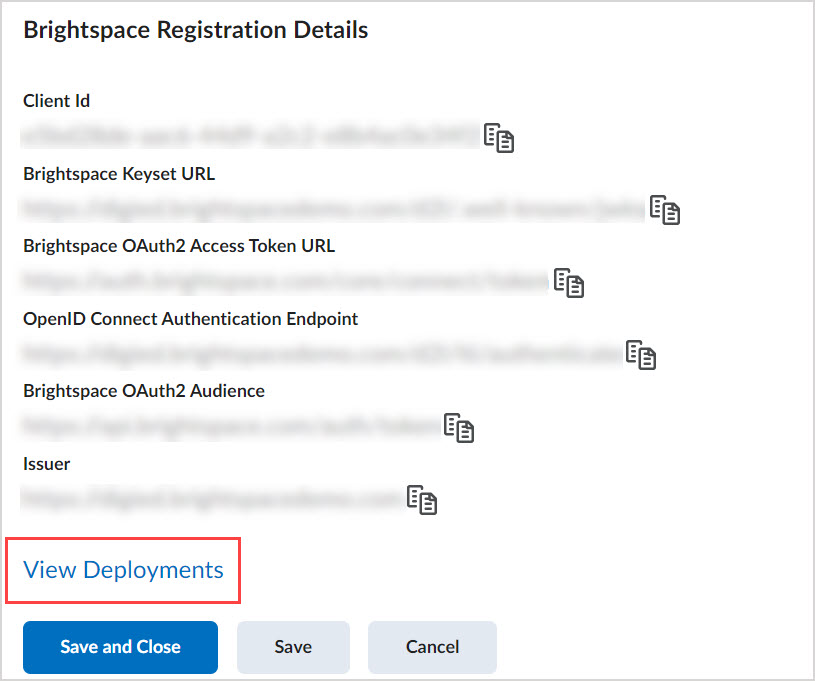
The registration details of your new LTI tool will be displayed under Brightspace Registration Details. Copy this information, including the Client ID, for the next steps of the setup process.
Click the View Deployments link. A new tab will open with the table of deployments.
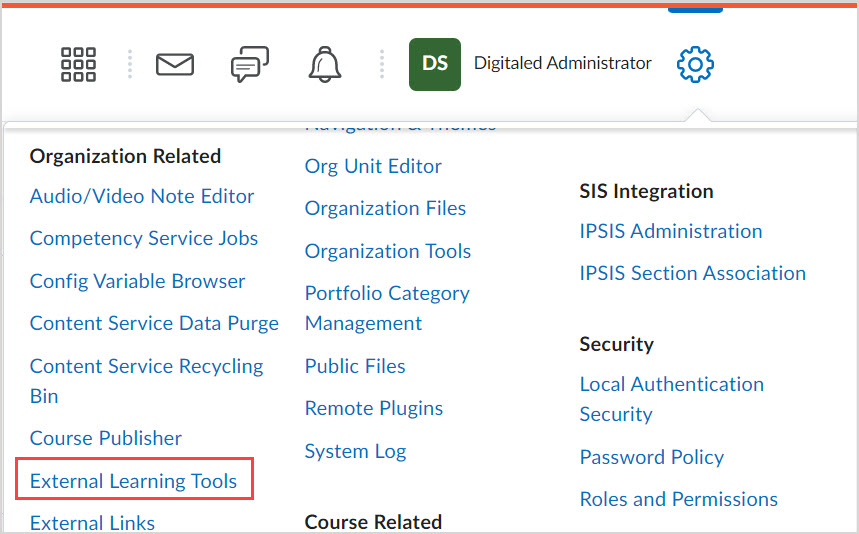
TIP: The LTI Advantage deployments can also be viewed from the Administrator Settings, by clicking External Learning Tools under the Organization Related heading.
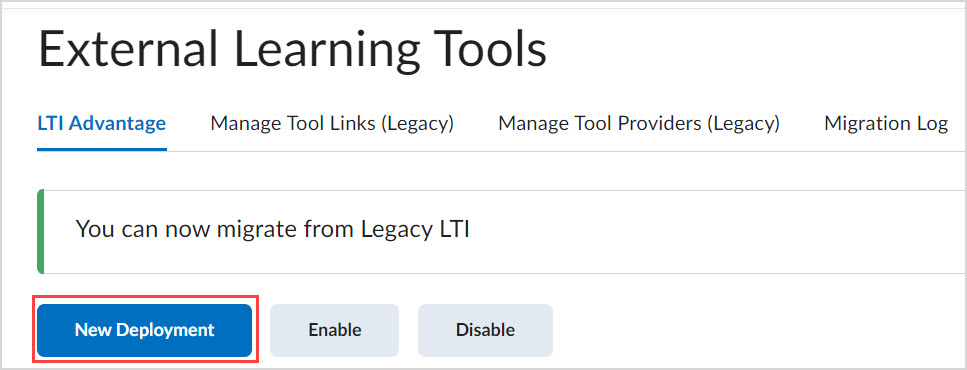
Select the LTI Advantage tab, then click New Deployment.
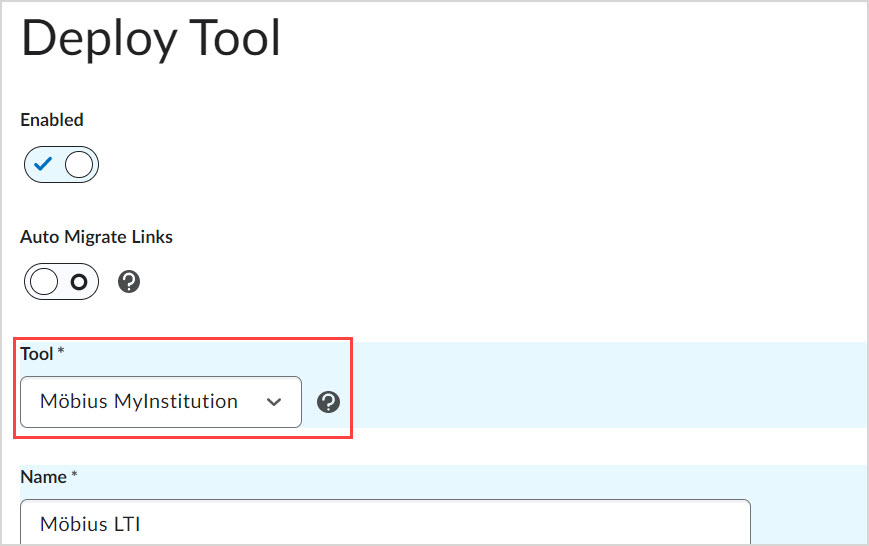
On the Deploy Tool page, select the name of your new tool from the Tool drop-down.
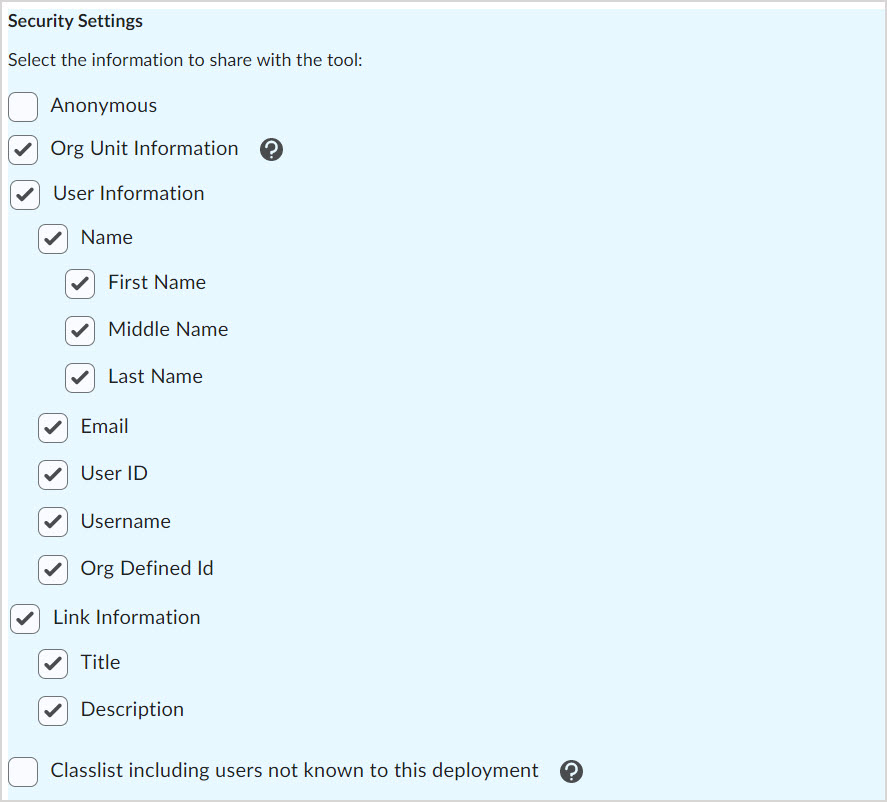
Enable the following checkboxes under the Security Settings heading:
- Org Unit Information
- User Information which will also check the boxes for Name, Email, User ID, Username, and Org Defined Id.
- Link Information which will also check the boxes for Title and Description.
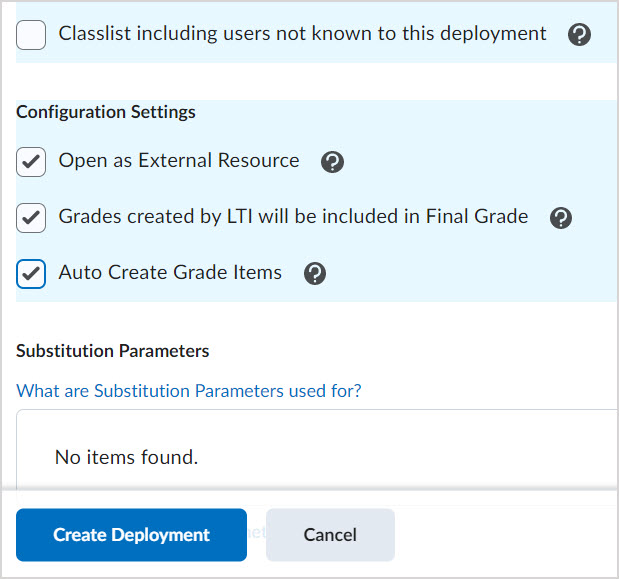
NOTE: When Auto Create Grade Items is enabled for the LTI tool:
- for LTI links using deep linking, a grade item is created automatically when the link is created; and
- for LTI links not using deep linking, a grade item will be created automatically the first time the activity is completed and a grade is pushed to Brightspace.
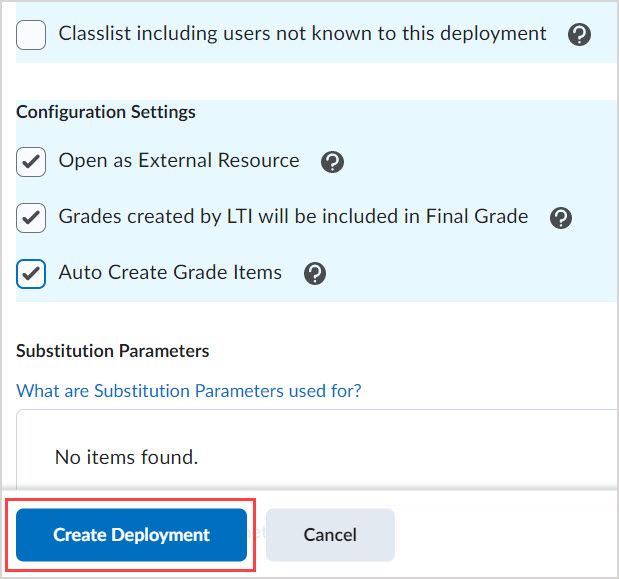
Click Create Deployment.
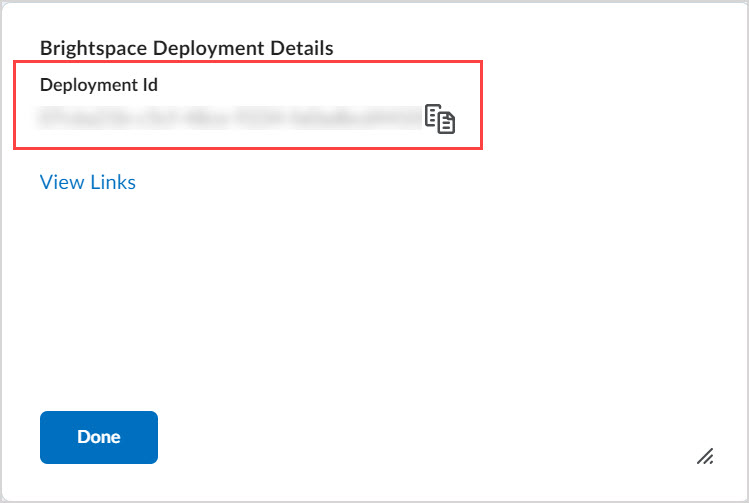
Under Brightspace Deployment Details, copy the Deployment ID value for the next steps of the setup process.
Add the Brightspace configuration to Möbius
To add the completed Brightspace LTI 1.3 configuration details to Möbius:
Click Add Configuration on the Edit LTI Configurations page in Möbius.

TIP: Check out Add an LTI configuration to Möbius for more details on getting to this page in Möbius.
Complete the fields in the Add LTI 1.3 Configuration window:
- Platform ID: Enter the Issuer value attained from Brightspace in Step 10.
- Deployment ID: Enter the Deployment ID value attained from Brightspace in Step 17.
- Client ID: Enter the Client ID value attained from Brightspace in Step 10.
- Public Keyset URL: Enter the Brightspace Keyset URL value attained from Brightspace in Step 10.
- Access Token URL: Enter the Brightspace OAuth2 Access Token URL value attained from Brightspace in Step 10.
- Authentication Request URL: Enter the OpenID Connect Authentication Endpoint value attained from Brightspace in Step 10.
- Access Token Audience URL: Enter the Brightspace OAuth2 Audience value attained from Brightspace in Step 10.
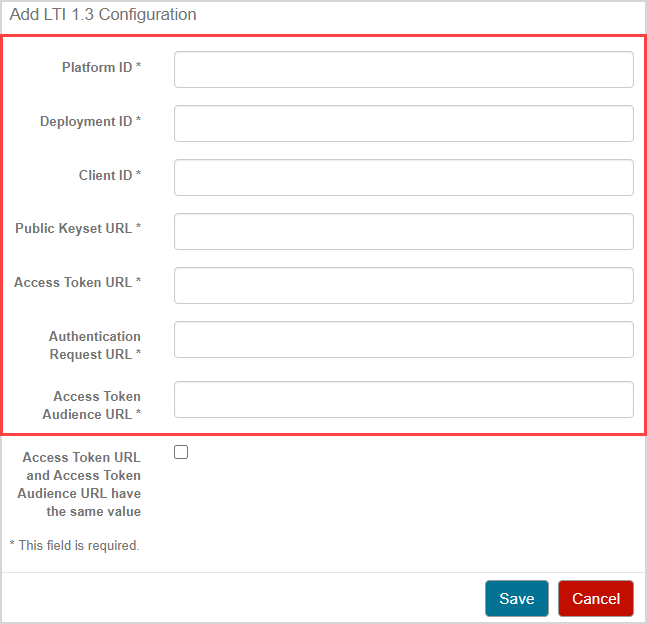
Click Save.

Set up Möbius deep-linking in Brightspace
Deep Linking is an LTI Advantage feature that simplifies the setup of tool links in a Brightspace course that point to an existing Möbius activity.
Deep Linking is enabled under Extensions when registering the Möbius tool, and also requires a link associated with the deployment.
To create a link for the configured LTI deployment in Brightspace:
In the Administrator Settings, click External Learning Tools under the Organization Related heading.

In the table, click the name of your deployment to view and modify deployment settings.

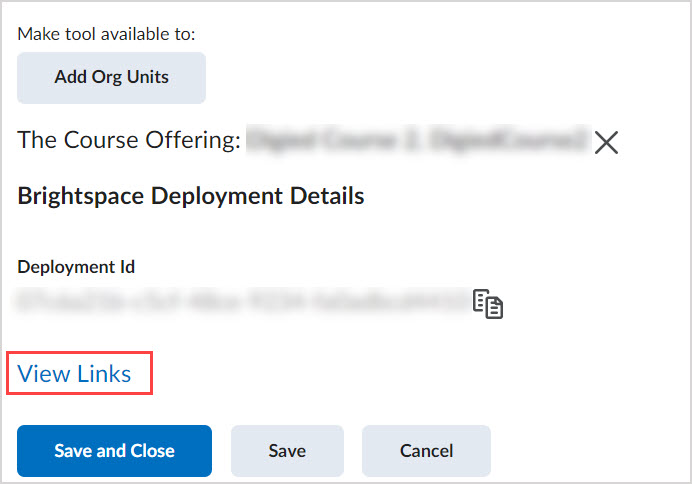
Click the View Links link. A new tab will open with the table of links for this deployment.
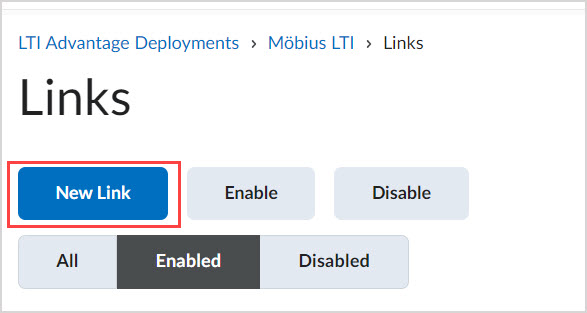
Click New Link.
Complete the fields under the Create Link heading:
- Name: Enter Möbius LTI as the name for the placement.
- URL: Enter the Content Selection URL value attained from View my Möbius LTI data.
- Type: Select Deep Linking Quicklink from the drop-down menu.
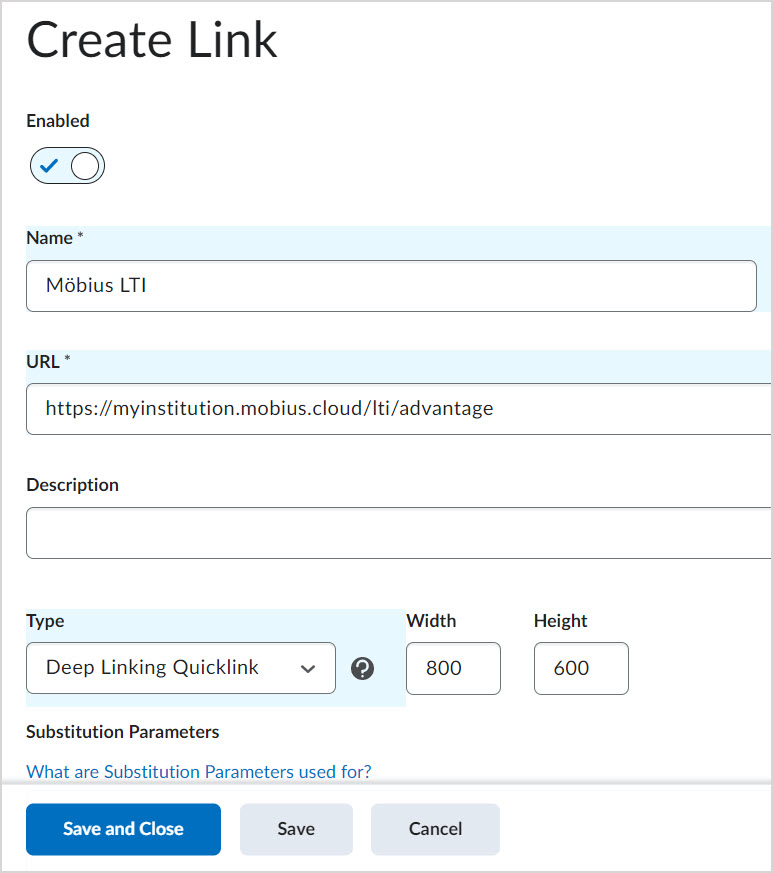
Click Save and Close to finish creating the link.
Link to a Möbius activity from your Brightspace course
Once the Möbius LTI link is configured, it will appear in the Existing Activities menu for any Brightspace course with access to the link.
IMPORTANT: The integration between Brightspace and Möbius should be tested by adding a Möbius assignment to the Brightspace course, completing the assignment as a student, and checking that grades are pushed back to the Brightspace grade book.
To use the configured Möbius LTI link in your Brightspace course:
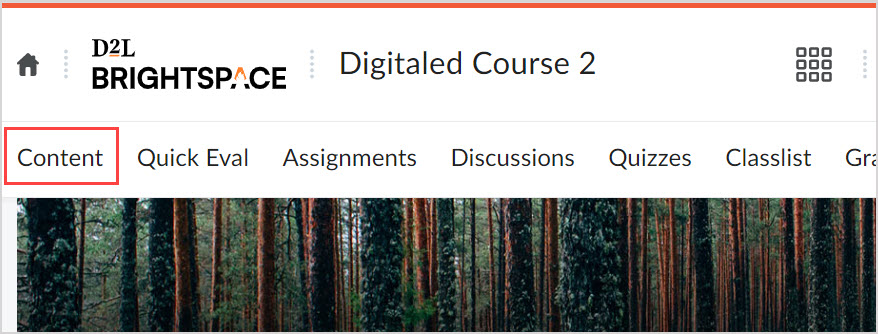
Open your Brightspace course and click Content.
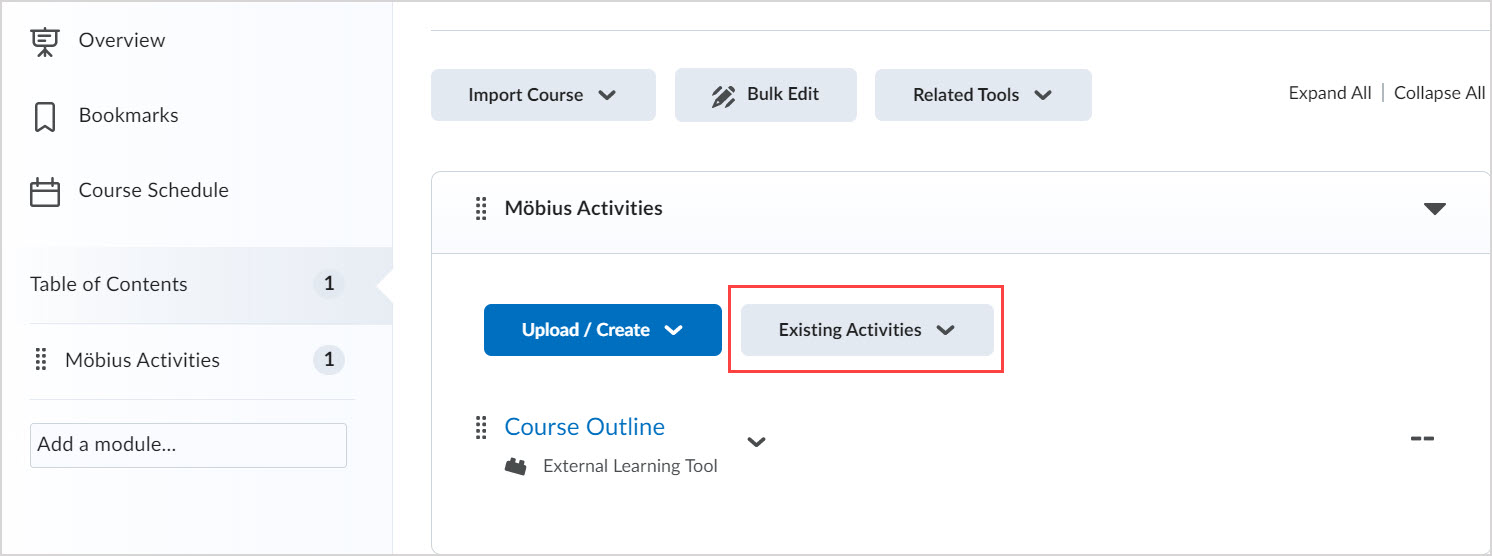
Under any module in the course, click Existing Activities.
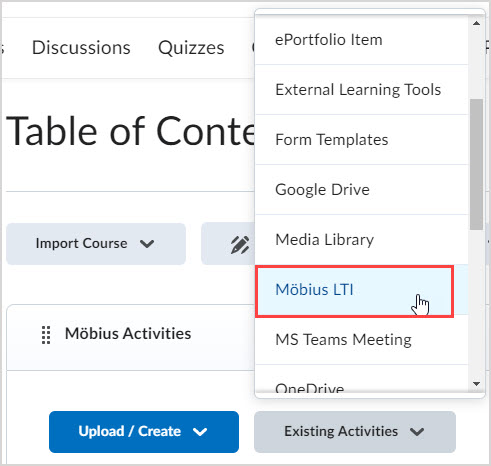
Select Möbius LTI (the name of your link) from the Existing Activities drop-down menu.
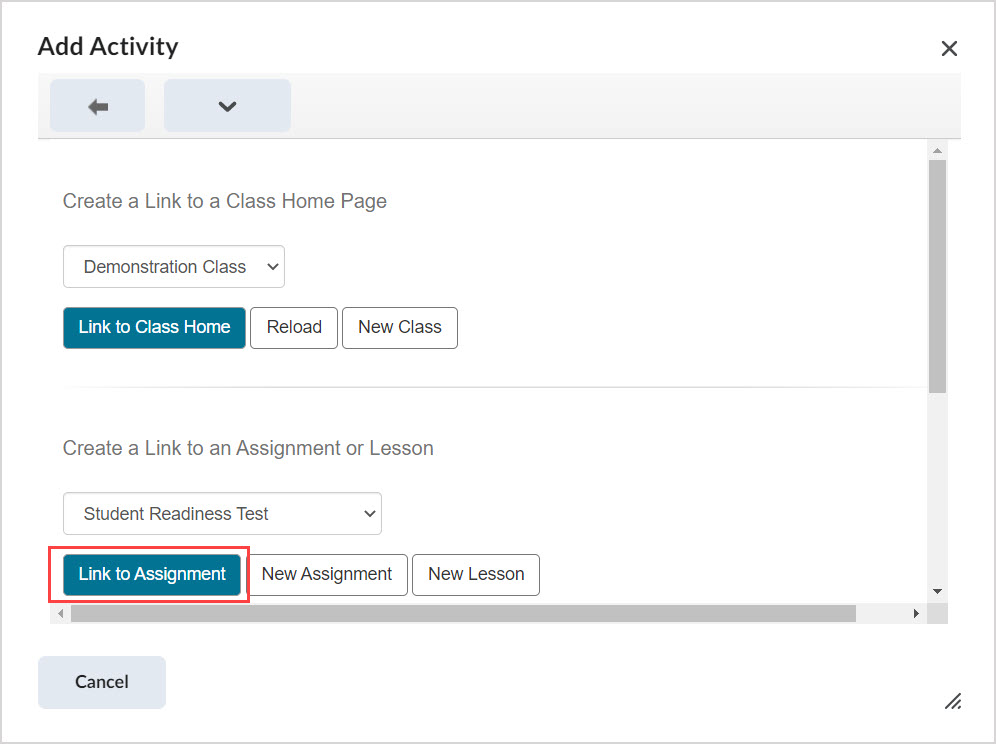
The Möbius mapping menu will appear in the Add Activity window for configuration of the link destination. Check out Activity mapping for details on completing this configuration and linking to a Möbius activity.
The content is added to your Brightspace course, with the name given in the Möbius mapping menu.
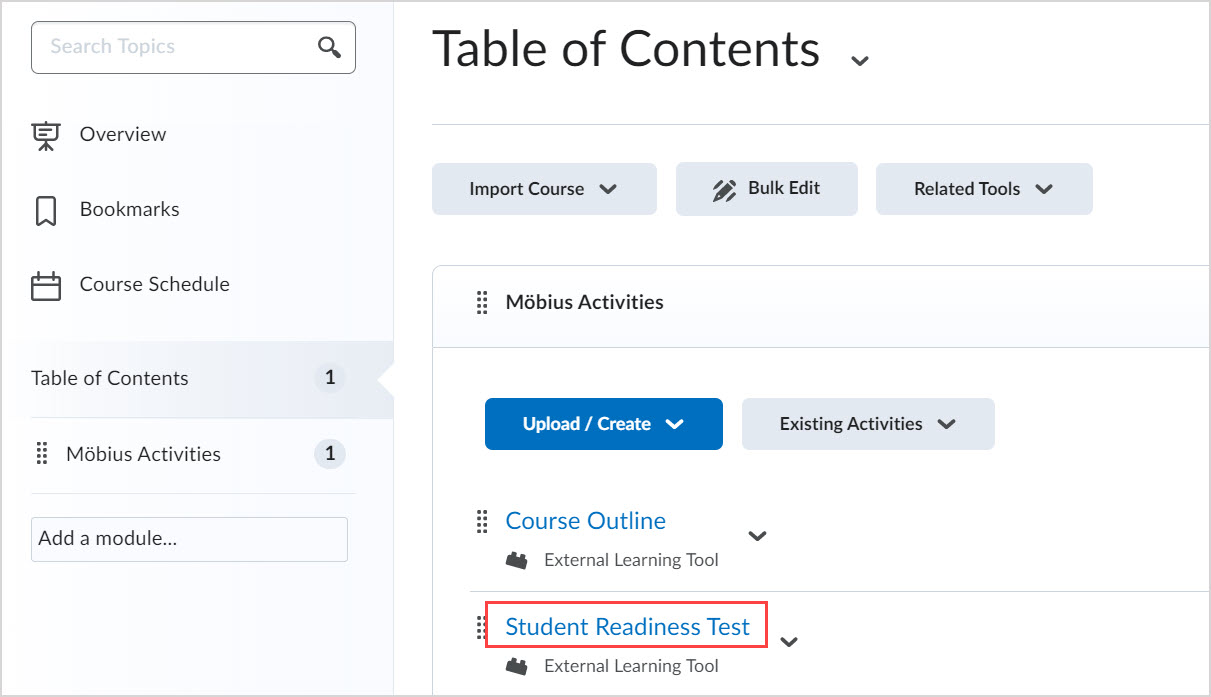
NOTE: Click the Actions button (next to the link) to edit the link destination and control availability of the link through Brightspace.
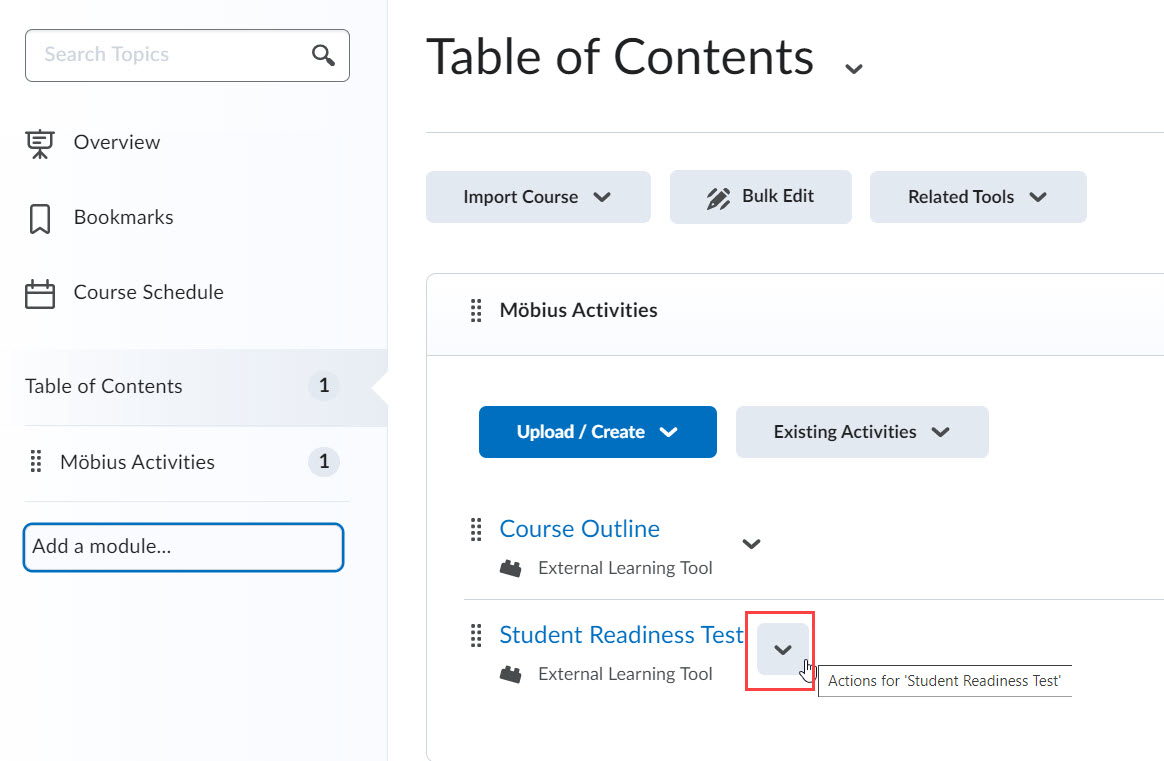
NOTE: If you didn't enable Auto Create Grade Items in Step 15, you'll need to manually add a Grade Item to the link:
- Click the Actions button and select View Topic.
- In the Assessment category, select a grade item using the drop-down menu, or create a new one using the link.
- Click Save to confirm the change.
TIP: Check out the LMS Integration Workflows for a visual representation of creating and using different types of links from Möbius to Brightspace:
What's next?
Now that you've connected Brightspace to Möbius, you're ready for: