Upload a student response to a document upload question
Document upload questions can be authored to generate a unique document code.
A student will send you their response (Example — by email) to a document upload question in the form of a document that references the document code.
NOTE: The student's document code is a unique numeric, alphabetic, or alphanumeric character set that was generated for them during their document upload question attempt (after they've clicked Generate Code within the question).
You'll then save the student's document locally on your computer so that you can upload each individual document to Möbius.
You can then navigate to the Gradebook to manually grade their document submission that you've uploaded on the student's behalf.
TIP: You can also perform bulk uploads of student documents as a .zip file, including assigned grades. Check out Bulk upload of student responses to document upload questions.
NOTE: Students will upload their document responses to Möbius themselves from within the activity if the document upload question is authored as direct upload.
Individual student document upload
To upload an individual student document response to Möbius for a document upload question:
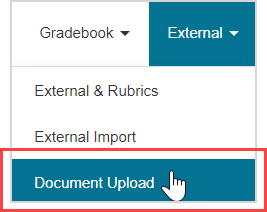
Click External on the Class Homepage.

Click Document Upload.

Define a search parameter in the Document Upload Search pane so that you can match the document submission that you've received from your student to the available document code in Möbius:

IMPORTANT: You must select at least 1 search parameter check box and its related fields. Otherwise, no search results will be displayed when you click Search.
- Select the Activity check box and respective activity from the list of units and activities if you know where the student would've accessed the document upload question from.

- Or, select the Document Code check box and enter a value if you know any information about the student's document code.
- Then, select which radio button this entered value represents:
- Starting with — The first character(s) of the document code.
- Anywhere — Located somewhere within the document code.
- Exact — A complete document code that's an exact match.

- Or, select the User check box and enter a unique student identifier.
- Then, select which type of unique student identifier is defined using the drop-down list:
- Login
- Student ID

TIP: You can select more than 1 parameter. Example — You can select the Activity check box as well as the Document Code check box (and complete the relevant fields for those 2 parameters).
TIP: Click Reset at anytime to start a new search.

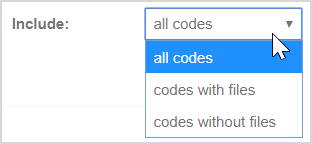
(Optional) Select which type of document codes to include from the drop-down list in the Document Upload Search pane:

- All codes — Show all available document codes.
- Codes with files — Only show document codes that you've already uploaded files for.
- Codes without files — Only show document codes that you haven't yet uploaded files for.
(Optional) Select how many records to display on the search results page from the Document Upload Search pane.

Click Search.

The student or activity that matches your search criteria is displayed in the Document Uploads pane. Match the document code in the Code column to the document code referenced by your student for the document that was sent to you.

Click Choose File and open the student document that matches the document code in the table.

NOTE: The allowed file extensions are displayed in the table. These permitted file extensions are defined when the document upload question is authored.

Click Upload.

The document is uploaded and the file can now be previewed from the Code column. Click on the file name to preview the upload in a new window.

Navigate to the Gradebook to manually grade the uploaded document.